Sunday, 27 December 2020

Recipe: Turkey (or Chicken) Bake with Mushrooms - Great for leftovers

Recipe: Turkey (or Chicken) Bake with Mushrooms


Turkey (or Chicken) Bake with Mushrooms
Great for leftovers

Greetings one and all, it's been a while hasn't it. I've been focusing on VirginiaWaytes.com for the last few months. I hope you have missed me 😁. Blessings of the Christmas season and Happy Holidays - I hope you have had a pleasant one this year, even if circumstances made it less than ideal. I return with a recipe that is great for using up all that leftover turkey and it works well with chicken leftovers as well for the rest of the year.

Serves 2-3

Ingredients

  • 50g (heaped tbsp) butter
  • 50g (heaped tbsp) plain flour
  • 1 pint/570ml milk
  • 1/2 tsp dried thyme
  • 1/2 tsp dried rosemary
  • salt & pepper to taste
  • 6x24g packets salt n shake crisps or similar (unsalted potato chips)
  • 100-150g (1-1.25cups) grated cheddar cheese
  • tbsp oil for frying
  • 2-3 cloves garlic minced or equiv garlic puree
  • 150g (half a punnet) chestnut mushrooms
  • left over turkey 

Instructions

  1. Preheat the oven to 180C/360F.
  2. Shred the turkey.
  3. Slice the mushrooms into bite sized pieces.
  4. In a frying pan heat the oil. Add the garlic and then the mushrooms and cook until they have released all their water and are looking toasty, but not dried out.
  5. Mix the turkey and mushrooms and place in the base of an oven proof dish - should cover the bottom in a nice thick layer.
  6. Melt the butter in a med saucepan.
  7. Add the flour and stir to make a thick paste.
  8. Add the milk, little by little, stirring in at each stage until all the milk is combined with the flour and butter mixture in a smooth sauce.
  9. Add the rosemary and thyme (I grind mine together in a pestle and mortar first because I don't like the large bits of rosemary and it helps release the flavour even more) and salt and pepper.
  10. Cook for a couple of minutes until it begins the thicken.
  11. Test for taste and add more seasoning if needed.
  12. Pour the white sauce over the turkey and mushrooms and mix through gently. Don't be too vigorous or the sauce may go grey because of the mushrooms - still tasty, just not as pretty. 😉
  13. Crush the crisps (potato chips) until they are small pieces, but not too far and place in a bowl.
  14. Mix the crisps and half the cheese and spread over the top of the turkey and sauce.
  15. Sprinkle the rest of the cheese on top of the crisps and put in the oven.
  16. Bake until cheese has melted and is starting to go golden - between 15-20 mins usually.
  17. Serve piping hot.

We had this today - still have turkey left, but it used up a good deal of it and was delicious. Just up the amounts to feed more people - I did double this today for five people and we have leftovers or the leftovers now 😂

Wednesday, 16 September 2020

Recipe: Set Chocolate Mousse #GlutenFree #EggFree

Recipe: Chocolate Mousse

Set Chocolate Mousse


This recipe is easy, delicious and very versatile. I made it last weekend for my family and it went down very well with everyone but my mother, but she doesn't like dark choc, so not really surprising. Might want to make the milk choc version for those with a sweeter tooth. Next time I plan to add a little orange liqueur to spice it up a bit.😋

The actual recipe comes from here: The Perfect Refuge an absolutely delightful Italian cooking channel on Youtube, but I use something of a different method, so I thought I would post it. This is the vid of the original recipe, and there is a second option using eggs as well - turn on the subtitles for English.


~15 slices (My father was the only one who managed to eat 2😂)

Ingredients

  • 250ml/1.05 cup cream (I used double, but I suspect single would be okay)
  • 40g/ 0.4 cup cocoa
  • 1 lt/4 cups milk
  • 150g dark (or milk) chocolate (3/4 cup of choc chips)
  • 70g/ 2/3 cup potato starch or corn flour (starch)
  • 60g/ 1/4 cup sugar (only need this is using dark choc - milk has plenty of sugar)

Equipment

  • 1 large mixing bowl, 1 medium one
  • scales/measuring cups/measuring jug
  • hand whisk
  • sieve
  • large saucepan
  • large rectangular dessert/terrine tin

Instructions

  1. Put the cocoa in the large bowl and slowly add the cream bit by bit using the whisk. You will end up with a thick paste.
  2. Add a splash of the milk to the paste to loosen it with the whisk, then keep adding and stirring until you've added about half the milk.
  3. In the medium bowl mix the corn flour/potato starch with the rest of the milk and whisk together.
  4. Add the corn flour/milk mixture into the cocoa mixture bit by bit using the whisk, making sure it combines well.
  5. Sieve the liquid into the large saucepan and push through any lumps remaining in the sieve. (I had just a few little ones).
  6. Heat gently on the hob and break in the chocolate.
  7. Stir continuously while the chocolate melts, then bring the mixture to the boil.
  8. Boil gently for 2 mins or until the mixture has thickened (took me more like 5, but I was heating it very gently because I fear the mixture splitting).
  9. Line the tin with cling film (if your mould is silicon, this step may be unnecessary, but it makes like a lot easier),
  10. Pour in the mixture and place more cling film over the top, in contact with the mixture.
  11. Place the dessert in the fridge for 5-6 hours min (I did mine overnight).
When you are ready to serve, remove the top cling film, turn it out onto a large platter, remove the rest of the cling film, and dust with a little cocoa. Slice with a sharp knife into individual portions. Serve will little crunchy biscuits for a bit more texture - it would be wonderful with amaretti.

It is really nice with a little more cream drizzled on if you like you desserts even richer.

Banner Photo by Ihor N on Unsplash

Thursday, 9 July 2020

Youtube Journey Part 2 - Adobe After Effects & InDesign - My Crash Course


Adobe After Effects and InDesign - My Crash Course

Youtube Journey Part 2

Adobe After Effects & InDesign

My Crash Course


I was going to do this yesterday for Writerly Wednesday, but I was distracted by making birthday cupcakes for a friend. So today it is!

Now I threw together a banner and a logo for the my shiny new YouTube channel, Tales With Tasha, in Photoshop pretty sharpish as soon as I set it up, but I knew doing anything for actual vids would be harder.

When I started out I knew two things:
  1. I didn't just want to film me reading things. I want part of each vid to be live action, but I remember the Disney page turning format very fondly and wanted something along those lines for the stories. Also helps with accessibility.
  2. I wanted a short little logo animation to segue from live action to the story.
My first thought was Adobe After Effects.

Of course, then I hit my first problem - I had never even opened After Effects before 😂. However, never let it be said that this has ever stopped me in the past. I taught myself how to use Photoshop using turtorials, how much harder could this be?

This is harder than I thought - From New Amsterdam

Okay, so maybe a bit harder 😎. The thing about After Effects is its for animators and people who understand film terms and I don't, well I've picked up a little now. Never fear, however, because the lovely creators of YouTube have wonderful channels with step by step tutorials on just about everything. I love them.

Endeavour 1 - My Page Turning Book

So I knew I wanted a book with pages that turn, and I found one plugin and several tutorials, but none of them were quite right. In the end this one popped up, thank heavens:


It also isn't quite right, but it does have all the elements I needed so that after following it I could figure out how to create what I wanted. It also allowed me to understand how everything goes together.

For example, I had no idea that when you import images, if you change them on the disc, they are changed in the animation too. This is a revelation to me, and I assume it is actually a setting, like importing the mp3 files into Audition etc.
  • Stage 1 - Follow Tutorial Exactly
  • Stage 2 - Tutorial pages turn backwards for some reason, so figure out how to make them turn forwards.
  • Stage 3 - Figure out how to create page content.
It was Stage 3 that was the hard part.

Page Content

First Idea - Photoshop:

  1. Create a base template
  2. Place text
  3. format text
  4. Rinse and repeat
Only problem - with 2K words per story, this was going to be slow!

Next Idea - InDesign


which I had also never used 😝.

2 most useful things about InDesign
  1. We can import a preformatted Word Doc and it will automatically paginate for us.
  2. We can export all pages as images.
This is the tutorial for I used to find out how to do #1 - Pretty Fabulous Designs has some great turtorials for doing all sorts of things.

The plan was growing! Mwuahahah!!!!

Gary Oldman as Dracula - Evil Laugh


Third Thought - Plain White Pages are Boring


I found some wonderful page textures on Unsplash.com by Annie Spratt. She also has some other fabulous photos, but it was the large number of textures I was after this time.

For this I did use Photohop, creating a template for left and right pages with shadows in the margin so it looks a little 3D. Not a lot 3D, but a little 😉

These can then be used as backgrounds for the pages in InDesign.


The End Result


Anyway, I played and fiddled and now have a format I can easily customise for each video. This is a very short demo to show what I mean.

I can customise everything I need to:
  • Background
  • Page content
  • Book style
  • Page turning interval
So it should do as a template.

The Plan

  1. Format the story to be animated in Word with the correct size font (I have to play with these anyway to get them ready for reading, so it's only a tiny little step more).
  2. Set up an InDesign layout with the background of choice depending on story content.
  3. Import Word file into InDesign.
  4. Add any extra formatting.
  5. Export pages to PNG
  6. Import into After Effects project and set pages to have the correct content.
  7. Use recording to set page turn intervals.
  8. Add pretty background behind the book to please YouTube's algorithm.

Endeavour 2 - My Animated Logo

This one was actually much simpler - I went through Youtube looking at tutorials, found one I liked and went with it.

This was the tutorial I chose in the end:

And here is what my animated logo looks like:


Now I just have to teach myself how to use After Effects in Premier Pro 😎.
Oh and actually film the bits and format all the stories I have planned etc, etc, etc ...

So, y'know, just a bit of stuff. 😂

How is everyone else doing? Any interesting projects going on? Do you have a YouTube channel?

Friday, 3 July 2020

Free Fiction Friday - The Cop, The Vampire, and National Security by Natasha Duncan-Drake


The Cop, The Vampire, and National Security by Natasha Duncan-Drake

Free Fiction Friday

The Cop, The Vampire, and National Security by Natasha Duncan-Drake


It is the first Friday in July which can mean only one thing - Free Fiction Friday!

Every month we offer our subscribers a free short story for them to download at their leisure. We upload it in the following formats, so there is something for everyone:
  • PDF
  • ePub
  • Mobi
  • AZW3
The links are also placed in the final welcome email to our newsletter, so anyone who joins up after the monthly email has gone out still gets a copy of this month's story.


Snoopy reading a book and laughing

This Month's Story

The Cop, The Vampire, and National Security
by Natasha Duncan-Drake

Matt Plumber was a detective with the Met, but his career is functionally over. Breaking an international drug ring with ties inside the Met and the Foreign Office has cost him his partner and his reputation. However, while in hospital suffering from a gunshot wound, he has a rather unusual supporter in the form of Sister Bashir who is far older than she looks. 

~*~

Sexy Stories 13


This week also saw the exciting finale for season 1 of The Manor - the paranormal series from Virginia Waytes (my alter ego) for a more adult audience.

Josh is back at The Manor, but is he safe? There is still the magic bound inside him to deal with and there is the question of where his uncle's dark witch disappeared to and what she will do next. Danger still looms.

Wednesday, 24 June 2020

My Shiny New Youtube Channel #WriterlyWednesdays


My Shiny New YouTube Channel


Now as I mentioned in last week's writerly Wednesday post, I have decided I need a Youtube channel. So I have been thinking about it all week and trying to plan, which involved a lot of watching Youtube vids on how to set up a Youtube channel etc. 😁
YouTube Logo


First of all I had to decide what I wanted to put on it and this is what I have come up with so far:
  • Story narration
  • Novel excerpt narration
  • Book trailers and other Wittegen Press news vids
Other suggestions of things you might like to see, gratefully accepted.

Then I made a list of all the content I already have to choose from, well actually I made a Google Sheet (so useful). Turns out I have over 100 sources to choose from. And that doesn't include the naughtier stories, which I can't put up because Youtube does not like adult content.

In all honesty I don't have a strategy completely worked out yet, but I am plotting.

Sherlock plotting with his fingers tapping in front of his mouth.

One thing I did decide is that my focus is going to be on the narration, with other things as additions, because I think that is what might bring in an audience. So I brainstormed for a Youtube channel name and came up with...

Drum Roll


Tales With Tasha

So far I have a channel art, an icon and 2 subscribers, both of whom are other accounts I own, but we all have to start somewhere, down't we 😎.

Next I need to come up with:
  • The about section
  • A plan of attack so I can get the content prepared.
Apparently I need 100 subscribers and have had the channel for 30 days before I can get my proper URL. 💖So if you feel like subscribing to a completely empty channel, that would be awesome - thank you.💖 I promise there will be content.

Do any of you have a YouTube channel? What content do you put on it? Any tips? Drop me a link so I can check it out.

New Release Day

Yesterday was new release day over at VirginiaWaytes.com (my alter ego) with:

Sexy Stories 12 - The Manor s01e12

Josh is gone, but there is still hope to find him, even with the pack bond occluded to be useless. His connection to Pippa may be the answer and she and Lucy must work together to launch a dangerous rescue mission.

Wednesday, 17 June 2020

The Social Media Minefield #WriterlyWednesdays

The Social Media Minefield #WriterlyWednesdays


The Social Media Minefield 

Writerly Wednesdays


So yesterday I went to a very enlightening event run by my old school's Alumni association - don't worry, it was a Zoom event. It was hosted by one of the old girls who is now a social media professional and she had some great insights.

We all know that a social media presence is vital for most businesses these days, especially we indies trying to get along in the great bit pond of sharks. So I thought I would write up my take-aways from the session. Now this isn't everything she said, or all the tips she gave, but these are the parts that stuck in my brain, with a few of my own observations thrown in.

The Most Important Aspect of Social Media

Three women chatting and engaging with each other.
Photo by Aw Creative on Unsplash

Social media is just that, social. Posting and running does not work. Engagement is key.

I must admit, I fall down on this. My Facebook engagement is dismal - mostly because I hate the platform. Given the way algorithms work on these platforms now, without engagement you're dead in the water.

The 3 Most Important Social Media Platforms

We have a plethora of social media platforms to choose from out there, but from a business point of view at the moment the three most important are:
TikTok is in there too, but it is a very specialised platform and requires knowledge of trends etc, which can be very hard from a business point of view.

Things To Do On All Social Media

  1. Make sure your bio is up to date
  2. Make sure your contact info is up to date
  3. Check all links are pointing at the right places
Even if we make the greatest posts, if people can't find us easily, they won't bother. Social media is all about the customer's instant gratification.

Also, we need to make sure we are socially aware and ready to respond to such topics if they come up. Social media is an unforgiving place. The holy grail is to go viral, but we must make sure we're not going to do so for all the wrong reasons.

Set up a social calendar so that social media is planned out in advance. This includes things like world book day, etc. and can also help with the social awareness. But don't take advantage of things like Pride and Black Awareness Month, make sure we are giving back, not just trying to take.

Facebook

Facebook Logo

Once upon a time Facebook was the hip and happ'n place to be, but these days it is for the mid range to older demographic. Not that there is anything wrong with that, but it's good to know. If our market is teenagers, we are unlikely to find our audience as well there as other platforms.

On Facebook catching attention is very important and the best way to do that is:
  1. Video - short, sharp, easy to digest, engaging video that gets people to stop on the post.
  2. Images/Links - if no video go with images/gifs or links to catch people's eye
There is a button at the top of every business page on Facebook - make sure it is set to the optimal thing for our brand. For example, mine is set to sign up to my newsletter on The Sexy Stories page and a Shop Now button on my general Author's Page.

Pin a post to the top of your page's timeline ( I didn't even realise this was possible) with all our useful information in it.

Don't just like other people's posts - comment, or use the reaction options - the algorithm likes this.

1 post a day is probably what to aim for, but pushing it to 2, if it's a promotional event is fine. Don't overload with lots and lots of posts.

Twitter

Twitter Logo

Twitter is a fast moving, sometimes slightly irreverent platform. The best way to find out how the land lies and how to engage well at the time is to check out other users who are doing it right and who we admire. Then take their formula and apply it to our own corner of the platform.

For example - hashtags can be really, really useful and good ones for writers are: #WritingCommunity
#WritersLift, #ShamelessSelfPromotion etc. See what is popular, how they are being used and figure out how they can help us too, but always remember, it's about giving back as well as asking for things.

N.B. If you capitalise the first letter of a new word in a hashtag, not only is it easier to read, but it also allows visually impaired users with audio desciption to hear the hashtag properly.
  • Just liking things doesn't cut it these days - if we want to help out another Twitter user, hit the retweet - if we think it's really important, retweet with comment to up the profile.
  • Add a pinned tweet to our profile - pinned tweets allow people who follow us to know what we would really like them to retweet. Whenever I follow a new person, I look for their pinned tweet and retweet it for them.
  • Use images/gifs/vids in tweets - adding some form of image media to a tweet immediately makes it more eye-catching and it is much more likely to be engaging.
  • Ask questions, have conversations, engage with other people.
1-3 tweets per day is good for an average day.

My Twitter Follow/Unfollow Policy:

[Edit: Forgot to mention - this part is all me, not anything the lovely lady teaching us about social media said, but I did just hit 2K followers on my new Virginia account using this strategy and the retweeting pinned tweets one. It may not be suitable for other kinds of business, however.]

  • Some of the people I follow are friends - they tend to be mutuals, but are whitelisted even if they aren't. I do not unfollow them.
  • Some people I follow are celebrities/brands - they are whitelisted unless they do something hideous.
  • Everyone I follow for business related reasons gets a 2-3 week grace period, if they do not follow me back I unfollow them - this is so I do not hit any of Twitter limits. Sometimes this ends up with a mutual follow because I follow them again at another point and it was just they missed me the first time, so it can be good housekeeping regardless of limits.
  • Other reasons for unfollowing usually involve politics or some sort of -ism that was not obvious when I first checked out their account.

Instagram

Instagram Logo

Now I don't use Instagram much, but is seems this needs to change. I have very little to say about it, since I don't really get it yet, but I took one thing away with me from the session:
  • We need to make sure our images are fabulous.
Big businesses contract photographers just to populate their Instagram feeds, so there is a lot of competition. If our camera phone is not great, we need to edit the images before they go up. Having colour themes so the grid looks cool is also a plus.

I have no clue exactly how to go about this yet, but I shall  have to have a go eventually.

YouTube

Youtube Logo

Now I didn't put this in the top three, but it is an important platform, especially for creators like us. It is one of the biggest search engines in the world for content, so it is a great place to be.

I have neglected Youtube so far, but I plan to rectify this soon. I will report back on what I decide to do as I come up with a plan. This is especially tricky for Virginia Waytes, since that is all adult content and Youtube does not allow that, but I have a few ideas.

Useful Tools

And last but not least - some tools I have found most useful in my social media travels, or that I have just learned about which will be very useful.
  • Buffer - great for scheduling social media posts in advance - has a free option. I have been using this one for years and it is very, very useful.
  • Linktree - allows you to have one link so everyone can find all your main links in one place. I had never heard of this, but it is apparently really useful for Instagram. Also has a free option.
  • WhoUnfollowedMe - great for seeing new followers (it's easy to miss people on Twitter's interface), seeing who unfollowed, and checking who are mutuals. I have a paid plan with this because I found the free version so useful, and it is awesome.
Well I hope this has made a few useful points for everyone. Do drop me a comment to chat if you would like, or let me know your tips and tricks. The social media minefield is something we all have to play in everyday and we can always learn more about how to sidestep the explosions!

~*~

Yesterday was New Episode Day

Sexy Stories 11 - The Manor s01e10

Pippa and Josh are becoming closer all the time, but the danger of Josh's old pack lurks on the horizon. It hangs over them like a shadow and it may be a long journey back to the light.

Podcast - all the naughty bits totally free
eBook - all the plot and all the naughty bits 99c

Tuesday, 9 June 2020

Recipe: Tangzhong Milk Bread - Delicious White Bread with a Great Shelf Life

Tangzhong Milk Bread

So I have been making this recipe for three weeks now and it is fabulous. This makes 2 loaves and it keeps for up to a week in an airtight container. That's if it lasts that long. However, it's a little tricky because it's a very sticky dough so I have a couple of tips.
  • Use a stand mixer or specialised dough mixer if possible - I use my Kitchen Aid with the dough hook attachment. If you need to do it by hand, oil is going to be your friend, because using flour with dry out the dough too much.
  • Handle the dough with oiled gloves or very oily hands.
  • Handle the dough on a well oiled surface or a non-stick silicon baking sheet - my lovely sister bought me a large silicon pasty mat for Christmas last year and it is so useful for this.
Not my image - but this is what it looks like - will swap this out when I remember to take a piccie!


Tangzhong Milk Bread


Ingredients

for the Tangzhong
  • 40g Strong White Bread Flour
  • 200ml/g 0.85 cups water

for the dough
  • 580g/ 4cups Strong White Bread Flour
  • 60g/ 1/4cup sugar
  • 12g/ 2 tsp salt
  • 10g/ 2.5 tsp dried yeast
  • 10g/ 2.5 tsp dried milk powder
  • 260g / 1cup + 2 tbsp milk
  • 1 large egg
  • 50g/ 1/2 stick unsalted butter (room temp)
for the glaze
  • 1 egg yolk
  • milk

Instructions

The Tangzhong - make in advance

Now I have seen recipes that call for this to me made the night before, 6 hrs before and 30 mins before, so it is up to you which you go for depending on what time you have.
  1. Place the flour and water into a shallow pan and heat gently, stirring all the time.
  2. Cook until the mixture is a thick paste.
  3. Transfer to a container and cover with cling film. Place in the fridge for 6hrs or over night, or place in the freezer for 30mins.
  4. Take out and allow to come to room temp before using.
The Bread
  1. Add the flour, sugar, salt, yeast and milk powder to the mixer bowl making sure not to let the salt and yeast come into direct contact.
  2. Mix the ingredients together to ensure proper distribution.
  3. Warm the milk in the microwave for 30s until it is luke warm to the touch.
  4. Add the egg and whisk together.
  5. Add the wet ingredients and the tangzhong to the dry and mix on low speed until the dough is beginning to come together.
  6. Add the butter to the dough and continue to mix on med until combined.
  7. Increase the mixer speed and knead for between 5-10 mins until the gluten is developed and the dough has come away from the sides of the mixer.
  8. Take the dough out and form into a ball by folding the sides under. (If you try this without oiled gloves or very oiled hands it will stick to you and you will never get it into a ball - trust me, this is what happened to me the first time).
  9. Place in an oiled bowl, cover in cling film and allow to rise for at least 45 mins to 1 hr depending on how warm it is. The dough is ready when you can put an oiled finger into it and it holds its shape. (I do this in my Instant Pot on the yoghurt setting - proves in 45 mins then).
  10. Turn out onto a non-stick surface and divide into six.
  11. Roll each into a ball and place under cling film for 15 mins.
  12. Lightly oil 2 2lb (9x5'') loaf pans.
  13. Take each ball and roll out into an oval using a non-stick rolling pin.
  14. Fold the top point of the oval over the middle and press down with the heel of your hand.
  15. Fold the bottom up over the middle and press down with the heel of our hand.
  16. Take one of the non-folded edges and press over like the first roll of a swiss roll and press the edge into the main dough with finger tips so it sticks.
  17. Roll up and seal the edge by pinching it, so you have a mini roll the approx width of the loaf pan and 1/3 the length (looks to be a similar shape to a pain au chocolat).
  18. Place in one end of the loaf pan.
  19. Repeat 13-18 until there are three rolls in each tin next to each other.
  20. Cover with cling film and allow to rise in a warm spot for 30 mins, until the dough is up to the top of the loaf pans.
  21. Pre-heat the over to 180C/355F
  22. Beat together an egg yolk and a little milk to form the glaze.
  23. Brush the tops of the loaves gently with the glaze.
  24. Bake for 25 mins - they will turn a lovely deep golden brown.
  25. Allow to cool on a wire rack.

This bread makes the most amazing eggy bread/egg flip or French toast. One small slice can suck up a whole egg! It is also delicious for sandwiches and toast.


The Sexy Stories Podcast 10


It's Tuesday, which means a new ep of my podcast Virginia Waytes' Sexy Stories. We are coming towards the end of season 1 of The Manor at the moment, and things are really getting exciting as well as very, very naughty!

Paranormal romance - adults only
The Manor s01e09
Daddy Issues: Vampire Wisdom & the Comfort of Friends


Monday, 1 June 2020

Recipe: Delicious Chicken & Rice - #InstantPot & #StoveTop Instructions


Recipe: Chicken & Rice

Delicious Chicken & Rice


Instant Pot or Stove Top


This is a recipe I only tried last week and it has become one of my husband's favourites and I love it too. Possibly not quite as much as he does, but it is very yummy. It is also so very easy and can be made in the Instant Pot (or other pressure cooker) or on the stove top.

serves 2 (just up the amounts for more)

Ingredients

  • 6 mini breast fillets (chicken tenders) cut into bite sized pieces ~300g - breast would work well too, but thighs might need a little more cooking.
  • 1/2 large onion - diced very small
  • 1 large carrot or 2 small ones - diced very small
  • 500ml / 2 cups chicken stock (I use low sodium, but just use your favourite)
  • 2 cloves garlic (crushed - I use lazy garlic and its about a tsp)
  • sprinkle of Italian seasoning
  • 200g/1 cup Jasmine rice (or white rice of choice)
  • 2 tbsp oil
  • salt and pepper to taste
  • 25g/ 1/4 cup Parmesan cheese, or something similar
  • fresh herbs - e.g. parsley, coriander/cilantro or basil (optional)

Instant Pot Instructions

  1. Turn on the Instant Pot and choose the saute setting.
  2. Add the oil, the onions and the carrots and saute for about 5 mins or until the onions are translucent and the carrots are beginning to go tender.
  3. Add the garlic and stir for about 30 sec.
  4. Add the chicken and stir around until the chicken is beginning to colour a little.
  5. Cancel the saute.
  6. Use a little of the chicken stock to deglaze the bottom of the pot, then add the rest.
  7. Add in the rice and stir gently so all the rice is covered in the stock.
  8. Add the Italian seasoning and salt and pepper.
  9. Put on the lid, make sure the valve is on sealing, choose the pressure/manual setting and set for 10mins.
  10. When the time is up, allow to sit for 5 mins to allow the chicken to rest.
  11. Release the pressure and open the pot.
  12. Stir the rice and make sure it hasn't stuck.
  13. Add the Parmesan and stir through.
  14. If using fresh herbs, chop them and add them now and stir through.
  15. Serve immediately.

Stove Top Instructions

  1. Add the oil to a deep stove top pan that has a tight fitting lid and heat.
  2. Add the chicken and cook through until almost completely done, then remove and set aside.
  3. Add a little more oil to the pan and add the carrots and the onions and sweat down until the onions are soft and the carrots are beginning to become tender.
  4. Add the glaric and fry until it become fragrant, 30-60sec
  5. Deglaze the pan with a little of the stock and then add the rest.
  6. Add in the rice and stir in.
  7. Add in the Italian herbs and seasoning.
  8. Add back in the chicken.
  9. Bring to the boil and cover with the lid.
  10. Turn down the heat and cook for 13-15 mins or until the rice is done to your liking and has absorbed nearly all the stock. Add more water if necessary, but there should be enough.
  11. Turn off the heat and stand for 5 mins with the lid still on.
  12. Stir to fluff the rice and add in the Parmesan and fresh herbs (if using) and stir through.
  13. Serve immediately.
This recipe is so quick and easy and makes a great, hearty meal. It's also very adaptable and we could add different veg if we wanted to. The secret is the spicing and Parmesan - everything else is up for debate. It would be easy to veggify this by substituting the chicken, either with some chunky veg, or some quorn or tofu, and using a Parmesan substitute that is vegetarian friendly.

Tuesday, 26 May 2020

Joys of Podcasting 2 - Learning Curve

Joy of Podcasting 2 - Learning Curve

Joys of Podcasting 2 - Learning Curve


My podcast: Virginia Waytes' Sexy Stories is now up to episode 8 and chugging along nicely. For those not in the know, my podcast is a serialised paranormal romance for adults only where each week:
  • the podcast🎧 has a brief recap and all the naughty bits from the week's episode 
  • and there is also an eBook📕 with all the plot that would make the podcast far too long. 
Sexy Stories 08 - The Manor s01e07 Sexual Tensions: Werewolf Distraction Techniques

There are lots of supernatural beings and magic and excitement, as well as plenty of sensual sexy times.

So the whole podcasting thing can be a bit confusing, as I found out, because there are many different ways to do things. For example where to host, how to get the best sound, how distribution works etc. So welcome to my second post about podcasting and here are some of the things I have picked up along the way.

I shared the equipment I use over at this post: The Joys of Podcasting: A Beginning so I won't go into that again. Suffice to say I am still using the same stuff.

However, podcasting has other trip wires I had not appreciated, but once we know they are there it is easy to skirt around them. Please be aware, I am no expert, this is a post about how I went about things.

#1 Create a Podcast Trailer

Some podcasting sites, including Apple allow us to create a trailer for our podcast. A trailer is just what is sounds like, a short introduction to our podcast, usually about 2-3 mins in length. This is really useful for several reasons:
  1. We want out podcast approved on streaming platforms before episode 1 goes live
    For example Apple takes a while to approve new podcasts - it can be anything from hours to a week - and there has to be at least one "episode" live for them to approve it. This means if we want our podcast to launch on Apple at the same time as it goes live everywhere else we need a valid episode before we actually launch. A trailer counts as a valid episode.
    Most other places take less time to approve, but it is still best to have the podcast live on other platforms before launch,
  2. A trailer gives us a chance to introduce our style and hook listeners before launch day. We're trying to interest people in our product just like movies do, so a trailer is a great idea to gather interest. If we are very lucky they might even subscribe to our podcast.
I use Podbean as my hosting site and it allows settings for an upload to let services know if an episode is a trailer or a full episode. I can only assume other hosts do the same, but you'd have to check.

#2 Where to Get a Podcast Seen

There are many streaming platforms where it is a good idea to make sure our podcasts are seen. These are the ones I use and also the articles I used to find out how to submit my feed to them:
Now these do not all update instantly when a new episode comes out. I tend to set my eps to go live at 1AM because then, usually by breakfast/commute time (which is when podcasts are often listened to when the world is normal) they tend to have percolated through. The one that is always not there is Apple Podcasts. Every week I log in to my console as soon a I get up and hit refresh on the feed - it then refreshes usually in under half an hour.

N.B. we MUST make sure our podcast season and episode numbers are set. If they aren't no matter how many times we hit refresh, the ep will not show up on Apple. One week I forgot to set them and the moment I figured it out I added them in and voila, everything worked.

This is not an exhaustive list of where to list our podcasts, but there are just sooo many and these are some of the biggest.

BTW - I made these little graphics for linking to the various sites on my VirginiaWaytes.com blog and anyone is most welcome to use them if they find them useful. They are all png and were created from various sizes of logo available online, just right click and save them.


#3 Make Sure to Tell Everyone About the Podcast on Social Media


This is an obvious one to most of us who have been trying to get out work out there in any way online, but I think it deserve reiterating. No matter how many podcast services our podcast is on, the best way to get the message out there is with our Twitter, Facebook and Instagram accounts, and our mailing lists.

When my podcast goes live it gets a handful of views before I get to social media. Then as I pimp it around the numbers start to jump up. All these sites have algorithms that boost podcasts, but they have a nasty habit of only boosting the ones that already have an audience, so we have to do all the hard graft on our own. C'est la vie in the world of the independent producer 💖.

#4 Fantastic Advice from the Experts

There are many people out there who know more about this than me and many of them are very, very helpful.

Getting the Prefect Sound

There is a channel on Youtube with the most fantastic advice for all things audio run by a chap called Mike Russell. He has some wonderful videos which can help us take the sound of our podcast from good to great. This is my favourite vid of his:

I cannot express how good the advice in these vids is.

So Much Good Advice

Live365 has so many articles about so many different aspects of podcasting. It is so useful.

#5 Make a List


[Edit] I forgot to add this, but, if you like me forget things, make a list of what there is to do every time an episode goes live. Since I have made my list I have found it so much easier. Of course I have all the book things to do as well, but it never hurts to have a checklist 😃.

~*~

And that's all I can think of at the moment. Podcasting is an ever expanding world, but I hope this might help a few people sift through the information overload that is out there. Best of luck if you are launching a podcast, drop me your links in the comments if you are. Let me know any useful bits of advice you have picked up along the way too. Thank you 💖

Tuesday, 19 May 2020

Recipe: Chocolate Chip Cake - no added refined sugar

Recipe: Chocolate Chip Cake


Chocolate Chip Cake - no added refined sugar


So as I have mentioned before, I am trying to cut down on the refined sugar in my diet, and hence I am baking with things like honey and maple syrup as sweeteners. This recipe uses maple syrup instead of the brown and white sugar it originally had, so it is not as cookie like as the original, but it is very yummy and the maple gives a wonderful flavour.

I also cut the ingredients by half, since there are only the two of us at home, and it was still more than enough for a family. Just double up if you would like the 24 pieces the original recipe promised.

This is best eaten with a beverage of choice and would be heavenly with a glass of milk, but goes equally well with tea or coffee.

You could also throw in some nuts or some dried fruit if that floats your boat.

Ingredients

  • 165g (1 1/3 cups) all purpose flour
  • 1tsp baking soda
  • 1 tbsp corn starch
  • 1/2 tsp salt
  • 85g (3/8 cup) unsalted butter
  • 140ml (~2/3 cup) maple syrup
  • 1 large egg
  • 1/2 tbsp vanilla extract
  • 100g (1 cup) dark chocolate chips

Instructions

  1. Preheat the over to 160C/325F
  2. Melt the butter in the microwave or in a pan and allow to cool slightly.
  3. Line a 4x8'' baking pan with baking parchment/grease-proof paper.
  4. Add the flour, baking soda, corn starch and salt and mix together in a bowl.
  5. Put the melted butter into a large bowl, add the maple syrup and mix together.
  6. Add the egg and vanilla to this mixture and whisk until it is light brown.
  7. Add the dry ingredients into the wet and combine.
  8. Stir in the chocolate chips.
  9. Put the mixture into the lined baking pan.
  10. Bake for between 25-30 mins depending on your oven until a tooth pick comes out clean.
This cake will keep up to a week in an airtight container and it gets better the second day.

And it's Tuesday!

That means it's Sexy Stories podcast day over at VirginiaWaytes.com. The Manor is taking a 1 week mid-season break, so I have sexy vampires for you on the podcast.

We have the podcast for all the naughty bits, and the eBook for all the plot and the naughty bits.
Forgotten Soul is one of my permanently free eBooks too, so win/win.

Thursday, 14 May 2020

Recipe: Tofu & Spam Fritters with Egg Fried Rice


Tofu & Spam Fritters with Egg Fried Rice

Tofu & Spam Fritters with Egg Fried Rice

So this is two recipes I saw on Youtube combined to make a lovely meal. And I know you're thinking "Spam?!" - but trust me, this is delicious and really easy and it's the tofu that makes it so easy and the spam that makes it delicious. My husband hates tofu, but really loves this. Original fritter recipe is here on a wonderful site called Aaron & Claire's Korea and their Youtube channel is fab. This is one of the channels where I saw the steamed egg recipe too.

The spam provides a wonderful flavour which permeates the tofu, and the tofu provides a fabulous second texture, nutritious content and means the spam is not fatty or too salty. A great balance. I mean you could probably use some comfit pork belly if you want to go posh for a dinner party, but for a week night, spam is good 😄.

Makes 4 fritters & enough rice for 2

Ingredients


Fritters
  • 1/2 block tofu (I used Cauldron Organic Tofu because that's what Morrisons had)
  • 1/3 of 200g can of Spam 
  • 1/2 cup plain flour (ish)
  • 1 egg
  • 50g panko bread crumbs (ish)
  • black pepper to season
  • oil for frying
Rice
  • 1 cup white rice
  • 2 egg yolks
  • 2 spring onions (green onions/scallions) chopped 
  • salt and pepper to season
Tofu & Spam Fritters with Egg Fried Rice

Instructions

  1. Cook the rice per instructions on the packet and cool down with cold water.
  2. Cut 4 slices from the tofu about 1cm deep, then cut these in half. Season with black pepper (we don't need salt because there is plenty in the spam).
  3. Place the blocks on kitchen paper to soak up excess moisture.
  4. Cut 2 slices from the spam and cut each in half to the same size as the tofu. I was lucky, mine matched almost exactly, but trim to fit if they don't. The idea is to make a cube (ish).
  5. Dust one side of a block of tofu in flour and press onto the spam. Do the same on the other side so we have a spam sandwich with the tofu as the bread. Repeat for all 4 fritters. Then leave for a minute or so - the flour will bind and stick them all together.
  6. Beat the egg in a shallow bowl, and put the flour on one plate and the bread crumbs on another.
  7. Cover the tofu/spam tower in flour.
  8. Dip in the egg with right hand.
  9. Drop in the bread crumbs with right hand and use left to pat on the bread crumbs on all sides, turning with left hand. Using separate hands for wet and dry dipping will prevent our fingers becoming caked as well. Repeat for all fritters and leave to stand for 10 mins or so to set up.
  10. Preheat the oven to about 120C (~250F)
  11. Take a frying pan and put in about 1,5 cm of oil - heat until a little piece of bread sizzles.
  12. Place the fritters in the oil carefully and fry until the breadcrumbs go golden on the bottom.
  13. Turn over and repeat for the top.
  14. Then turn fritters onto their sides and repeat for each face. The easiest way to do this is use tongs and always turn all the fritters the same way so that there is no confusion.
  15. Pop the fritters in the oven to keep warm.
  16. Take the cold rice and mix through the egg yolks.
  17. In a pan, add a tbsp of oil and heat.
  18. Add the chopped spring onion and fry for a few moments.
  19. Add the rice and egg to the pan and stir fry until piping hot. (You can add other things to the rice if you like, like soy sauce or other veggies, but it is really nice as is).
  20. Serve with the fritters and sweet chilli dipping sauce, or dipping sauce of choice. Would be yummy with some stir fried broccoli on the side too.

Wednesday, 13 May 2020

Guest Post - Patricia Josephine - A Quick Bite - Book Launch #WriterlyWednesday

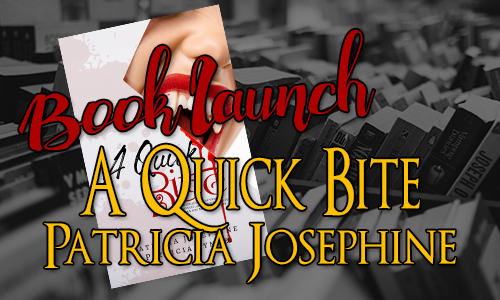
Book Launch - A Quick Bite - Patiricia Josephine

Guest Post

Patricia Josephine - A Quick Bite - Book Launch

#WriterlyWednesday

It gives me great pleasure to welcome the lovely Patricia Josephine to my blog today, to talk about her new book, A Quick Bite, launched this week. If you, like me, love vampires and all things paranormal, this is a book for you.

However, before we get to that, I'll let Patricia introduce you to some real life vampires.


Three Real Life Vampires (or so they say.) 

by Patricia Josephine

Tales of vampires have fascinated humanity for centuries. Sometimes they are monsters, and other times, they are sexy, sparkling heroes. While most stories are complete fiction, here are three cases of so-called real vampires.

Mercy Brown.


Mercy Brown was a young woman who lived in New England around the 1900s. Disease spread to her family and the locals got the idea that that meant she was a vampire. After she died, her body was dug up to make sure she wasn’t a vampire. Her body hadn’t decomposed and they found fresh blood in her system, leading them to the conclusion that she was a vampire. They cut out her heart and burned, putting the ashes in a drink which was fed to her brother. They believed it would save him since he was sick. Sadly, it didn’t work.

Fritz Haarmann, The Vampire of Hanover


Fritz Haarmann was a German serial killer in the early 1900s. His method of killing was to bite the neck of his victims so they bled to death. That led to rumors of a real vampire prowling for victims. Of course, alleged cases of real vampires weren’t uncommon then, but they were usually baselss. Fritz Haarmann was eventually captures and executed.

Arnold Paole


Arnold Paole was a Serbian man who feel to his death in the early 18th century. A sad tragedy, but the story became remarkable because afterwards, local villagers stated he had become a vampire. Their proof: 16 villagers had died recently. His body was due up to be examined. They found no decomposition and claimed to have seen fresh blood on his lips. So they staked the body.

(Sources: http://eskify.com/10-alleged-cases-of-real-vampires/)
 

A Quick Bite


A Quick Bite by Patricia Josephine
Vampires.
Werewolves.
Zombies. 

These monsters tickle our imagination.

Sink your teeth into a collection of tales about paranormal creatures that go bump in the night. Each story is told in exactly 200 words and designed to give you a quick bite no matter how busy your day is. 

Are you hungry?

Buy Links: Amazon

About the Author


Patricia Josephine
Patricia Josephine is a writer of Urban Fantasy and Sci-Fi Romance books. She actually never set out to become a writer, and in fact, she was more interested in art and band in high school and college. Her dreams were of becoming an artist like Picasso. On a whim, she wrote down a story bouncing in her head for fun. That was the start of her writing journey, and she hasn't regretted a moment. When she's not writing, she's watching Doctor Who or reading about serial killers. She's an avid knitter. One can never have too much yarn. She writes Young Adult Paranormal, Science Fiction, and Fantasy under the name Patricia Lynne.

Patricia lives with her husband in Michigan, hopes one day to have what will resemble a small petting zoo, and has a fondness for dying her hair the colors of the rainbow.

Social Media Links:

Website: - https://www.patriciajosephine.com
PatreonTwitter - Facebook - NewsletterGoodreads - Amazon Author Page - Smashwords

Monday, 4 May 2020

Recipe: Korean Steamed Eggs - #InstantPot & #StoveTop # Vegetarian #GlutenFree

Recipe: Korean Steamed Eggs

Korean Steamed Eggs 

#GlutenFree #Vegetarian


So I saw this recipe on Youtube in many different places and had to try it. I loved it, but my husband thinks it is the most horrible thing on the planet 😂. The texture is like a creme caramel, but it is hot and savoury instead of cold and sweet. It goes really, really nicely with a toasted bagel. Absolute heaven. And there are so many ways to change it up.

I forgot to take pictures, but I will try and remember next time. (I forgot the second time too - sorry - in my defence it was breakfast and I was hungry 😉).

The recipe below could easily feed 2 if having something with it, 1 if having it by itself. Nice and filling.

Ingredients

  • 2 eggs
  • 1/2 cup stock ( I used chicken, but a nice veggie stock would work brilliantly, or even just water)
  • salt and pepper to taste

Yep, really, that's all - see how herbs and spices could be added to change it up. Some recipes I found online call for finely chopped spring onion (green onion/scallion), but others said that was an optional extra. Ratio of eggs to stock is 1 egg to 1/4cup stock and just go up or down depending on how many it is for.

Variation I tried this morning (yes I wrote the post one day and posted it the next 😉) that I came up with while trying to get to sleep last night. So good.
  • 2 eggs
  • 1/2 cup water
  • 1 tsp low sodium soy sauce
  • 1/2 tsp toasted sesame oil
  • salt and pepper to taste

Instructions

  1. Beat the egg and stock together with a fork or a small whisk.
  2. Add the salt and pepper (or other spices of choice) and beat in.
  3. Pour through a sieve into a heat proof container suitable for steaming - I used a ceramic Camembert baking pot I have (and a deep individual pie dish this morning). Two smaller ramekins would also work if dividing the recipe for 2 people.
  4. Add the chopped onion if using at this point.
For the Instant Pot
  1. Put 1 cup of water in the bottom of the pot.
  2. Put in the pot of egg mixture on a trivet so it is not in the water.
  3. Put on the lid and make sure the valve is set to sealing.
  4. Use the steam option and put it on for 10 mins.
  5. When the beeper goes off, do a quick pressure release, remove the lid and serve.
For the stove
  1. Set up a deep pan with water in the bottom with a steam rack or something to keep the pot out of the water at the bottom.
  2. Cover the pot in cling film and place the pot on the stand in the pan.
  3. Put on a lid and bring to the boil.
  4. Steam for 15-20 mins until set.
This is a silky smooth egg dish that is a delight to eat. I eat it with a spoon straight from the pot. Nommy.

[Edit - sorry, forgot this earlier Banner Background Photo by Jakub Kapusnak on Unsplash]