Showing posts with label *Food: Meat. Show all posts

Monday, 1 June 2020

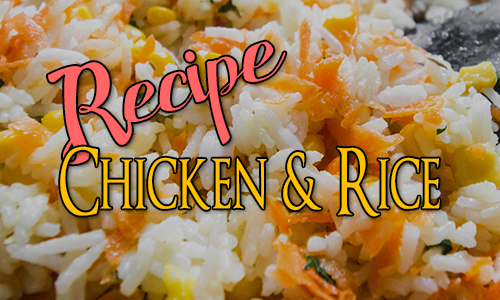
Recipe: Delicious Chicken & Rice - #InstantPot & #StoveTop Instructions


Recipe: Chicken & Rice

Delicious Chicken & Rice


Instant Pot or Stove Top


This is a recipe I only tried last week and it has become one of my husband's favourites and I love it too. Possibly not quite as much as he does, but it is very yummy. It is also so very easy and can be made in the Instant Pot (or other pressure cooker) or on the stove top.

serves 2 (just up the amounts for more)

Ingredients

  • 6 mini breast fillets (chicken tenders) cut into bite sized pieces ~300g - breast would work well too, but thighs might need a little more cooking.
  • 1/2 large onion - diced very small
  • 1 large carrot or 2 small ones - diced very small
  • 500ml / 2 cups chicken stock (I use low sodium, but just use your favourite)
  • 2 cloves garlic (crushed - I use lazy garlic and its about a tsp)
  • sprinkle of Italian seasoning
  • 200g/1 cup Jasmine rice (or white rice of choice)
  • 2 tbsp oil
  • salt and pepper to taste
  • 25g/ 1/4 cup Parmesan cheese, or something similar
  • fresh herbs - e.g. parsley, coriander/cilantro or basil (optional)

Instant Pot Instructions

  1. Turn on the Instant Pot and choose the saute setting.
  2. Add the oil, the onions and the carrots and saute for about 5 mins or until the onions are translucent and the carrots are beginning to go tender.
  3. Add the garlic and stir for about 30 sec.
  4. Add the chicken and stir around until the chicken is beginning to colour a little.
  5. Cancel the saute.
  6. Use a little of the chicken stock to deglaze the bottom of the pot, then add the rest.
  7. Add in the rice and stir gently so all the rice is covered in the stock.
  8. Add the Italian seasoning and salt and pepper.
  9. Put on the lid, make sure the valve is on sealing, choose the pressure/manual setting and set for 10mins.
  10. When the time is up, allow to sit for 5 mins to allow the chicken to rest.
  11. Release the pressure and open the pot.
  12. Stir the rice and make sure it hasn't stuck.
  13. Add the Parmesan and stir through.
  14. If using fresh herbs, chop them and add them now and stir through.
  15. Serve immediately.

Stove Top Instructions

  1. Add the oil to a deep stove top pan that has a tight fitting lid and heat.
  2. Add the chicken and cook through until almost completely done, then remove and set aside.
  3. Add a little more oil to the pan and add the carrots and the onions and sweat down until the onions are soft and the carrots are beginning to become tender.
  4. Add the glaric and fry until it become fragrant, 30-60sec
  5. Deglaze the pan with a little of the stock and then add the rest.
  6. Add in the rice and stir in.
  7. Add in the Italian herbs and seasoning.
  8. Add back in the chicken.
  9. Bring to the boil and cover with the lid.
  10. Turn down the heat and cook for 13-15 mins or until the rice is done to your liking and has absorbed nearly all the stock. Add more water if necessary, but there should be enough.
  11. Turn off the heat and stand for 5 mins with the lid still on.
  12. Stir to fluff the rice and add in the Parmesan and fresh herbs (if using) and stir through.
  13. Serve immediately.
This recipe is so quick and easy and makes a great, hearty meal. It's also very adaptable and we could add different veg if we wanted to. The secret is the spicing and Parmesan - everything else is up for debate. It would be easy to veggify this by substituting the chicken, either with some chunky veg, or some quorn or tofu, and using a Parmesan substitute that is vegetarian friendly.

Thursday, 14 May 2020

Recipe: Tofu & Spam Fritters with Egg Fried Rice


Tofu & Spam Fritters with Egg Fried Rice

Tofu & Spam Fritters with Egg Fried Rice

So this is two recipes I saw on Youtube combined to make a lovely meal. And I know you're thinking "Spam?!" - but trust me, this is delicious and really easy and it's the tofu that makes it so easy and the spam that makes it delicious. My husband hates tofu, but really loves this. Original fritter recipe is here on a wonderful site called Aaron & Claire's Korea and their Youtube channel is fab. This is one of the channels where I saw the steamed egg recipe too.

The spam provides a wonderful flavour which permeates the tofu, and the tofu provides a fabulous second texture, nutritious content and means the spam is not fatty or too salty. A great balance. I mean you could probably use some comfit pork belly if you want to go posh for a dinner party, but for a week night, spam is good πŸ˜„.

Makes 4 fritters & enough rice for 2

Ingredients


Fritters
  • 1/2 block tofu (I used Cauldron Organic Tofu because that's what Morrisons had)
  • 1/3 of 200g can of Spam 
  • 1/2 cup plain flour (ish)
  • 1 egg
  • 50g panko bread crumbs (ish)
  • black pepper to season
  • oil for frying
Rice
  • 1 cup white rice
  • 2 egg yolks
  • 2 spring onions (green onions/scallions) chopped 
  • salt and pepper to season
Tofu & Spam Fritters with Egg Fried Rice

Instructions

  1. Cook the rice per instructions on the packet and cool down with cold water.
  2. Cut 4 slices from the tofu about 1cm deep, then cut these in half. Season with black pepper (we don't need salt because there is plenty in the spam).
  3. Place the blocks on kitchen paper to soak up excess moisture.
  4. Cut 2 slices from the spam and cut each in half to the same size as the tofu. I was lucky, mine matched almost exactly, but trim to fit if they don't. The idea is to make a cube (ish).
  5. Dust one side of a block of tofu in flour and press onto the spam. Do the same on the other side so we have a spam sandwich with the tofu as the bread. Repeat for all 4 fritters. Then leave for a minute or so - the flour will bind and stick them all together.
  6. Beat the egg in a shallow bowl, and put the flour on one plate and the bread crumbs on another.
  7. Cover the tofu/spam tower in flour.
  8. Dip in the egg with right hand.
  9. Drop in the bread crumbs with right hand and use left to pat on the bread crumbs on all sides, turning with left hand. Using separate hands for wet and dry dipping will prevent our fingers becoming caked as well. Repeat for all fritters and leave to stand for 10 mins or so to set up.
  10. Preheat the oven to about 120C (~250F)
  11. Take a frying pan and put in about 1,5 cm of oil - heat until a little piece of bread sizzles.
  12. Place the fritters in the oil carefully and fry until the breadcrumbs go golden on the bottom.
  13. Turn over and repeat for the top.
  14. Then turn fritters onto their sides and repeat for each face. The easiest way to do this is use tongs and always turn all the fritters the same way so that there is no confusion.
  15. Pop the fritters in the oven to keep warm.
  16. Take the cold rice and mix through the egg yolks.
  17. In a pan, add a tbsp of oil and heat.
  18. Add the chopped spring onion and fry for a few moments.
  19. Add the rice and egg to the pan and stir fry until piping hot. (You can add other things to the rice if you like, like soy sauce or other veggies, but it is really nice as is).
  20. Serve with the fritters and sweet chilli dipping sauce, or dipping sauce of choice. Would be yummy with some stir fried broccoli on the side too.

Thursday, 9 April 2020

Recipe: Fridge/Store Cupboard Raid Stew

Recipe: Fridge/Store Cupboard Raid Stew

πŸ’–Looking for the AtoZ post for today? Please scroll down to the previous post. πŸ’–

Recipe: Fridge/Store Cupboard Raid Stew


So my husband made a plea not to make something with beans in it (we have been going through the cupboard using up all our cans of various beans and his stomach is finally rebelling πŸ˜‚), so I thought, stew. This is another recipe that can be made from just about anything, so I am sharing it.

You could make this recipe vegetarian by using a meat substitute like tofu and quorn, or mushrooms, swapping out the Worcester sauce for soy sauce, and using robust veggie stock cubes.

Ingredients

  • 1-2 chicken breasts in chunks (can be any meat, just needs to be bite-sized)
  • 1 tbsp oil
  • 1 540g/19oz can new potatoes (fresh would be fine, new or old, just bite sized again)
  • frozen peas - however many you have or fancy (or fresh or canned - whatever is in the freezer/cupboard)
  • veggies - peeled and cut in to bite sized pieces - I used a large carrot and half a courgette (zuchinni) because that's what I had  (could be suede or parsnip or sweet pot or turnip or anything to hand as long as it's robust) 
  • 1 can cream of tomato soup (440ml/14oz) (if you don't have this, ketchup, a little tomato paste and some water made up to the right amount will work)
  • dash of Worcestershire sauce
  • 1/2 tsp mild chilli powder (optional)
  • salt and pepper to taste
  • 2 beef stock cubes
  • 400 ml boiling water
  • 1.5 tbsp corn flour (starch)

Instructions (Instant Pot)

  1. Turn on the pot and put the oil in the bottom.
  2. Use the saute option on normal.
  3. When the oil is heated, add the meat and brown.
  4. Mix the stock cubes with the water and use a little of this to deglaze the bottom of the pot to make sure nothing is sticking to it.
  5. Add the rest of the stock cube mixture.
  6. Add all the potatoes and veggies and stir.
  7. Add the cream of tomato soup and stir in.
  8. Add the dash of Worcestershire sauce and the spice and seasonings and mix.
  9. Put the lid on making sure the value is set to sealing.
  10. Cancel the saute.
  11. Use the pressure (may be called manual on some models) option and set for 15 mins.
  12. When the timer goes off, leave to natural pressure release for 10 minutes.
  13. Release the remaining pressure and open the pot.
  14. Make a slurry using equal parts cold water to corn flour.
  15. Turn on saute again and add the slurry to the pot, stirring all the time until the broth thickens. If it does not thicken enough make more slurry, half a tbsp at a time and add it until the desired thickness is achieved.
  16. Serve in bowls with crusty bread.

Instructions (Stove/Oven)

  1. Preheat the oven to 160C/140C fan/Gas 3 (320F/285F for fan)
  2. Using a stove proof casserole dish with a lid, heat the oil and brown the meat.
  3. Add the stock cubes to the boiling water and add them into the casserole.
  4. Add the potatoes and other veggies and stir in.
  5. Add the cream of tomato soup and stir in.
  6. Add the Worcestershire sauce, the spice and the seasonings and mix.
  7. Put on the lid and place in the oven (if you do not have a lid, wrap the top of the dish tightly with foil to seal it).
  8. Cook for 2 to 2.5 hrs until the meat is really tender.
  9. Make a slurry using equal parts cold water to corn flour.
  10. Put the casserole back on the hob and add the slurry to the pot, stirring all the time until the broth thickens. If it does not thicken enough make more slurry, half a tbsp at a time and add it until the desired thickness is achieved.
  11. Serve in bowls with crusty bread.
This was delicious and not too heavy, so good for bright days as well as murky ones. We actually used turkey in our stew the other night because I had some that needed using up. It fell to pieces because it was thinly sliced turkey steaks, but it was lovely none-the-less.

Banner BG Photo by Selina Thomas on Unsplash

Tuesday, 15 January 2019

Recipe - Sous Vide Honey Sesame Duck Breast with Rice and Sesame Broccoli


Sous Vide Honey Sesame Duck Breast with Rice and Sesame Broccoli

Ever had the problem of your duck breast going tough when you cook it? Never again with the sous vide method - it comes out perfectly every time. The searing with duck is a little bit more complicated than with chicken, but it is still really easy.

Now, there are 2 ways to go about this:
  1. quick prep, but the skin isn't going to be as crispy
  2. longer prep, with perfect crispy skin
Both give fantastic duck breast meat, so if that's all you're interested in, go with version 1, but if you love yourself a bit of duck skin, go with 2.

Serves 2

Ingredients

for the duck
  • 2 duck breasts (I use the Gressingham duck breasts from Morrisons that they have in packs of 2 on the 3 for £10 offer).
  • 1 tsp sesame oil
  • 2 tbsp honey
  • 2 tbsp soy sauce
  • 1 clove garlic (crushed - I use a tube)
for the broccoli
  • 1/2 head broccoli
  • 1 tsp sesame oil
  • 1 tsp normal oil
  • 1 clove garlic (crushed - I use a tube)
75g of Jasmine rice per person

Instructions

For the duck
  • Preheat the Anova to 57.5 °C / 135 °F
Quick prep:
  1. Place the duck breasts in a bag with all the other ingredients.
  2. Seal using the water displacement method or a vacuum sealer on moist.
More complicated prep:
  1. Score the duck skin with long even strokes - do not cut the meat and score against the grain.
  2. Sear in a med pan, skin side down for 2-3 mins until the skin it golden - no oil is required because the fat will render. Do not have the heat too high or it will burn.
  3. Place the duck in a bag with the other ingredients.
  4. Seal using the water displacement method or a vacuum sealer on moist.
Cooking:
  1. Put the duck in the water bath and set the timer for 2h
  2. When the duck is ready, remove it from the water bath and bag and pat dry - reserve the cooking liquid.
  3. In a hot, but not scorching pan, place the duck skin side down and cook until the skin is crispy.
  4. Meanwhile add the cooking liquid to a saucepan and add a little corn flour.
  5. Cook until bubbling and thickening.
  6. Allow the duck to rest for a few minutes before serving.
For the broccoli
  1. Blanch the broccoli by bring a pan of water to the boil, dropping in the florets and cooking for 3-4 mins (if you have small florets, go for 3, bigger, go for 4). Drain and leave to the side until almost ready to serve.
  2. Heat the oils for the broccoli in a small frying pan or wok and add the garlic (you could use a saucepan if you are using your only frying pan for the duck:)).
  3. Add the blanched broccoli to the garlicy oil and stir fry for a minute.
Cook the rice as indicated on the packet - usually in boiling water for about 12 mins.

Serve with the sauce drizzled over the top.

Cooking the duck sous vide with all the flavours in the bag means they really get into the meat, but the meat also stays beautifully soft and juicy.

If you prefer your duck done to a different level, here are the temps chefsteps.com recommend for different results (I haven't tried any of them):
  • 129 °F / 54 °C: Rare, with some chew
  • 135 °F / 54 °C: Tender and juicy (temp I use)
  • 144 °F / 62 °C: Totally tender, a little less juicy
  • 149 °F / 65 °C: Decidedly less juicy but still delicious
  • 158 °F / 70 °C: Cooked all the way through
Do you have any favourite duck recipes you can recommend?

Thursday, 10 January 2019

Sous Vide Chicken, Pesto and Mozzarella Roulade + Buttery Potatoes


Sous Vide Chicken, Pesto and Mozzarella Roulade + Buttery Potatoes

I made this recipe yesterday and it was delicious, so I am going to share. First let me say that I used these 2 recipes as a base, but had to do added things:
Now I have no idea if the original recipe could actually work as is, but when I used it, the potatoes just weren't cooked, so I had to add a step. The reason I think it is worth the trouble is because, boy, the flavour of the potatoes is wonderful.

Prep time: 5 mins Cooking Time: 1h20

Ingredients

  • enough salad potatoes for 2 (I did a whole bag of Morrisons' The Best salad potatoes because I intend to use the left overs in a potato salad, but just do as many as you want to eat - also in season new pots would be good).
  • 1 tbsp unsalted butter
  • 1 tbsp extra virgin olive oil
  • pinch of salt

Instructions

  1. Set the Anova to 87C or 190F - make sure to use hot water from the tap or kettle to start with because getting to this temp takes a long while otherwise
  2. Put everything in a zip-lock bag and seal using the water immersions method (or if you have a vacuum sealer, use the moist setting).
  3. Pop in the Anova for 1h (you may have to weigh them down because pots float - I used an upturned bowl). 
  4. Once the timer goes off take potatoes out of the Anova and set aside.
  5. Half an hour before serving boil a pot of water on the stove.
  6. Add the potatoes and cook until tender (anywhere from 10-20mins)
Yes it seems like a lot of work and the potatoes are boiled anyway, but seriously, the way the butter infuses with the potatoes is lovely. You could add herbs or just go with olive oil if you are looking for a different flavour profile/lighter option. Honestly, I won't be doing these often, but I wanted to try them and they would be great for a special occasion.

Sous Vide Chicken, Pesto and Mozzarella Roulade

This is delicious, and you may notice that I use a higher temp than the original recipe, this is because my husband just can't bring himself to enjoy the texture of the low-temp cooking.

Prep time: 20 mins Cooking Time: 1h15

Ingredients

  • 2 boneless, skinless chicken breasts
  • ~100g (4 tbsp ish) green pesto
  • 1 regular ball of mozzarella (~125g)

Instructions

  1. Set the Anova to 63C or 145F - if cooking straight after the pots, adding ice and cold water to the pot will help cool it down quickly.
  2. Butterfly each chicken breast and beat flat between 2 sheets of cling film (don't go too mad, but show it who's boss ;)).
  3. Spread each chicken breast with half the pesto.
  4. Thinly slice the mozzarella ball and place half of the slices over each pesto layer.
  5. Roll the chicken breast tightly and pack it in the cling film so it is easy to handle.
  6. Place each in a zip lock bag and seal using the water immersions method (or if you have a vacuum sealer, use the moist setting).
  7. Place in the water bath and set the timer for 1h15 
  8. When the timer goes off, remove from the water and carefully take each roulade out of its bag using tongs.
  9. Heat a frying pan/skillet on high on the stove.
  10. Remove the cling film from each roulade and brown in the frying pan on all sides - this only takes seconds.
  11. Serve (the chicken can be left to rest for a few minutes in a very low oven while finishing off the rest of meal).

Saturday, 5 January 2019

The Wonders of Sous Vide! My new love...


The Wonders of Sous Vide! My new love...

My wonderful twin bought me the most amazing machine for my birthday in December - the Anova sous vide cooker (pot not included).

Sous vide - "under vacuum" in French - is a method of cooking that cooks the food in a bag with all/most of the air removed, in a water bath maintained at the chosen temperature.
I was unsure when I first tried it, but now I am in love.

The most important bit is the water bath, which is what the Anova does. Some people buy a vacuum pack machine to go with it, but that's unnecessary - I use the water immersion method to force the majority of the air out of the bags before cooking. Below is a lovely vid from Anova explaining the water immersion method:

Now the sous vide method takes time, the whole idea is to cook the food longer at a lower temperature to produce the best results. Think of it like pasteurising the food. Sorry to my vegetarian friends, but I have only used it for meat so far, although I am assured you can use it for veggies and eggs etc.

The Anova comes with a great app that not only allows us to control the machine from afar, but also has many guides and recipes to get us started. The app is not fool proof in that it works wonderfully on my Sony phone, but has a bit of a mare on Rob's Samsung in that the app keeps losing connection with the phone. However, what I do to be safe is put on a backup timer so I know when things are done.

Just to be clear, the Anova itself has never forgotten how long it is supposed to be on or anything like that, it has always pootled on beautifully, but the app on Rob's phone did fail and didn't seem to want to reconnect so it didn't alert us about cooking time etc. On my phone, before I enabled the wifi, the bluetooth did drop out once the first time I tried it, but it reconnected with no probs and continued from where the Anova told it, it had got to.
What is really great is we can pick a guide or a recipe from the app and it will program the Anova for us. This has never failed to work.

Chicken

Photo by Mark DeYoung on Unsplash
I tried chicken first and, wow, I never want to cook chicken breast any other way again. The results were so soft and tender and juicy. Not going to lie, when I usually eat chicken I require mayonnaise or gravy because of the texture. However, don't need a thing when it comes out of the water bath.
The usual technique with chicken breast is:
  • load up the bag with the flavourings and the chicken,
  • use the water immersion method to force out the air from the bag and seal it,
  • pop it in the water bath at around 60C /140F for about 1h 15m, 
  • pour out the juices into a saucepan to reduce to make a sauce,
  • pat the chicken dry
  • heat a frying pan/skillet until very hot and show the chicken breast to it on either side for 15s or so to colour
and it's ready.
Perfect chicken every time.

So far I have tried the recipe on the app for Sous Vide Honey Mustard Chicken Breast by Christina Wylie, which is my fav (I just use English mustard instead of whole grain) and I used the techniques in the Sous Vide 5-Spice Chicken Breast by Barbara Freda, but with my own ingredients for Honey Sesame Chicken.

Steak

Photo by rawpixel on Unsplash
Then there is the steak. My father's birthday is 24th Dec and for his lunch he asked for steak. So we decided to try it sous vide. Now I don't like steak, but my husband, my sister and my father do, and, frankly, they were blown away.

With this one we didn't even use a recipe, we just went with the guides in the app. We has 3 rib eye steaks, all of which had quite hard lumps of fat in the them that would have been worrying cooking in just a pan.
The usual basic procedure with streak is:
  • season the streak with salt and pepper,
  • place in the bag and use the water immersion method to force out the air from the bag and seal it,
  • pop in the water bath at 53.9C/129F for 1h (this is for medium rare - the guide has exact temps and times for however we might like it)
  • take out and pat dry
  • in a very hot skillet/frying pan sear the meat on each side in 15s bursts until the desired colour is reached (no more than 2 min total).
Perfect, juicy, tender steaks every time in a totally predictable manner - no more guessing.

Other Requirements


To go with our Anova we need:
  1. a large heat proof pot of some kind as in the pic at the top - my large crock pot which used to be used only for the potatoes at Christmas is now getting much more of a workout :)
  2. sturdy zip-lock bags that will completely seal - if they are too flimsy they could split during cooking and some versions do not seal well enough, they have to be able to maintain a semi-vacuum - I use the medium bags I can get from Home Bargains, which work perfectly well.
  3. some sort of pegs or clips - these are to clip the bags to the side of the pot so they don't float around, I bought some soft grip pegs from Home Bargains :)
This is a scientific, easy way of cooking that produced perfect results every time. I love it and I look forward to experimenting some more.

Does anyone already use a sous vide machine? Any recipe recommendations? Any tips or tricks? Anyone thinking of getting one?

Thursday, 4 October 2018

Recipe: Turkey and Black Pudding Potato Topped Pie


This is a recipe I made up last night and it's based on my mother's shepherds pie - although, in our house, that just means it's mince based and topped with mashed potato - it has no bearing on if it uses lamb, beef or whatever :).

Not fond of or can't get black pudding?
Now if you don't like black pudding or it's just not something you can lay your hands on, you could just sub in more mince, but I would recommend adding another stock cube and a dash of something like Worcestershire sauce to add to the flavour profile. It won't be the same, but it will be yummy.

Vegetarian?
To make this vegetarian is tough, but using a meat substitute mince in place of the turkey and black pudding, substituting vegetable stock cubes for beef ones, and using soy sauce to add to the flavour profile (FYI Worcestershire is not vegetarian) will produce something very tasty, but nowhere near the same :).

Gluten Free?
Black pudding contains cereals as part of the recipe, so most of them are not gluten free, but there are makes out there (for example The Fruit Pig Company).

Also check your stock cubes and ketchup, because many contain gluten.

Good news is, Heinz Baked Beanz are gluten free.

Batch Cooking
This is a big recipe, it will serve 7 possibly 8, but this is the perfect recipe for batch cooking and it will freeze really well, or keep in the fridge to be eaten over several days. It can be reheated in the oven, or in the microwave.

Serves 7-8
Prep Time - 30 min
Cooking Time - 50 mins

Ingredients

  • 750g turkey thigh mince (breast mince is fine too, but thigh is much cheaper)
  • 400g black pudding (British style blood sausage)
  • 1 can (415g) Baked Beans (haricot beans in tomato sauce - Heinz are the best)
  • 1 can (300g) Cannellini Beans (you can use any bean you fancy - adds to the texture and vitamins)
  • 3 tbsp tomato ketchup
  • 2 beef stock cubes (I use Oxo)
  • 1.5 large carrots
  • 100ml water
  • 1.2 kg mashed potato (I buy mine frozen because it's quicker, but just do your mash as you would normally)
  • 1 tbsp oil

Equipment

  • Large frying pan or direct heat casserole dish
  • Spatula
  • Peeler
  • Knife
  • Grater
  • Casserole dish(es) to make the pie in
For mashed potato from scratch
  • Potato masher
  • Large saucepan

Instructions

  1. Preheat the oven to 160C/320F fan, 180C/350F non-fan, Gas Mark 4
  2. Peel the carrots.
  3. Grate one carrot with a fine grater.
  4. Chop the remaining half carrot into tiny cubes (3 or 4 mm) 
  5. Put the turkey mince in a large frying pan or casserole dish with the oil, over a medium heat and break up.
  6. Crumble in the stock cubes and stir through.
  7. Cook for a few minutes to seal the turkey mince.
  8. Crumble in the black pudding and combine.
  9. Fry until all the meat is cooked through.
  10. Add the ketchup, baked beans, cannellini beans, carrot and water and stir through.
  11. Cook gently until everything has come together and is hot, and the carrot has softened (the grated carrot will have virtually disappeared, but check the little cubes).
  12. Taste to check it is to you liking, if it's too sweet Worcestershire sauce can bring that down for you, if it's not sweet enough add a little more ketchup.
  13. Prepare your mash (if doing from scratch, peel and chop the potatoes into small pieces and boil for between 8-15 mins until tender, then drain and mash with a little butter and milk).
  14. Divide your mince mixture between how ever many pie casserole dishes you are using and spread into an even layer.
  15. Cover each mince layer with a layer of mashed potato.
  16. Bake in the oven for 40 mins
  17. Turn the oven up to 180C/350F Fan, 190C/375F non-Fan, Gas Mark 5 and bake for another 10 mins to brown the top.
Serve as is, or with a green vegetable of choice.

Reheating Instructions

Oven:
Cover with foil, put into an over at 160C/320F fan, 180C/350F non-fan, Gas Mark 4 for about 30 mins or until piping hot.

Microwave:
Place in a microwaveable container, cover with a plate or microwaveable lid, heat for 3 mins and check, then heat in 1 min intervals until hot.

P.S. Don't forget The Horror of Shakespeare - I'm posting a horror/paranormal drabble (100 word story) inspired by a Shakespearean quote every day through October.

Thursday, 21 June 2018

Recipe: Chilli Chicken/Tofu with Spicy Beans & Tomato Sauce


Chilli Chicken/Tofu with Spicy Beans & Tomato Sauce

My apologies for not updating in a while - I have been busy with a project, but I am back today with a lovely recipe to share. It is actually a cross between two recipes that I am very fond of, Chicken Marsala (I haven't posted this one yet), which gave me the technique for doing the chicken and Turkey/Soya/Quorn Chilli with Tortilla Crust and Avocado Salsa for the beans and sauce.

Updated - I forgot to mention this works extremely well with smoked tofu, rather than chicken for the vegetarians among us - the flavour goes beautifully, and coating it in flour and frying it would give the little crunch too.

Serves 4 Cooking Time 45 min

Ingredients

  • 4 skinless chicken breasts or 1 packet of smoked Tofu (Tofoo is fantastic)
  • 3 tbsp regular flour (for gluten free, you could use another flour of your choice - it is only to help the browning)
  • Salt
  • Pepper
  • ½ tsp mild chili powder
  • ½ red onion
  • 1 skinned red pepper 
  • 500g box of passata
  • 1 tbsp chipotle (if you don't like it as spicy, reduce the amount)
  • 1 tsp ground cumin
  • 1 can red kidney beans
  • 1 can cannellini beans
  • ¼ cup sherry (optional)
  • 2 tbsp oil for frying
Rice or tortillas for serving, with soured cream and avocado salsa (optional).

Instructions

  1. Put flour, pepper, salt and mild chili powder in a bag and shake to mix. 
  2. Pound the chicken breast until they are about ¼ inch thick or Cut the tofu into four equal, flat pieces.
  3. Put the chicken or tofu in the bag and shake to coat with flour.
  4. In a large frying pan (30cm/12in) or flameproof casserole heat the oil and add the chicken/tofu. Cook until golden on both sides and just cooked - about 5-6 mins for chicken, less for tofu.
  5. Remove and set aside to rest in a warm place.
  6. Chop the onion finely.
  7. Sweat down in the same pan as the chicken was cooked in, over a low heat, until translucent.
  8. Chop the red pepper into bite sized pieces and add to the pan.
  9. Add the ground cumin and stir through - cook for 1 min.
  10. Stir in the passata and chipotle - rinse out the passata box/can with a little water and add that too.
  11. Add the beans and the sherry and bring to the boil.
  12. Cook until the sauce has thickened and is viscous - can take up to 10 mins, but use your judgement.
  13. Turn the heat down, add the chicken/tofu to the pan, including any juices that came out, pop on the lid and cook for 2-3 mins until the chicken/tofu is warmed through.
  14. Serve with rice or tortillas.
This is a very hearty meal with lots of things that are really good for us. It is also very tasty and the way the chicken comes out so juicy inside and slightly crunchy on the outside it just about perfect.

Tuesday, 1 May 2018

Recipe: Turkey/Soya/Quorn Chilli with Tortilla Crust and Avocado Salsa


Turkey/Soya/Quorn Chilli with Tortilla Crust and Avocado Salsa

Made this recipe for tea last night and it was very yummy. We usually have salad on a Monday in the spring and summer, but it was so wet and horrible, I did this instead.

It should feed four, but I can attest to the fact that one person can eat enough of it for 3 because I watched my lovely husband, Rob, do just that last night. He had missed lunch. I used Turkey mince, but this is the kind of recipe where the meat is just a carrier for flavour, so it will work just as well with soya mince or Quorn mince.

Adding more beans (haricot or cannellini beans would work well with the kidney beans) would also cheaply bulk it out for more people or for those with an appetite like Rob had last night :).

Gluten Free
  • This is also gluten free if you can get/make pure corn tortillas - I could only get corn and wheat tortillas in my supermarket, but pure corn ones are available online
  • Also, if using soya mince and going for gluten free, check it, because sometimes they add wheat flour.
This is based off of this recipe (Turkey Tortilla Pie from Good Food), but I've changed a few things (of course I did ;)), hence this is my version.

Feeds 4, Time 30-40 mins

Ingredients


Chilli
  • 1 tbsp oil (use your fav - it's for frying)
  • 2 red onions (you could use white onions if you like, I just prefer the sweeter red ones)
  • 1 large red pepper (I used a roasted/skinned one from a jar)
  • 1.5 tsp ground cumin
  • 450g mince (turkey/soya/quorn)
  • 1 tbsp chipoltle paste (this makes it a decently warn chilli but not mouth on fire stuff, if you prefer it milder, reduce the amount)
  • 500g passata
  • 400g kidney beans (1 can)
  • 200g sweetcorn (1 can)
  • 2 corn tortillas (you can use wheat if it's all you can get, but the corn ones add a nice sweetness and allow for a gluten free meal if they are pure corn)
  • sprinkling of grated cheedar cheese
Salsa
  • 1 large rip avocado
  • juice 1/2 lime
  • dried garlic to taste (either granules or a garlic grinder)
To serve (optional)
  • soured cream
Equipment
  • flame proof casserole dish
    or large frying pan + casserole dish
  • small bowl

Method

  1. Finely chop the onions.
  2. Add the oil to either your flame proof casserole or the frying pan and put on a low heat on the hob.
  3. Add the onions and cover - allow to sweat down until soft. This can take up to 10 mins - the onions should be translucent when done.
  4. Dice the red pepper and add to the pan.
  5. Add the mince and stir thoroughly.
  6. Cook for 5 mins or so until the mince is browned - the time will vary depending on what mince you are using, so use your own judgement.
  7. Stir in the chipotle.
  8. Add the passata, then rinse out the can/box with a little water and add that as well.
  9. Bring to a boil and simmer for 5 mins or so.
  10. Add the kidney beans and the sweetcorn and cook until the chilli is thick and viscous, not watery.
  11. While the chilli is cooking, dice the avocado into small cubes.
  12. Place in a small bowl and squeeze over the half a lime.
  13. Sprinkle with the dried garlic to your own taste and mix.
  14. If you were cooking in a frying pan, once it is done transfer the chilli to your casserole dish.
  15. Put the grill on full power.
  16. Cut the corn tortillas into 8 triangles each.
  17. Place the tortilla triangles all over the top of the chilli like a lid.
  18. Sprinkle lightly with cheese.
  19. Place under the grill until the cheese melts and the edges of the tortilla's crisp up.
  20. Serve in bowls with the salsa sprinkled over the top and a dollop of soured cream if that is your thing.
This is a very tasty, hearty meal and it definitely going in my regular use folder.

Thursday, 15 February 2018

Recipe - Easy Butter Chicken without the butter :)


Easy Butter Chicken without the Butter


This is based on this BBC recipe, but I altered the ingredients because when I made it as is, I found it way too astringent. Altering the spices and adding coconut cream balanced it for me, although I have only eaten butter chicken not out of a packet once or twice, so I have no idea how it measures up to normal butter chicken.

As ever with recipes I post that are based on chicken, if you are vegetarian anything similar like Quorn or tofu would probably take the sauce well too. Having checked Google, Quorn and tofu both take marinade well :).

START THIS RECIPE THE DAY BEFORE or MORNING OF for best results - I would recommend marinating the chicken for at least half a day, overnight is even better.

With all the extras will server 3-4, with only the rice will serve 2-3
up the amount of chicken for more if necessary - there is plenty of sauce

Ingredients

3 skinless chicken breasts (~450g)

Marinade
juice of 1 lemon
2 tsp ground cumin
2 tsp paprika
1 tsp mild chilli powder
200g (~7/8 cup) natural yogurt

The rest
2 tbsp oil (I live olive oil, but use whichever you prefer)
1 large red onion
3 cloves garlic
inch fresh ginger
1/2tsp garam masala
1 tsp fenugreek
3 tbsp tomato puree
300ml (1 1/4 cups) chicken or veg stock
250ml (~1 cup) carton of coconut cream

To serve (pick n mix)
120-150g jasmine/basmati rice (check the packet for typical serving size and cooking time)
naan bread
mango chutney or lime pickle
fresh coriander

Instructions

  1. In a bowl or bag mix the marinade.
  2. Chop the chicken into bite sized pieces and add to the marinade. Seal and place in the fridge overnight, or for a good few hours. This will allow the lemon to get into the meat and the yogurt to mellow the acidity.
  3. Chop the onion finely.
  4. Mince the ginger and the garlic.
  5. Heat the oil gently in a pan and add the onion, garlic and ginger. Cook on low until the onions are translucent and soft - at least 10 mins.
  6. Add the spices and the tomato puree and cook for 2-3 mins until the mixture is fragrant.
  7. Add the stock, the chicken with the marinade and the coconut milk and allow to bubble gently and reduce to thicken the sauce.
  8. While the chicken is bubbling away, cook the rice and prepare any of the other extras.
  9. Once the sauce is reduced by about half, serve immediately with the chosen extras.

Tuesday, 6 February 2018

Recipe - Chicken, Chilli & Peanut Butter, Potato Topped Pie #GlutenFree


Chicken, Chilli & Peanut Butter, Potato Topped Pie

This recipe serves 3 hungry people, or 4 normally, but the great thing about it is, reheating it the next day, it tastes even better, so it's fine for 2 people as well. If you don't like eating the same thing twice in a row for dinner, it would make a good lunch if you have a microwave at work.

It takes a little time to prepare, but is well worth it. Because it has a potato top not pastry, it is gluten free—an added bonus.

This recipe is based off of this one from BBC Good Food, but I changed a lot of it, so here is my version.

Ingredients

Chicken Filling
  • 1 tbsp oil (which ever you prefer for frying)
  • 2 tbsp minced or finely chopped ginger
  • 2 tsp mild chilli powder
  • 1 tsp ground cumin
  • 1 tsp ground coriander
  • 2 medium red onions
  • 2 red peppers (roasted from a jar are easiest)
  • 2-3 skinless chicken breasts (~450g)
  • 250g (~1 cup) passata
  • 2 tbsp tomato puree
  • 1 vegetable bouillon cube (make sure it is gluten free)
  • 3 tbsp peanut butter
  • 250ml water
  • 300g can cannellini beans
Mash
  • 500g potatoes
  • 1/2 tbsp fresh coriander finely chopped (if you love coriander add more, but my husband is not fond of it and this amount gives a nice undercurrent without being in your face).
  • 1 tsp mild chilli powder
  • knob of butter
  • splash of milk

Instructions


  1. Peel and chop the potatoes and put on the stove in a saucepan of water to boil until tender. At least 15mins, but could take longer - check them with a fork before draining.
  2. Preheat the oven to 200C/180C Fan/gas 6/400F/350F Fan
  3. Finely chop the onion (I like the onion to disappear, but keep it chunkier if you prefer) and roughly chop the pepper.
  4. Heat the oil in a pan on low, add the onion, ginger, chilli, cumin and coriander. (If your peppers are fresh and not from a jar like mine, also add now). Cook gently until the onion and ginger are completely softened and the onion is translucent.
  5. Add the peppers and cook for a minute or two (if you didn't add them in the previous step).
  6. While the onions are softening, chop the chicken into small chunks.
  7. Add the chicken to the pan and fry unto it begins to colour slightly.
  8. Add the passata (you can use canned toms if you prefer, I just hate the bits :)) and tomato puree and stir through.
  9. Dissolve the bouillon cube in 150ml (2/3 cup) boiling water and add to the pan.
  10. Mix the peanut butter with 100ml (~1/2cup) water and add to the pan. 
  11. Add the drained cannellini beans and cook for at least five minutes.
  12. Mash the potatoes with the butter until smooth.
  13. Add the milk (if you add it before you will get lumpy mash), the coriander and the chilli powder and mix together.
  14. Put the chicken mixture into the bottom of a medium baking dish (mine is 26x16x6cm) and carefully spread the potato over the top.
  15. Pop in the over for approx 35min.
  16. Serve with the green vegetable of your choice - peas or beans or broccoli would all be good.

The pie will also keep well in the fridge for up to three days, and will freeze well - just stop after step 14. If cooking after freezing, make sure it is thoroughly defrosted before heating. It will need approx 50mins in the oven from chilled. If it starts to colour too much on top, cover with foil.

If reheating some of the fully cooked pie the next day, always make sure it is piping hot before eating - you do not want to poison yourself. Also, if reheating in the oven, leave uncovered for the first 10 mins, then cover with foil for the rest of the cooking time or it will burn.

If you enjoy a crunch on top of your pie, some crushed peanuts scattered over the top would give it some nice texture.

Tuesday, 16 January 2018

Recipe: Honey Sesame Chicken with Sesame Broccoli and Rice


Honey Sesame Chicken with Sesame Broccoli and Rice

It's the new year, so it's time to try new recipes. I started last night with this one. The base recipe comes from Two Peas and Their Pod, but it's done with a pressure cooker, so this is how I made it without one. I've also added UK measurements as well as US and reduced the original recipe which was to feed six.

N.B. This recipe can be gluten free if you use Tamari (Japanese soy sauce) rather than regular soy sauce, which usually contains gluten.

Given that chicken is basically a meat that takes on any flavour it is put with, I would guess this would be nice done with tofu or Quorn, for those of a vegetarian persuasion.

If you don't like broccoli, you could substitute snow peas, or something similar - but if you haven't tried sesame broccoli, give it a go - it was that which turned me onto the green menace after years of having hated it.

Feeds 2 (just scale up for more)


Ingredients


For the chicken
  • 2 large skinless chicken breasts, bite-sized pieces
  • 1/2 tblspn oil (use whichever you like best)
  • 1/2 small (lemon sized) onion, finely chopped (I used red, the original recipe says white, so go with what you prefer)
  • 1 clove garlic
  • 1/4 cup/60ml soy sauce (low salt)
  • 2 tbsp/30ml ketchup
  • 1/4 tsp mild chilli powder
  • 1 tsp toasted sesame oil
  • 1/4cup/60ml honey
  • 1 tbsp corn flour (cornstarch)
  • 1.5 tbsp cold water
For the broccoli
  • 1/2 head of broccoli in florets
  • 1/2 tbsp oil
  • 1/2 tbsp toasted sesame oil
  • 1 clove garlic minced
Sesame seeds to garnish, optional - (I toasted mine in a dry pan to bring out the flavour)
Rice to serve - I like Jasmine rice, but just use your favourite.

Instructions

  1. Put the oil in a frying pan or casserole (suitable for direct heat) that has a lid, heat gently on the hob and add the onion. Pop on the lid and allow to soften and go translucent.
  2. Add the garlic and cook for 1 min to allow the flavour to start coming out.
  3. Turn up the heat and add the diced chicken, sealing it all over.
  4. Lower the heat again, add the soy sauce, ketchup and chilli, put the lid on and cook gently until the chicken is cooked through and no longer pink inside. (Depending on your definition of bite sized, this can take between 10 & 15 mins usually - check by splitting a chunk in two). If you are waiting for someone to come home, this is the point where you can leave it until you know they are almost back - just keep the lid on and the heat really low once the chicken is done.
  5. While the chicken is cooking, get the rice going - follow the instructions on the packet.
  6. Blanch the broccoli by bring a pan of water to the boil, dropping in the florets and cooking for 3-4 mins (if you have small florets, go for 3, bigger, go for 4). Drain and leave to the side.
  7. Add the sesame oil and honey to the chicken and stir well to mix.
  8. Mix the corn flour and water in a small bowl, then add to the frying pan - stir in quickly and cook gently until the sauce thickens.
  9. Heat the oils for the broccoli in a small frying pan or wok and add the garlic (you could use a saucepan if you are using your only frying pan for the chicken :)).
  10. Add the blanched broccoli to the garlicy oil and stir fry for a minute.
  11. Serve in warmed bowls with sesame seeds sprinkled on the chicken and the broccoli (you can sprinkle them on the rice too if it makes you happy ;)).

Rob all but licked the bowl when he was finished, which I count as a success :).

Tuesday, 12 September 2017

Recipe: Hearty Mexican Style Bean, Rice and Chicken Soup


Hearty Mexican Style Bean, Rice and Chicken Soup

This is a wonderfully hearty recipe and it is very easy to bulk up for more people. It's also gluten free and if you want to make a veggie version replacing the chicken with tofu or mushrooms or quorn, and the chicken stock with vegetable stock would work well.

This dish also only takes a few minutes to throw together if the chicken and rice are cooked in advance, so it is great for those dinners when there is little time to cook.

Ingredients

serves 4
  • 2 or 3 chicken breasts (you can also use chicken thighs, just up the number depending on the size of the thighs)
  • 2 tsp oil (olive, sunflower, or whichever you prefer)
  • 1 red onion
  • 1 red or green pepper (capsicum) (I use a roasted red pepper from a jar because I don't like pepper skin)
  • 250g/9oz (about 2/3 cup) cooked rice (brown rice cooked = 2x uncooked weight, white rice cooked = 3x uncooked weight) I use a basmati/wild rice combo when I can get it, but plain basmati when I can't - a pouch of precooked rice also works :)
  • 1-2 tbsp chipotle paste (chipotle is spicy, so go with your personal taste on amount, also check the label if you need it to be gluten free - not all of them are)
  • 200g/7oz (just over 1 cup) sweetcorn (I use a can, but frozen is okay too)
  • 400g/15oz can black beans (1.75 cups) (if you can't get black beans, kidney beans, haricot beans or whichever is your fav canned bean will do as long as they are not in a sauce).
  • 1.2 l ( about 4.5 cups) chicken stock (I use dilutable liquid stock)
  • a handful of fresh coriander finely chopped or 1 tspn dried coriander leaf

Optional to serve:
  • 1 large or 2 small ripe avocados
  • 1 lime
  • garlic powder or grated garlic
  • soured cream

Equipment

  • sharp knife
  • large caserole pan that can be used on the hob
  • spatula

Instructions

  1. If using dried rice, cook as instructed on the packet, drain and put aside for later.
  2. Fry off the chicken in the pan with 1 tsp of the oil until it is cooked through, remove from the pan and leave to rest. (You can do this in advance or use left over chicken as well - it does not need to be hot).
  3. Finely chop the onion.
  4. Heat the other tsp of oil in the same pan and throw in the onion, cooking on a low heat to sweat it down until it is translucent. Do not allow it to colour.
  5. Chop the pepper.
  6. Add the pepper to the pan. If it is raw allow to cook for 2-3 mins before continuing, if it is roasted from a jar go on to the next step immeditately.
  7. Add the chipotle paste, rice and sweetcorn to the pan and stir to make sure everything is coated in the paste. Allow to cook for a couple of minutes.
  8. Add the stock and stir.
  9. Drain and add the black beans and stir.
  10. Up the heat and bring to the boil before turning down the heat again so the pot is simmering.
  11. Shred the chicken and add half to the pan along with the corriander.
  12. Let it simmer for a minute or too and then let it sit for another minute.
  13. While the soup is simmering, cut the avocados into small cubes, add the juice of the lime and garlic to taste and stir.
  14. Ladle the soup into bowls and add the rest of the shredded chicken on top.
  15. Serve with a dollop of soured cream and the acovado salsa scattered on top.
For some added crunch, crumble a few tortilla chips onto to the top of the soup before eating. But not too many or they will go soggy :).

This works really well reheated the next day and is great for a packed lunch where there is access to a mircowave. Just make sure the soup is piping hot when reheated because of the rice and the chicken.

Tuesday, 31 January 2017

Recipe: Harissa Chicken & Butternut and Moroccan Style Vegetable Couscous


I have had another success in the kitchen with a new recipe, so I thought I'd share. :)

Gluten Free: since this has couscous it is not gluten free, however, subbing in quinoa or wild rice would work just as well. Also make sure your harissa paste has not been bulked out with gluten.

Vegetarian: Quorn or Tofu would make a good substitute for the chicken.

Vegan: Vegan Quorn  or Tofu instead of chicken and a soy or coconut yogurt would work well to make this dish vegan friendly.

Harissa Chicken & Butternut with Moroccan Style Vegetable Couscous


Serves 4 (if you have a group with really healthy appetites then up the amount of couscous and veggies, or add another chicken breast :))

Ingredients

Traybake
4 skinless chicken breasts
2 red onions
3 tbsp harissa paste
3 tbsp natural yogurt
2 tbsp oil (sunflower, olive, vegetable, coconut etc)
Vegetable Couscous
120g couscous
150ml (~3/4cup) chicken or vegetable stock
2 tsp Moroccan spice mix (this is available off the shelf or there are recipes for making it)
2 red bell peppers (capsicum) (I use roasted, deskinned ones from a jar because I hate pepper skin, but you could use fresh)
2 large flat mushrooms
100g frozen peas
1 tbsp oil (sunflower, olive, vegetable, coconut etc)
Other options are aubergine, courgette, tender stem broccoli - anything you like really that will take the Moroccan spice.
To serve: more natural yogurt

Instructions

  1. Pre-heat the oven to 200C(400F)/180C(350F) fan/Gas 6.
  2. Mix 2tbsp of the harissa with the 3tbsp of yogurt and add a little salt as well (leaving the salt out if you don't normally use it is fine).
  3. Slash the tops of the chicken breast.
  4. Roll the chicken breast in the yogurt mixture and leave to marinate.
  5. Peel, de-seed and cut the butternut squash into wedges.
  6. Peel and cut the red onions into eight wedges each.
  7. Mix the last tbsp of harissa with the oil in a large roasting tin.
  8. Add the butternut and onion and stir until covered.
  9. Cook in the oven for 10 mins.
  10. Add the chicken to the tray and pop back in the oven for 20-30 mins until the chicken is done and the butternut is tender.
  11. While the bake is cooking, chop the mushroom and red pepper into small chunks.
  12. Add the tbsp oil to a frying pan with 1tsp of the Moroccan spice mix and heat until the spices start to give off their aroma.
  13. Add the mushroom and cook until it gives off its water.
  14. Add the pepper and peas and cook for five mins until they pick up the spice.
  15. Cook the couscous in the stock with the other tsp of Moroccan spice (check the instructions on the packet, for mine it was bring the stock mixture to the boil, add the couscous and keep cooking for five mins, or until all the water was absorbed and then let stand until the time totals five mins).
  16. Add the couscous to the frying pan of veg and mix together.
  17. Take the tray bake out of the oven and serve one chicken breast per person with some of the butternut and onion, with the couscous on the side, and extra yogurt for those who want it.
This is very tasty and mildly spicy. I'm a mild chilli, korma kind of girl, so its that level of heat for anyone who might be worried. I had never used harissa before, so I was not sure if it would be too spicy for me, but it was good. For those who like more punch, adding a chilli or two would work to give it a bit of a whack.

Tuesday, 10 January 2017

Recipe: Spring Vegetables with Roast Chicken and Feta (Gluten Free) #TipsTuesdays


So I tried out a new recipe last night and Rob gave it a 9.5 out of 10, so I had to share. It's based off this one on GoodFood, but I added and changed a few things, so this is my version :).

Now this recipe only fed two of us, but I had 2 chicken thighs and Rob had the other 7 because he had just finished in the gym and was craving the protein, hence I think it would serve 3 comfortably.

This recipe is entirely gluten free.

For a Vegetarian Version sans Chicken

I think it would be very easy to convert this to being a vegetarian dish with just a few changes. Quorn pieces or baby new potatoes would make a good substitute for the chicken, but I'd add about 100ml of vegetable stock as well to make up for the lack of chicken juices that are released during cooking. Also, watch the cooking time and just take it out when everything is tender. Always check your cheese as well, just in case, to make sure it doesn't use animal rennet.

Spring Vegetables with Roast Chicken and Feta

Serves 3 (to serve 4 just up the number of vegetables)

Ingredients

  • 1 pack of chicken thighs (8 or 9) (I used thigh fillets because I hate dealing with bones when eating but with skin on the bone works too if you like crispy skin etc
  • 2 tbsp olive oil
  • 1 lemon (the original recipe zested the lemon, but I hate lemon zest in things and you still get all the flavour without that)
  • 4 shallots
  • 4 sprigs of rosemary or 2 tsp dried rosemary (guess who didn't have fresh rosemary last night :))
  • 2 large roasted red peppers (from a jar)
  • 1 large courgette
  • 250g peas (the original recipe wanted fresh, but they are often hard to get and frozen work well)
  • ~100g asparagus spears
  • ~100g tender stem broccoli (Morrisons do a nice mix pack of asparagus and tender stem broccoli, which is what I used)
  • 100g feta (about half an average block)

Equipment

  • 1 large roasting tray
  • 1 sharp knife
  • 1 chopping board
  • 1 spatula
  • 1 saucepan

Instructions

  1. Pre-heat the over to 200C/400F | 180C/350F fan | Gas 6
  2. Cut you lemon into eight wedges.
  3. Put the lemon into the roasting pan, giving each wedge a gentle squeeze to release some of its juice.
  4. Chop the shallots and add them to the roasting tin. I like my shallots to melt away into nothing so I chop them finely, but you can have larger rings if you would like.
  5. Drain and chop the roasted red peppers into bite sized pieces and add to the roasting pan. I always split the ones I bye down the middle first and then make sure there are no seeds left in them.
  6. Split the courgette down the centre and the chop into thick chunks on the diagonal. Add to the pan.
  7. Add the oil and mix everything around. I added just a pinch of smoked salt at this point because my pepper were preserved in brine, so not much salt was needed, if yours are just in water you might like to add a pinch more.
  8. Add the chicken thighs and mix. If you are using skin on thighs, make sure they all end up skin side up once they are coated in the oil.
  9. Put the roasting tray in the oven and cook for 40-50 mins until the chicken is cooked all the way through.
  10. Take out of the oven and cover with a lid or foil to let the chicken rest.
  11. Bring a saucepan of water to the boil and cook the peas, asparagus and broccoli for 4 mins.
  12. Drain the vegetables and add to the roasting tin, mixing everything around to coat the vegetables in all the lovely cooking juices.
  13. Crumble over the feta and serve.
This really was delicious and its packed with vitamins and good things.

~*~

Defence, Pretence, Offence
by Beren (aka Tasha)

3rd and 4th chapters of my new Harry Potter fanfiction are now up.


Summary: The threat of open war in on the horizon. The Order and the Ministry are of one accord and both know that where Harry Potter is, Voldemort will eventually be. Preparations are being made and this time the side of the light will not be caught unawares.

Summer classes, sabotage, revelations about Draco's father, teaching and the final showdown with Voldemort all await Harry and Draco in this exciting sequel to Gold Tinted Spectacles (LJ | AO3 | Wattpad).

Links to CH03: LJ | DW | AO3 | Wattpad
Links to CH04: LJ | DW | AO3 | Wattpad
Link to other parts: LJ | DW | AO3 | Wattpad 

New chapters are posted every Monday, Wednesday and Friday.

Warning: This story is canon compliant until the end of Order of the Phoenix and then goes AU. None of the HBP or Deathly Hallows plot will be used, or the Horcruxes for that matter since this story was planned before we knew the details about those things, and hence has it's own fanon. This includes birthdays and other information that have since been revealed on Pottermore and in further productions.

Thursday, 3 November 2016

Recipe: Bolognese with Crispy Cheesy Courgette Batons (Gluten Free)


Greetings, today I have a new recipe for you. It is gluten free and can very easily be made in vegetarian or non-vegetarian versions. I made it for me and my husband last night and it's very tasty and much lighter in the stomach than pasta.

Bolognese with Crispy Cheesy Courgette (Zucchini) Batons (Gluten Free)

Wittegen Press
FREE
Wattpad

Ingredients

serves 2 or 3

  • 250g Turkey Breast Mince (sub quorn or soya mince for veggie version or even a can of pulses if you prefer)
  • 2-3 large flat mushrooms (you can use smaller mushrooms, but the big ones have more flavour)
  • 500g tomato passata
  • 3 cloves of garlic
  • 2 stock cubes (I use beef Oxo, if you are going veggie use vegetable stock cubes and if you are going gluten free use Knorr not Oxo)
  • 3 sweet roasted red peppers (I get mine in a jar like this, but you can buy and roast your own - these are not chilli peppers)
  • glug of sherry (optional)
  • 1 tbsp oil (olive, sunflower and coconut are all good)
  • 2.5 medium courgettes (zucchini)
  • 50g (1/2 cup) ground almonds (aka almond flour or almond meal)
  • 50g (1/2 cup) grated Parmesan (for veggie option use a vegetarian substitute hard Italian cheese because Parmesan uses animal rennet - check the packaging to be sure)
  • 1 tbsp salt (don't worry, most of this is washed off)
  • 1.5 tspn Italian seasoning (store bough or here is a recipe)
  • 1/2 tspn garlic powder
  • 1 large egg

Instructions

  1. Pre-heat the oven to 220C or 425F.
  2. Cut 2 of the courgettes (zucchini) into 2.5 to 3 inch lengths (I cut the ends off mine and cut them in half). Then cut each length into 8 pieces along their length so you have batons.
  3. Place the batons in a colander and sprinkle with the salt. Leave for between 30 mins and 1 hr to drain all excess water. (1 hr is better, but 30 mins will do at a push).
  4. When your courgette batons are almost finished draining, chop the mushrooms into bite sized pieces and the remaining 1/2 courgette into thin rounds that are then divided into quarters.
  5. Add the oil and garlic to a deep frying pan and gently heat.
  6. Add the mushrooms and the courgette quarters (NOT the batons) and cook until they are softening and have given up their water.
  7. Drain (if from a jar) and chop the peppers into bite sized pieces and also add to the pan. 
  8. Add the mince and cook through.
  9. Crumble the stock cubes straight into the pan and stir through. (If you like your food with some bite you can add a little chilli too).
  10. Add the passata to the pan, rinse out the passata container with a little water and also add.
  11. Add the sherry and 1/5 tsp Italian seasoning. (My peppers come in brine, so I find I don't need to add any more salt at this point, if you are roasting your own a little salt or a splash of Worcestershire sauce (not veggie) or soy sauce (Tamari is gluten free) is good).
  12. Bring to the boil and turn down to a simmer - allow to cook gently while you are dealing with the rest of the dish (after 10 mins with the lid off the liquid will have reduced so it it thickening, put the lid on).
  13. Mix the ground almonds, Parmesan, 1 tsp of the Italian seasoning and the garlic powder in a flat bottomed, shallow bowl or plate.
  14. Crack the egg into a bowl and whisk it.
  15. Line a large baking tray with grease proof paper or baking parchment or a silicon baking sheet.
  16. Wash the courgette spears under the tap to remove the salt, then pat them dry with kitchen paper towels.
  17. Dip each courgette spear into the egg, then coat in the almond and cheese mixture, before placing on the baking sheet.
  18. Cook for 30 minutes in the oven, turning once during cooking, until the crumb coating is golden brown all over and the courgette inside is tender.

Serve with the bolognese in a bowl and the courgette spears on the side so people can dip them in, or not, as they see fit :).

Tuesday, 9 August 2016

Recipe: Avocado Pesto Tagliatelle with Italian Style Chicken (or Roasted Veg) #TipsTuesdays 39


I'm betting you can tell we eat a lot of chicken in our house, because this week I have another recipe that involves chicken. However, this is a very easy one to make vegetarian and even vegan, because all you do is replace the chicken with roasted vegetables (or tofu or Quorn if you like). This recipe makes a lovely creamy pesto without all the cheese and oil used in a normal pesto and with all the goodness of avocado.

Avocado Pesto Tagliatelle with Italian Style Chicken (or Roasted Veg)

You could make this recipe even healthier by swapping out the tagliatelle for courgetti or another spiralized vegetable, but this is one of the few dishes where I prefer actual pasta. The tagliatelle takes the creamy pesto so well.

The pesto is the most amazing bright green colour thanks to the basil and the avocado, which makes my inner child so very happy :).

The pesto will store, but not for too long and it will go brown unless kept cold and sealed. I used the leftovers of mine on crackers the next day after covering it in cling film and storing it in the fridge. It was still lovely, but aim to use this quickly for best results.

Serves 4

Ingredients

For the pesto

  • 1 large avocado (make sure it is ripe)
  • 31g fresh basil leaves (this is one packet from Morrisons :) - the original recipe I used said 1 cup)
  • 50g (1/3 cup) Pine Nuts
  • 3 cloves of garlic (I use the squeezy stuff :))
  • 1 lemon
  • 2 tblspns extra-virgin olive oil
  • salt and pepper

For the chicken

  • 2 chicken breasts
  • Italian seasoning (I use a pre-made spice mix from Morrisons called "Italian Seasoning", but to make it: dried basil, dried oregano, dried rosemary, dried marjoram, dried thyme, dried sage, red pepper flakes, onion powder, garlic powder - all in equal amounts)
  • 1 tblsp oil for frying

or For Roasted Veg

  • 1 red pepper (bell pepper, capsicum)
  • 1 yellow pepper (bell pepper, capsicum)
  • 1 green pepper (bell pepper, capsicum)
  • 1 courgette
  • 2 large mushrooms
  • 2 tblsp extra virgin olive oil
  • Italian Seasoning
+ pasta - you can use any pasta you like, but my fav is tagliatelle


Instructions

  1. Cook your pasta and leave in cold water (pasta is much better for you if you cook it, cool it down and then refresh it just before you use it).
For Chicken
  1. Take the chicken breasts and butterfly them (this page shows you how).
  2. Sprinkle both sides of the chicken breasts with the Italian seasoning.
  3. Heat the oil in the pan on a high heat and cook the chicken on both sides until it goes golden brown (the caramelisation gives extra flavour).
  4. Turn down the heat, put on a lid and allow the chicken to cook through completely until there is no pink left - shouldn't take more than a minute or two.
  5. Leave to rest in the pan with the lid on (this makes sure it is juicy).
or For Veg
  1. Heat the oven to 240C (230 fan)/475F/Gas 9
  2. Chop all the vegetables into bite sized peices.
  3. Put the oil in a roasting pan and turn all the veg in the oil to coat.
  4. Sprinkle with Italian seasoning.
  5. Cook for approx 45 mins or until tender (start the pesto just before done).
For both
  1. Peel the avocado and cut into pieces (this page shows you the best way to do it without slicing your fingers).
  2. Juice the lemon (I use a tea strainer to make sure there are no pips or bits in my juice).
  3. If you're using whole cloves of garlic, chop them roughly.
  4. Place all the ingredients of the pesto, apart from the salt and pepper into a large bowl or your food processor and blend until smooth. (I found a stick blender was much better at breaking up the basil leaves, but if you like bits in your pesto, use the food processor - you may need to add a little water if the pesto is too thick, but remember that it will loosen a bit when added to the hot pasta).
  5. Add salt and pepper to taste (I used just a tiny bit of salt).
  6. Refresh your pasta with boiling water from the kettle, drain and place back in the saucepan.
  7. Add the pesto to the saucepan and mix with the pasta (the little bit of water that always clings to pasta will loosen the pesto).
  8. If using slice the chicken breasts into bite size pieces.
  9. Place the pesto pasta in bowls with the chicken breast or roasted vegetables scattered on top.
  10. Enjoy.
This is a wonderful creamy recipe - just don't forget the garlic like I did the first time - luckily when I tasted it I realised what I had done before trying to serve it :). As ever the key to getting it right is tasting while cooking (just don't taste the chicken until it's done).

Tuesday, 2 August 2016

Recipe: Pulled Chicken with Avocado Salsa - #TipsTuesdays 38


Welcome back to my blog and Tips Tuesdays, where I am continuing sharing some of the staple recipes I use during the week. I try to use recipes that are as healthy as possible. This is pulled chicken, which is a healthier version of pulled pork, but just as tasty.

Pulled Chicken with Avocado Salsa


This can easily be made gluten free, just check the highlighted* ingredients.

Serves 4 - but is very good reheated the next day

Ingredients

  • 6-8 skinless chicken thighs (you can use bone in or not as you like)
  • 2 tbspn Chipotle Paste (you can use less if you prefer - just go to your own taste)
  • 250ml passata
  • 75g BBQ sauce* (this is the one you need to check for gluten - some add flour - this recipe can be used if you can't find any,)
  • 1 onion (I use red)
  • 1 lime
  • 1 large avocado
  • handful of fresh coriander or 1/2 tsp of dried coriander leaf (optional)
to serve:
  • tacos or rice, 
  • lime wedges, 
  • 1 can of refried beans, 
  • lettuce (shredded), 
  • soured cream if feeling naughty

Instructions
  1. Put the oven on at 180C/160C fan/Gas mark 4 (350F/300F Fan).
  2. Take the chicken thighs and rub them with 1 tbspn of the chipotle paste. (Use gloves if you can while doing this because you don't want chilli on your skin. You can also add salt and pepper if you want, but I don't really think it needs it.)
  3. Finely chop the onion.
  4. Mix the remaining 1 tbspn of chipotle paste with the passata, the BBQ sauce and half the onion, adding about 100ml of water as well. (I tend to do this straight in the casserole dish to save on washing up :))
  5. Place the chicken in a roasting tin or casserole dish that will take the chicken pieces quite snugly.
  6. Spoon the sauce over the top of the chicken so it is covered.
  7. Either cover with foil very tightly or put on the casserole lid and pop into the oven for 1 hr.
  8. Increase the oven temp to 200C/180 fan/ Gas Mark 6 (400F/350F fan) and uncover the chicken, baking for another 20 mins.
  9. While waiting for the chicken to cook, juice the lime and place in a container with half a teaspoon of salt and the other half of the chopped onion. (I like to use smoked salt because it gives a little more flavour).
  10. If serving with rice, remember to put on your rice for the correct cooking time during this period too.
  11. Check the chicken to see it is tender and the sauce is not too runny. (If your chicken is done and your sauce is not reducing you can take the chicken out and keep warm, then put the sauce in saucepan and reduce it a bit more. You don't want it too sloshy :))
  12. Shred the chicken using 2 forks and remove the bones if using bone in thighs. (I find it easier to do this by taking the chicken out of the sauce and doing it on a flat surface, then adding it back into the sauce).
  13. Cut the avocado into small cubes. 
    1. The easiest way to do this is to cut all around the avocado stone along the longest axis, halving the avocado. 
    2. Then twist and the two halves will come away from each other. 
    3. Then take your knife and tap it sharply into the stone and twist again, the stone should come out.
    4. Now cut stripes into the avocado halves, length wise and width wise while still in the skin. 
    5. Then make one cut perpendicular to the others around the inside of where the stone was. 
    6. Now turn it out into the bowl.
  14. Add the avocado and coriander (if using) to the onion and lime mixture.
  15. Heat the refried bean as instructed on the packet.
To serve either load up tacos with beans, lettuce, pulled chicken and avocado salsa (with soured cream on top if you're feeling decadent) or serve everything on a plate with rice. It is delicious either way. A spritz of lime over the top can make the flavour even fresher if you like that kind of thing.

What is your favourite use of chipotle paste?