Showing posts with label *Food: Easy Recipes. Show all posts

Sunday, 25 February 2024

Delicious! Stuffed Potato & Parmesan Waffles

Delicious! Stuffed Potato and Parmesan Waffles - picture of a stuffed waffle on a plate with a cheese pull in front of a dark background.

Stuffed Potato & Parmesan Waffles

Gluten Free & Vegetarian

This is a partial repost, but also an updated recipe from back in 2020. The original recipe is for plain potato & parmesan waffles, but my lovely twin just gifted me and my hubby a stuffed waffle iron, so of course we had to try it out. These are so very delicious, I had to share.

As I mentioned, the original recipe is based off of Nigella's Garlic & Parmesan waffles from her book, "At My Table". This is just a different take on the recipe, with a stuffing of red peppers and mozzarella.

Makes 3x 5''(12.7cm) waffles

A serving for me was 1 waffle, but my husband ate 2 easily, so scale up to fit your needs

Ingredients

For the waffle batter (Gluten Free)
  • 400g / 2 cups mashed potato (left over mash works well, or I used cooked frozen mash this time)
  • 4 tbsp (60ml) butter
  • 8 tbsp (120ml) milk
  • 2 eggs
  • 45g/ ~3/8cup finely grated Parmesan (or hard Italian cheese vegetarian equiv)
  • 4 tbsp cornflour
  • 1/2 tsp baking powder
  • 1 tsp Dried Rosemary (I like the grind it in a pestle and mortar or spice grinder to make it distribute better and release its flavour)
  • salt & pepper to taste
For the stuffing
  • half a ball of mozzarella (vegetarians check the packet to make sure you have a veggie version)
  • half a large red pepper (capsicum) - I use jarred roasted peppers (I hate the skin on fresh ones), but if you are using fresh you will need to fry the peppers off before use, unless you want crunchy almost raw pepper in your waffle - which is an option for a texture change.

Instructions

  1. Melt the butter (I microwave it for 30s then stir until completely melted, but you can do it in a saucepan) and leave to stand to cool down.
  2. Preheat the waffle iron.
  3. Prepare the filling by chopping the mozzarella and pepper into small pieces.
  4. Microwave your mash if using frozen or allow to come to room temp if using leftovers, and, using a fork or something similar, break up the mash so that it is light pieces, not one lump.
  5. In a large bowl whisk together the cooled butter, eggs and milk.
  6. Add in the potato a little at a time, whisking it in each time. I used a flat manual whisk, but you could use an electric hand whisk, or a bowl mixer if you prefer.
  7. Add the Parmesan, cornflour, baking powder, rosemary, salt and pepper and beat until smooth(ish).
  8. Lightly oil the waffle iron.
  9. Place a few spoonfuls of batter in the bottom of the waffle iron - enough to just cover the raised areas. After a couple of second it will begin to puff up a little.
  10. Take 1/3rd of the filling and place in the centre of the waffle batter, leaving half a cm or so around the edge.
  11. Carefully spoon batter over the filling, sealing it in and filling the waffle iron to a little over 3/4 full.
  12. Close the waffle iron, invert it, and cook for about 7 mins total or until golden brown - different waffle makers will vary. After 7min check the cook and let it go a little longer if necessary.
  13. Tip out of the waffle from the maker onto a plate (I discovered tipping was way easier than trying to lever it out with a spatula - just be careful not to burn yourself).
  14. If making lots, pop the cooked ones in a low oven until ready to eat.

Depending what meal we are making these for, they go well with eggs or some suitable veg on the side (I imagine garlic roasted tender stem broccoli would be amazing). A piquant sauce on the side is also a nice flavour combo (Sauce Shop Honey Chipotle BBQ sauce is what I had with mine where as Rob ate his without anything on the side).

Stuffed Potato and Parmesan Waffles on a grey plate, with a cheese pull.

This is a very versatile recipe, so if you don't like the amount of cheese or want to use a different herb/spice, just go ahead and play. It one to have fun with.

Check Out My Fiction YouTube Channel

Tales with Tasha - YouTube

Each week we have a theme and so there will be something for all tastes.
  • ๐ŸŽคMicro stories and/or silly jokes as YouTube Shorts Monday - Sunday- for fun quick viewing
  • ๐Ÿ•ฎA longer story every now and then for story time, over coffee or before going to bed

Tasha's Social Media

๐Ÿ“šJoin My Newsletter๐Ÿ“š


Receive 2 FREE eBooks just for signing up and a free short story once every month on Free Fiction Friday.


Two books covers - one with a woman firing guns above the title "Assassin's Blood" the other with a woman screaming and glowing with the title "Curse of a Banshee"

List hosted on MailChimp, information will only be used for Newsletter contact, and we do not send spam.

Sunday, 6 March 2022

Recipe: Almond Flour, Banana, Peanut Butter, Choc Chip Muffins (Gluten Free)

Recipe: Almond Flour, Banana, Peanut Butter, Choc Chip Muffins - Gluten Free

Recipe: Almond Flour, Banana, Peanut Butter, Choc Chip Muffins (Gluten Free)

This is based off another of Olena's recipes at iFoodReal - Almond Flour Muffins, but I tweaked it a bit and added in a few things, so here is my version. Her recipe is fab and no doubt healthier than mine, but I wanted to add a bit of a rounder flavour, hence the peanut butter.

These are gluten free and Olena's recipe is low carb, but I added the peanut butter, so if you are on a Keto diet you'll need to figure that in. It's not against the rules because it is moderately low in carbs, but it needs to be considered.

Ingredients

  • 3 ripe bananas - all the sweetness comes from these, so go for bananas that are going brown (buying them a week in advance and leaving them on the side is advised - just remember to buy extra for roving munchers because I almost lost mine to the hubby a couple of times ๐Ÿ˜‚)
  • 3 large eggs
  • 1 tsp vanilla extract (not essence!)
  • 1/2 tsp cinnamon
  • 1/2 tsp powdered ginger
  • 1 tsp baking soda (bicarbonate of soda)
  • 1 tsp baking powder
  • 1/4 tsp salt
  • 120g 1/2 cup natural peanut butter (I recommend Skinny Dips Hi-Oleic Smooth PB - it has an amazing flavour)
  • 300g (2 bags) 3 cups ground almonds (almond flour)
  • 200g (2 bags) 70% dark choc chips (Dr Oetker are really good - and yes this is 4x the amount Olena uses, but what can I say, I love choc chips ๐Ÿ˜‹)

Equipment

  • 12 muffin cases (2in/55mm)
  • 12 spot muffin tin or individual muffin tins
  • 1 food mixer (you can do it by hand in a bowl with a masher and a spoon, but it will take some elbow grease)
  • 1 spatula
  • 1 ice cream scoop (you can use a spoon, this just makes it easier)

Method

  1. Pre-heat the oven to  180C/350F.
  2. Place the paper muffin cases in the muffin tin. You can use cooking spray and cook the muffins directly in the tray if you wish, but I prefer them in cases to make them more portable.
  3. Add the banana, eggs, vanilla, cinnamon, ginger, bicarb, baking powder and salt into the food processor and whizz until smooth. You may have to scrape down bits of banana from the side a couple of times.
  4. Add in the peanut butter and whizz again to mix in.
  5. Add the ground almonds and process until just mixed in. You will definitely have to stop and use the spatula to scrape down the walls at least once. DO NOT OVER PROCESS.
  6. Take out the blade and scrape it off before putting it aside.
  7. Pour in the choc chips and mix through the batter with the spatula. Do this slowly or you will end up with batter all over the counter top (ask me how I know ๐Ÿ˜†).
  8. Use the ice cream scoop to portion the batter into the 12 cupcake cases. I find the best way is to put a level scoop in each and if there is a little batter left at the end, add some more to each case.
  9. Bake in the oven for 20-25 mins. I usually do them for 15 mins, then turn the tray and put them on for another 5 because they do quickly in my oven. They are done when they are golden on top and a tooth pick comes out clean.
  10. Take them out and let them cool on a wire rack for at least 20 mins. I think they are even better the next day, and they will keep in an airtight cool place for four or five days.
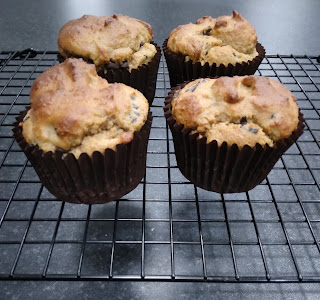
4 Almond Flour, Banana, Peanut Butter, Choc Chip Muffins on a cooling rack.


Check Out My Fiction YouTube Channel

Tales with Tasha - YouTube

Each week we have a theme and so there will be something for all tastes.
  • ๐ŸŽคMicro stories as YouTube Shorts Monday - Thursday - for fun quick viewing
  • ๐Ÿ•ฎA longer story every Friday - for story time, over coffee or before going to bed

Tasha's Social Media


๐Ÿ“šJoin My Newsletter๐Ÿ“š


Receive 2 FREE eBooks just for signing up and a free short story on the first Friday of every month on Free Fiction Friday.


Two books covers - one with a woman firing guns above the title "Assassin's Blood" the other with a woman screaming and glowing with the title "Curse of a Banshee"

List hosted on MailChimp, information will only be used for Newsletter contact, and we do not send spam.

Sunday, 28 November 2021

Recipe - Caramelised Onion & Goats Cheese Frittata #Vegetarian #GlutenFree

Caramelised Onion and Goats Cheese Frittata

Caramelised Onion & Goats Cheese Frittata

#Vegetarian #GlutenFree

Now this recipe is very versatile and you can basically add anything you want, as long as it is cooked in advance or will cook in the same time as the frittata. So for meat lovers, make sure to cook bacon or sausage before adding it in. This method is for the air fryer, but you can also make it in a skillet and pop it in the oven to finish off.

serves 2-3 people or 4 with sides

Equipment

  • Air fryer or oven proof skillet/frying pan and oven
  • baking tin that fits in the air fryer
  • grease proof paper
  • med bowl
  • whisk

Ingredients

  • 5 large eggs
  • 160ml (2/3 cup) milk 
  • ~4 tbsp caramelised onions (use your preferred method - I do something like this Instant Pot Caramelised Onions this is A Stove Top Method - they keep in the fridge well)
  • 45g (~1/4 cup) soft goats cheese
  • 30g smoked cheese (optional)
  • handful of frozen peas
  • sprinkling of grated cheese (I use a pre-grated four cheese mix, but mozzarella would do, it's mostly for the crust)
  • salt & pepper to taste

Instructions

Air Fryer

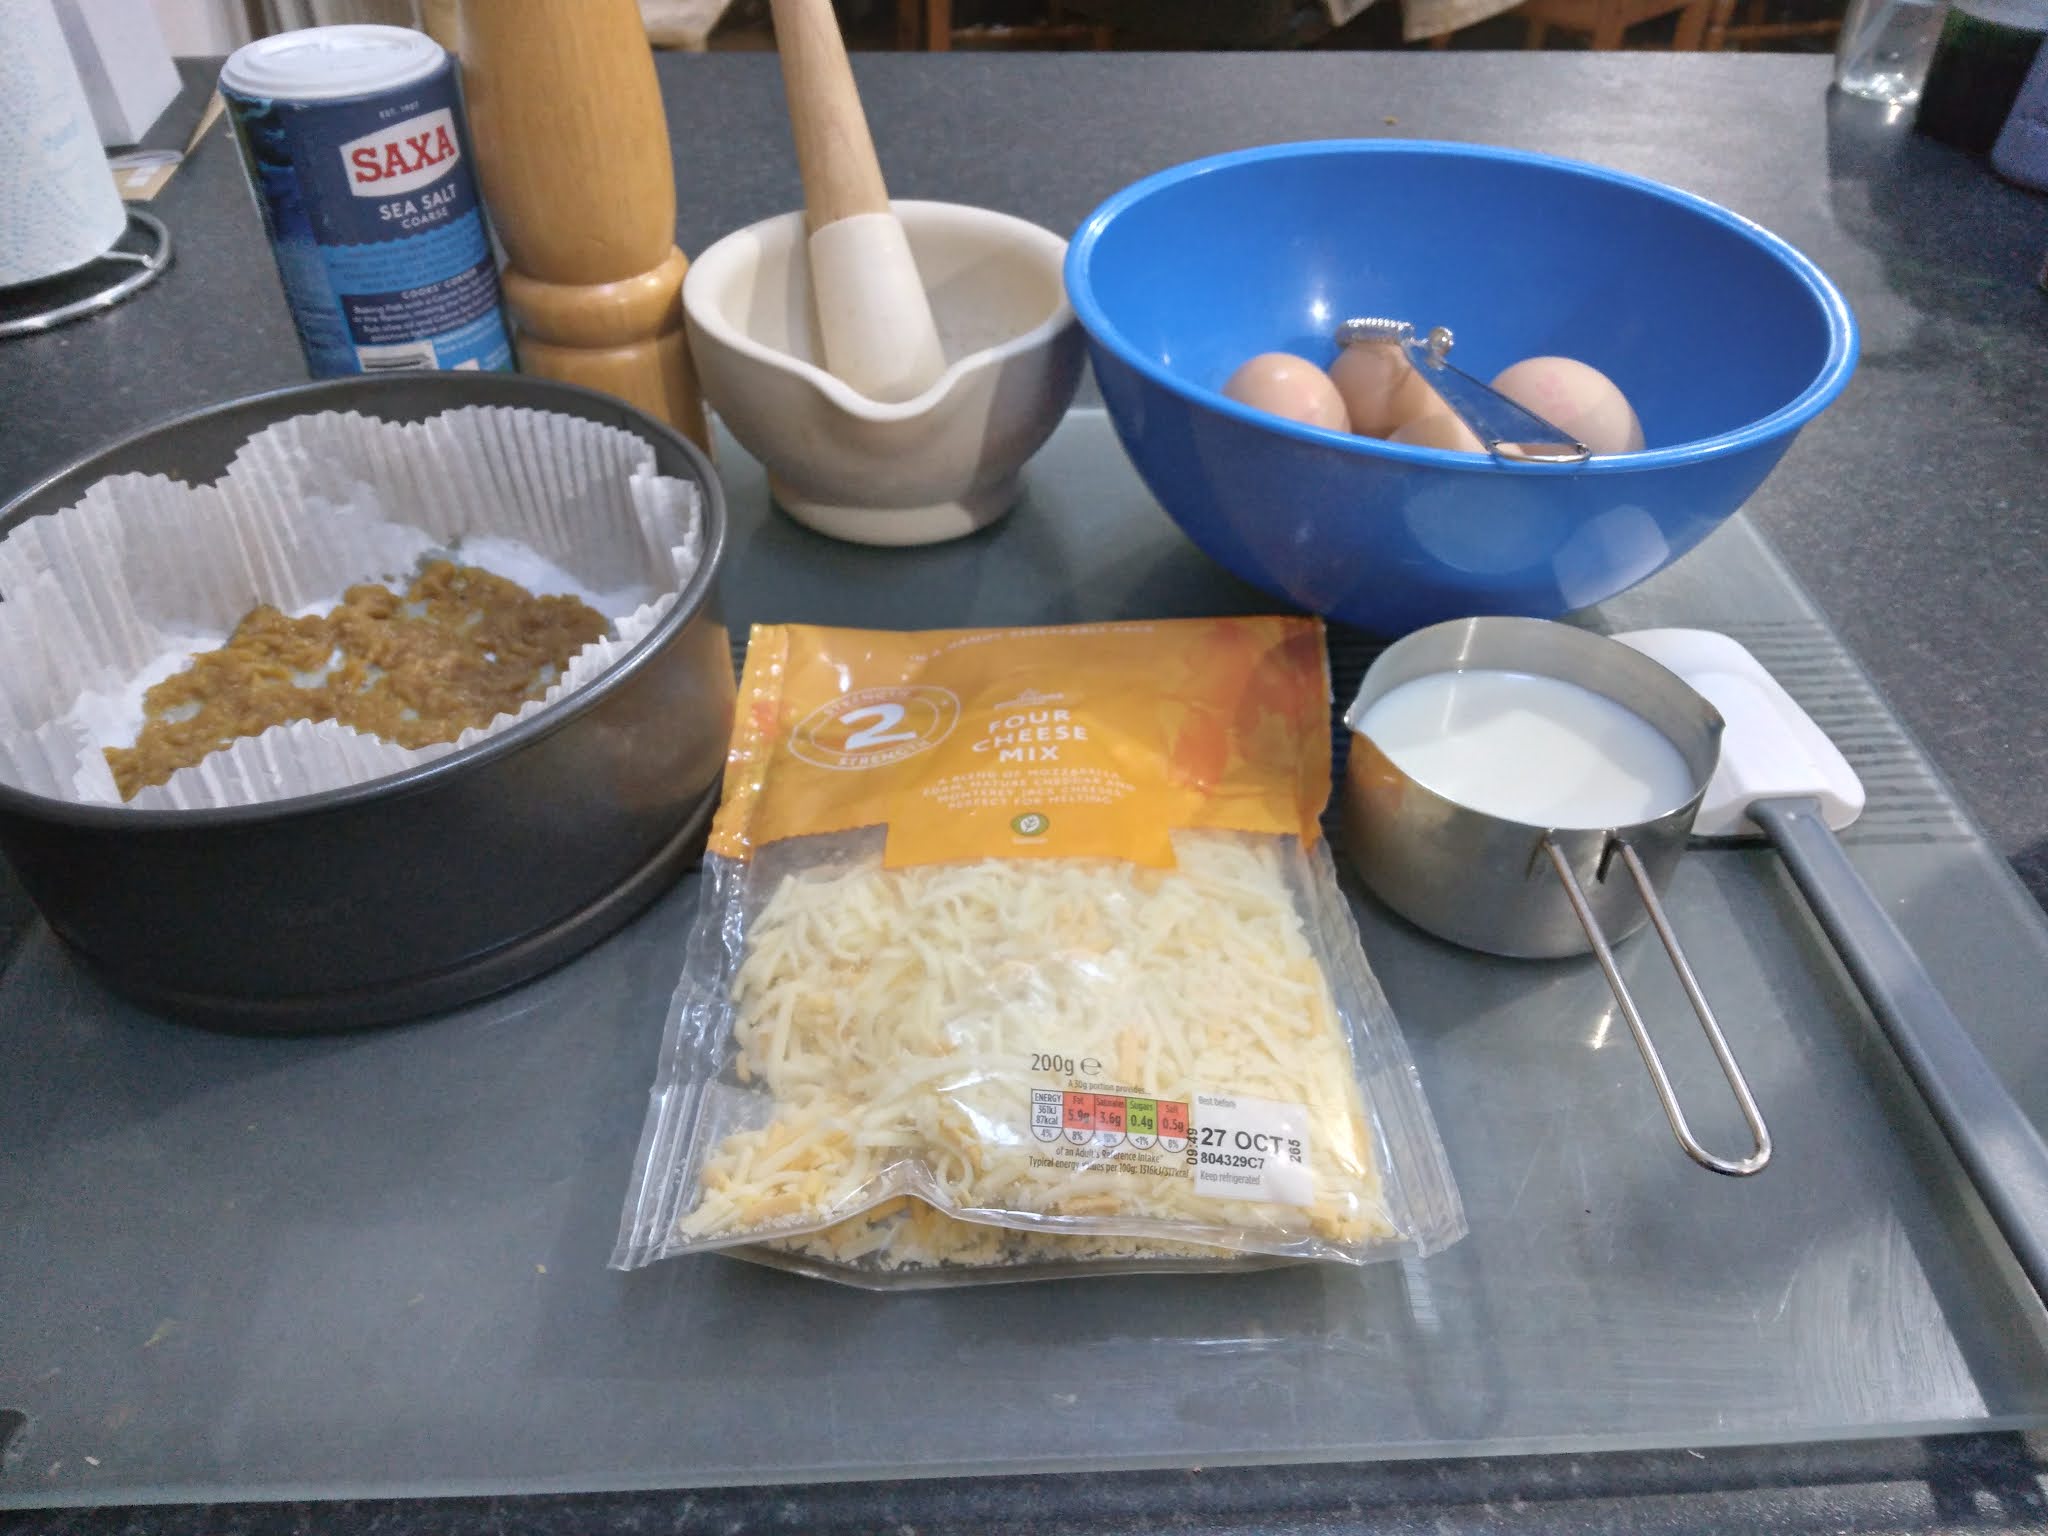
  • Line your baking tin with greaseproof paper on the bottom - as you can see from the image, I use a cake liner, but that's because my springform tin leaks - ask me how I know ๐Ÿ˜. In the photos I hadn't cut down my liner, but now I cut off about a cm at the top, which prevents it folding inwards.
  • Spread the caramelised onions over the base of the lined tin.
  • Beat together the eggs, milk and seasoning (you can add other herbs here too if you like - rosemary would be good).

Eggs milk and seasoning in a bowl

  • Pour into the baking tin.
  • Dot in the goats cheese and smoked cheese in little lumps and scatter in the peas.
  • Sprinkle the grated cheese over the top.

Frittata in the air fryer ready to be baked.

  • Pre-heat the air fryer to 150C /300F (my air fryer is an Instant Pot Pro Crisp)
  • Pop the frittata in the air fryer and cook for ~20mins or until set in the middle (use a knife to test it). My baking tin is quite deep, so it takes longer, but start at 20 and keep checking.

Cooke frittata
As you can see my liner folded over, which is why I trim them now.

or

Oven/Hob

  • Preheat the oven to 180C/350F
  • Heat a little oil in the frying pan on the hob.
  • Add the onions on the base of the frying pan and pour in the egg/milk mixture.
  • Dot in the goats cheese and smoked cheese and peas.
  • Cook until the bottom is just set.
  • Sprinkle over the grated cheese and pop in the oven for 10-15 mins until set.

This comes out as a light and fluffy frittata which is delicious on its own or served with potatoes and veggies.


Check Out My Fiction YouTube Channel

Tales with Tasha - YouTube

Each week we have a theme and so there will be something for all tastes.
  • ๐ŸŽคMicro stories as YouTube Shorts Monday - Thursday - for fun quick viewing
  • ๐Ÿ•ฎA longer story every Friday - for story time, over coffee or before going to bed

๐Ÿ“šJoin My Newsletter๐Ÿ“š


Receive 2 FREE eBooks just for signing up and a free short story on the first Friday of every month on Free Fiction Friday.


Two books covers - one with a woman firing guns above the title "Assassin's Blood" the other with a woman screaming and glowing with the title "Curse of a Banshee"

List hosted on MailChimp, information will only be used for Newsletter contact, and we do not send spam.
Saturday, 13 November 2021

Recipe: Cauliflower Cheese Soup - Perfect and delicious for a cold autumn or winter day. #Vegetarian

Recipe: Cauliflower Cheese Soup

Cauliflower Cheese Soup

This is a lovely, filling soup, comforting and warm with some deep wintery flavours. Now the first part of the recipe where we roast the cauli is optional, but it really enhances the flavour of the soup, so only skip it if you really don't have time. 

I made my soup using my Instant Pot Pro Crisp, which is an air fryer and a pressure cooker (I really wanted to try it out since it's new and I had only used the air fryer part once), but it is totally possible using an oven and a large saucepan.

As long as you check your stock, this recipe is gluten free and vegetarian. To make it vegan, swap out the cheddar cheese for a vegan alternative and maybe a bit of nutritional yeast to boost the flavour.

Ingredients

  • 1 large cauliflower
  • 2 tbsp olive oil
  • 1/2 tsp ground turmeric
  • 1 tsp ground paprika
  • salt and pepper to taste
  • 1 large onion
  • 2 cloves of garlic
  • 1 can (400ml/14oz) coconut milk
  • 1lt vegetable (or chicken if you don't mind it not being vegetarian) low sodium stock
  • 150g shredded mature cheddar
  • 1/2 tsp garlic powder (optional)

Instructions

  1. Cut the cauliflower into medium sized florets, then cut each in half.
  2. Mix the turmeric, paprika, salt and pepper in a small bowl.
  3. In a large bowl add 1tbsp olive oil to the cauliflower and make sure it is all coated, then add the mixed spices and toss until each floret is covered.
  4. Optional, but recommended - Roast the cauliflower: in the air fryer, place in the basket and roast at 200C (390F) for around 15 mins, giving it a shake at regular intervals, or until the edges of the cauli have browned nicely - in the oven, spread the cauli on a large baking sheet and pop it in at 220C (425F) and roast for 20 mins, turning the cauli ever 5 mins or so.
  5. Chop the onion into medium sized pieces.
  6. Sautรฉ the onion: for an Instant Pot, press the saute option on high, for the hob, put a large saucepan over a med to high heat and add the other tbsp of olive oil with the onion. Cook the onion, stirring constantly until it is going golden, but not crisping on the edges.
  7. Bruise and add the garlic cloves and cook for another minute until it is fragrant.
  8. Add the cauliflower (if you would like, reserve some of the cauli as a garnish, but I totally forgot) to the pot and mix with the onion.
  9. Add the coconut milk and the stock and stir to combine.
  10. Cook until the onion is melting away and the cauli is so tender it is breaking up. Instant Pot - put on the lid, pressure cook for 10 min and do an instant pressure release. Hob - simmer for 15-20 mins.
  11. Taste the soup, add more seasoning if necessary, but remember the cheese will add salt. I also added some garlic powder at this point because pressure cooking can mute garlic flavour.
  12. Add the cheese to the pot and using a stick/immersion blender, blend the soup until it is smooth.
Serve with something crunchy sprinkled on top, or your reserved cauliflower as a garnish. Those little crunchy fake bacon bits would be really nice, or real crispy bacon, or croutons, or crunchy onions - the options are limitless.


Check Out My Fiction YouTube Channel

Tales with Tasha - YouTube

Each week we have a theme (this week is was vampires, next week it is creepypasta/urban legends) and so there will be something for all tastes.
  • ๐ŸŽคMicro stories as YouTube Shorts Monday - Thursday - for fun quick viewing
  • ๐Ÿ•ฎA longer story every Friday - for story time, over coffee or before going to bed

๐Ÿ“šJoin My Newsletter๐Ÿ“š


Receive 2 FREE eBooks just for signing up and a free short story on the first Friday of every month on Free Fiction Friday.


Two books covers - one with a woman firing guns above the title "Assassin's Blood" the other with a woman screaming and glowing with the title "Curse of a Banshee"

List hosted on MailChimp, information will only be used for Newsletter contact, and we do not send spam.

Image used in banner by Anna Nekrashevich from Pexels

Monday, 18 October 2021

Recipe: Delicious & Healthy Instant Pot Potato, Garlic & Rosemary Soup #Vegetarian #Vegan #GlutenFree

Recipe: Potato, Garlic and Rosemary Soup, with image of instant pot behind

Delicious & Healthy Instant Pot Potato, Garlic & Rosemary Soup

This is a lovely, hearty and healthy smooth soup that you can add crunchy things like croutons to, if that is what you like. Would also be lovely with nuts or pine nuts or roasted pumpkin seeds - anything like that. It uses coconut milk for some extra creaminess as a delicious alternative to cream or milk.

Now before you say, but I don't have an Instant Pot, never fear, you can make this on the stove top just as easily, except you'll probably have to give it a stir every now and then. Simply follow the instructions using a large saucepan on the hob and cook the potatoes until they are tender.

Vegetarian / Vegan / Gluten Free

Serves 6 hungry people min, and will keep in the fridge/freezer

Equipment

Required

  • 5.7 lt / 6 quart Instant Pot (or you could halve the recipe if you have the smaller one)
  • or a large heavy base saucepan
  • trivet
  • wooden spatula
  • 1lt / 4 cup jug
  • Stick blender of stand blender
Optional if you're not worried about how smooth the soup is

  • sieve
  • large bowl
  • silicon spatula
  • ladle

Ingredients

  • 2kg/4.4lb potatoes of your choice (I used Albert Barlett Rooster Potatoes)
  • 1 bulb/head of garlic
  • 1 large white onion
  • 1.5 tsp dried rosemary
  • 1lt/ 4 cups low or no salt veggie stock (I use 2 good quality stock cubes and boiling water) - chicken stock would work too if you're not worried about it being vegetarian.
  • 1 can (400ml / 1.7 cups) coconut milk
  • salt and pepper to taste
  • 1 tbsp oil for frying
Potato, garlic and rosemary soup in an instant pot.
Instant Pot Potato, Garlic & Rosemary Soup

Instructions

  1. Peel and chop the onion and garlic roughly (it's going to be blended so doesn't need to be fancy, just small enough to fry off).
  2. Use the sautรฉ option on the instant pot on high - add in the oil and the onion and fry off until translucent (make sure to stir often of it will stick).
  3. Add the garlic and fry for another minute or so.
  4. Set aside in a bowl to cool.
  5. Deglaze the bottom of the Instant Pot with a little of the stock.
  6. Put in the trivet (because potatoes are heavy, they can cause a burn notice if they all slump and stick to the bottom, so having the trivet in the way makes this much more unlikely).
  7. Peel and chop the potatoes into small chunks and add to the Instant Pot.
  8. Blend the onions and garlic (optional - I did this so I didn't have to blend the soup as much at the end) and add on top of the potatoes.
  9. Add the rosemary. To get the most flavour out of my dried rosemary, I like to grind it down in my pestle and mortar before adding it, but you can just add it whole if you prefer.
  10. Add the can of coconut milk, the stock, and the salt and pepper (go easy on the seasoning, you can always add more at the end, but you can't take it out).
  11. Close the lid of the Instant Pot and choose the Pressure/Manual option and cook for 15 mins.
  12. When the cook time is done, release the pressure - this will take a while because the pot is pretty full.
  13. Lift out the internal pot to the counter and take out the trivet using a fork. Give it a few minutes to begin to cool before either blending with the stick blender or blending in batches in a stand blender. It can splash when blending, so letting it cool is a good plan - I have a lovely burn from where I failed to do this when making pumpkin soup last week.
  14. Optional - Pass the soup through the sieve into a large bowl, using the ladle to get it out of the instant pot and the silicon spatula to push it through. It shouldn't take long, but if you don't want to do this part, you can miss it out, I just hate little bits in a smooth soup that I didn't deliberately put there ๐Ÿ˜‰.
  15. Return the soup to the Instant Pot and check for seasoning, add more if necessary. It can be left on keep warm or simply reheated when it is needed.


๐Ÿ“šJoin My Newsletter๐Ÿ“š


Receive 2 FREE eBooks just for signing up and a free short story on the first Friday of every month on Free Fiction Friday.


Two books covers - one with a woman firing guns above the title "Assassin's Blood" the other with a woman screaming and glowing with the title "Curse of a Banshee"

List hosted on MailChimp, information will only be used for Newsletter contact, and we do not send spam.

Monday, 27 September 2021

Recipe: Date, Oat & Walnut Bites - Chocolatey goodness without added refined sugar #GlutenFree

Recipe: Date, Oat & Walnut Bites - shows chocolate covered sweets on a plate

Date, Oat & Walnut Bites

Chocolatey goodness without added refined sugar #GlutenFree 

So I am very much into reducing my refined sugar intake at the moment because it makes me feel better. I was eating far too much junk and it does not agree with me. Hence I went looking for healthier alternatives to make at home. There is an amazing channel on YouTube Schnelle Rezepte that has some absolutely yummy ones. This is one of their recipes, but I altered it a little, so this is my version. I have made their version and it is good, but it was a little too dry for my liking and I had to use too much maple to moisten it so it would stick together. 

This is Schnelle Rezepte's version, check it out and give it some love.

The dry version is more like a protein bar, where as my take is more of a truffle texture. Both very valid and just as tasty. They are not sugar free because they have dates and a touch of maple, but the sugars in those are much better than the refined white stuff in everything from the shops. Hence them being healthier than a Mars bar. As long as you use gluten free oats (not all oats are packaged where this is guaranteed) then these are gluten free too and vegan.

These are my version (as you can tell if you check out the YouTube vid, our YouTube host has much better lighting ๐Ÿ˜‰):

Tasha's Date, Oat & Walnut Bites
Please forgive the marks on them - they have been in a bag in the fridge for 3 days and it only now occurred to me to take a picture ๐Ÿ˜‚.

Equipment

  • Small food processor/hand blender - mine is a set kind of like this one, but held together with duct tape ๐Ÿ˜Ž.
  • Food processor
  • spatula
  • baking sheet lined with grease proof paper or silicon mate
  • bowl
  • 2 forks

Personal notes:

  1. I know in the vid the lovely host only uses one small food processor, but that did not go well for me the first time I tried - too much for the bowl, hence me using the two. 
  2. It could also all be popped into the large food processor and done in one, but if you are using unsoaked dates in a big food processor, make sure your blade is sharp because mine just batted around the bits without mincing them the first time. I think it counted as a blunt object rather than a blade at that point (it was old), so I bought a new one ๐Ÿ˜.

Ingredients

  • 80g/1cup oats (oatmeal)
  • 130g approx 3/4cup pitted dates (if you don't have enough dates, I have topped up with raisins and it worked fine)
  • 100g /1cup walnuts (pecans would work too)
  • 1 tsp maple syrup (you can use more, but I like it just for a background flavour) after making them several times, I don't use this anymore
  • 10g/ approx 1.5 tbsp cocoa (it doesn't have to be particularly accurate)
  • 150g/5.3oz 72% dark choc (this is 1 cup of choc chips, but I use a bar, hence the oz conversion on this one - Dr Oetker is great for this)
Another variation for sweeter and sharper
  • 80g/1cup oats (oatmeal)
  • 40g  pitted dates
  • 90g dried apricots
  • 100g ground almonds (or take almonds and give them a blast in the food processor)
  • 10g cocoa
  • 150g 72% dark choc
  • tbsp boiling water - because on the dates are soaked a little bit of water is needed to make the mixture sticky enough

Instructions

  1. Soak the dates in boiling water for 20 mins
  2. Put the oats in the small food processor, or in a tall vessel to use with the stick blender, and blend to a fine a consistency as you like. I prefer mine fine, but if you like more texture just give them a short blitz. Transfer to the large food processor.
  3. Repeat with the walnuts and add to the large food processor.
  4. Drain the dates and add them to the mini food processor and process into a paste (scrape down the sides to make sure everything is processed between blasts). When done, add to the large food processor. If you want some chunky fruit in their too, you could add a couple of whole, unsoaked dates to the large food processor too.
  5. Add the cocoa powder and the maple syrup to the large food processor as well and blend everything into one mixture.
  6. Remove the blade and set aside.
  7. With your hands ball up the mixture and place on the baking sheet, flattening slightly - a pair of gloves is good for this because it is very sticky. I make mine bite size and the mixture makes between 16 and 25, but you can go larger if you prefer. (I make these in double batches of 40 once a week because I give so many away - they are very popular).
  8. EITHER - Melt the chocolate in the microwave on high in the following sequence 30s/30s/15s/10s, stirring between each so the choc does not overheat - this should temper the chocolate. OR - Melt 3/4  of the chocolate in the microwave in 30s intervals until completely melted. Add the last quarter of the choc back in and stir to melt - this should temper the choc.
  9. Dip the date bites in the choc using the 2 forks, allowing excess to drip back into the bowl before putting them back on the baking sheet.
  10. Place in the fridge until set. I keep mine in the fridge because my kitchen is warm and it also means we don't eat them all at once.
These are great for an energy boost instead of a biscuit (cookie) with a nice cup of tea/coffee. They also work for cycle rides etc.

I also tried to create a version that uses peanut butter as well, but I have not perfected that yet. I may just try Schnelle Rezepte's alternative snickers bar instead. ๐Ÿ˜Ž


๐Ÿ“šJoin My Newsletter๐Ÿ“š


Receive 2 FREE eBooks just for signing up and a free short story on the first Friday of every month on Free Fiction Friday.


Two books covers - one with a woman firing guns above the title "Assassin's Blood" the other with a woman screaming and glowing with the title "Curse of a Banshee"

List hosted on MailChimp, information will only be used for Newsletter contact, and we do not send spam.
Sunday, 27 December 2020

Recipe: Turkey (or Chicken) Bake with Mushrooms - Great for leftovers

Recipe: Turkey (or Chicken) Bake with Mushrooms


Turkey (or Chicken) Bake with Mushrooms
Great for leftovers

Greetings one and all, it's been a while hasn't it. I've been focusing on VirginiaWaytes.com for the last few months. I hope you have missed me ๐Ÿ˜. Blessings of the Christmas season and Happy Holidays - I hope you have had a pleasant one this year, even if circumstances made it less than ideal. I return with a recipe that is great for using up all that leftover turkey and it works well with chicken leftovers as well for the rest of the year.

Serves 2-3

Ingredients

  • 50g (heaped tbsp) butter
  • 50g (heaped tbsp) plain flour
  • 1 pint/570ml milk
  • 1/2 tsp dried thyme
  • 1/2 tsp dried rosemary
  • salt & pepper to taste
  • 6x24g packets salt n shake crisps or similar (unsalted potato chips)
  • 100-150g (1-1.25cups) grated cheddar cheese
  • tbsp oil for frying
  • 2-3 cloves garlic minced or equiv garlic puree
  • 150g (half a punnet) chestnut mushrooms
  • left over turkey 

Instructions

  1. Preheat the oven to 180C/360F.
  2. Shred the turkey.
  3. Slice the mushrooms into bite sized pieces.
  4. In a frying pan heat the oil. Add the garlic and then the mushrooms and cook until they have released all their water and are looking toasty, but not dried out.
  5. Mix the turkey and mushrooms and place in the base of an oven proof dish - should cover the bottom in a nice thick layer.
  6. Melt the butter in a med saucepan.
  7. Add the flour and stir to make a thick paste.
  8. Add the milk, little by little, stirring in at each stage until all the milk is combined with the flour and butter mixture in a smooth sauce.
  9. Add the rosemary and thyme (I grind mine together in a pestle and mortar first because I don't like the large bits of rosemary and it helps release the flavour even more) and salt and pepper.
  10. Cook for a couple of minutes until it begins the thicken.
  11. Test for taste and add more seasoning if needed.
  12. Pour the white sauce over the turkey and mushrooms and mix through gently. Don't be too vigorous or the sauce may go grey because of the mushrooms - still tasty, just not as pretty. ๐Ÿ˜‰
  13. Crush the crisps (potato chips) until they are small pieces, but not too far and place in a bowl.
  14. Mix the crisps and half the cheese and spread over the top of the turkey and sauce.
  15. Sprinkle the rest of the cheese on top of the crisps and put in the oven.
  16. Bake until cheese has melted and is starting to go golden - between 15-20 mins usually.
  17. Serve piping hot.

We had this today - still have turkey left, but it used up a good deal of it and was delicious. Just up the amounts to feed more people - I did double this today for five people and we have leftovers or the leftovers now ๐Ÿ˜‚

Wednesday, 16 September 2020

Recipe: Set Chocolate Mousse #GlutenFree #EggFree

Recipe: Chocolate Mousse

Set Chocolate Mousse


This recipe is easy, delicious and very versatile. I made it last weekend for my family and it went down very well with everyone but my mother, but she doesn't like dark choc, so not really surprising. Might want to make the milk choc version for those with a sweeter tooth. Next time I plan to add a little orange liqueur to spice it up a bit.๐Ÿ˜‹

The actual recipe comes from here: The Perfect Refuge an absolutely delightful Italian cooking channel on Youtube, but I use something of a different method, so I thought I would post it. This is the vid of the original recipe, and there is a second option using eggs as well - turn on the subtitles for English.


~15 slices (My father was the only one who managed to eat 2๐Ÿ˜‚)

Ingredients

  • 250ml/1.05 cup cream (I used double, but I suspect single would be okay)
  • 40g/ 0.4 cup cocoa
  • 1 lt/4 cups milk
  • 150g dark (or milk) chocolate (3/4 cup of choc chips)
  • 70g/ 2/3 cup potato starch or corn flour (starch)
  • 60g/ 1/4 cup sugar (only need this is using dark choc - milk has plenty of sugar)

Equipment

  • 1 large mixing bowl, 1 medium one
  • scales/measuring cups/measuring jug
  • hand whisk
  • sieve
  • large saucepan
  • large rectangular dessert/terrine tin

Instructions

  1. Put the cocoa in the large bowl and slowly add the cream bit by bit using the whisk. You will end up with a thick paste.
  2. Add a splash of the milk to the paste to loosen it with the whisk, then keep adding and stirring until you've added about half the milk.
  3. In the medium bowl mix the corn flour/potato starch with the rest of the milk and whisk together.
  4. Add the corn flour/milk mixture into the cocoa mixture bit by bit using the whisk, making sure it combines well.
  5. Sieve the liquid into the large saucepan and push through any lumps remaining in the sieve. (I had just a few little ones).
  6. Heat gently on the hob and break in the chocolate.
  7. Stir continuously while the chocolate melts, then bring the mixture to the boil.
  8. Boil gently for 2 mins or until the mixture has thickened (took me more like 5, but I was heating it very gently because I fear the mixture splitting).
  9. Line the tin with cling film (if your mould is silicon, this step may be unnecessary, but it makes like a lot easier),
  10. Pour in the mixture and place more cling film over the top, in contact with the mixture.
  11. Place the dessert in the fridge for 5-6 hours min (I did mine overnight).
When you are ready to serve, remove the top cling film, turn it out onto a large platter, remove the rest of the cling film, and dust with a little cocoa. Slice with a sharp knife into individual portions. Serve will little crunchy biscuits for a bit more texture - it would be wonderful with amaretti.

It is really nice with a little more cream drizzled on if you like you desserts even richer.

Banner Photo by Ihor N on Unsplash

Monday, 1 June 2020

Recipe: Delicious Chicken & Rice - #InstantPot & #StoveTop Instructions


Recipe: Chicken & Rice

Delicious Chicken & Rice


Instant Pot or Stove Top


This is a recipe I only tried last week and it has become one of my husband's favourites and I love it too. Possibly not quite as much as he does, but it is very yummy. It is also so very easy and can be made in the Instant Pot (or other pressure cooker) or on the stove top.

serves 2 (just up the amounts for more)

Ingredients

  • 6 mini breast fillets (chicken tenders) cut into bite sized pieces ~300g - breast would work well too, but thighs might need a little more cooking.
  • 1/2 large onion - diced very small
  • 1 large carrot or 2 small ones - diced very small
  • 500ml / 2 cups chicken stock (I use low sodium, but just use your favourite)
  • 2 cloves garlic (crushed - I use lazy garlic and its about a tsp)
  • sprinkle of Italian seasoning
  • 200g/1 cup Jasmine rice (or white rice of choice)
  • 2 tbsp oil
  • salt and pepper to taste
  • 25g/ 1/4 cup Parmesan cheese, or something similar
  • fresh herbs - e.g. parsley, coriander/cilantro or basil (optional)

Instant Pot Instructions

  1. Turn on the Instant Pot and choose the saute setting.
  2. Add the oil, the onions and the carrots and saute for about 5 mins or until the onions are translucent and the carrots are beginning to go tender.
  3. Add the garlic and stir for about 30 sec.
  4. Add the chicken and stir around until the chicken is beginning to colour a little.
  5. Cancel the saute.
  6. Use a little of the chicken stock to deglaze the bottom of the pot, then add the rest.
  7. Add in the rice and stir gently so all the rice is covered in the stock.
  8. Add the Italian seasoning and salt and pepper.
  9. Put on the lid, make sure the valve is on sealing, choose the pressure/manual setting and set for 10mins.
  10. When the time is up, allow to sit for 5 mins to allow the chicken to rest.
  11. Release the pressure and open the pot.
  12. Stir the rice and make sure it hasn't stuck.
  13. Add the Parmesan and stir through.
  14. If using fresh herbs, chop them and add them now and stir through.
  15. Serve immediately.

Stove Top Instructions

  1. Add the oil to a deep stove top pan that has a tight fitting lid and heat.
  2. Add the chicken and cook through until almost completely done, then remove and set aside.
  3. Add a little more oil to the pan and add the carrots and the onions and sweat down until the onions are soft and the carrots are beginning to become tender.
  4. Add the glaric and fry until it become fragrant, 30-60sec
  5. Deglaze the pan with a little of the stock and then add the rest.
  6. Add in the rice and stir in.
  7. Add in the Italian herbs and seasoning.
  8. Add back in the chicken.
  9. Bring to the boil and cover with the lid.
  10. Turn down the heat and cook for 13-15 mins or until the rice is done to your liking and has absorbed nearly all the stock. Add more water if necessary, but there should be enough.
  11. Turn off the heat and stand for 5 mins with the lid still on.
  12. Stir to fluff the rice and add in the Parmesan and fresh herbs (if using) and stir through.
  13. Serve immediately.
This recipe is so quick and easy and makes a great, hearty meal. It's also very adaptable and we could add different veg if we wanted to. The secret is the spicing and Parmesan - everything else is up for debate. It would be easy to veggify this by substituting the chicken, either with some chunky veg, or some quorn or tofu, and using a Parmesan substitute that is vegetarian friendly.

Tuesday, 19 May 2020

Recipe: Chocolate Chip Cake - no added refined sugar

Recipe: Chocolate Chip Cake


Chocolate Chip Cake - no added refined sugar


So as I have mentioned before, I am trying to cut down on the refined sugar in my diet, and hence I am baking with things like honey and maple syrup as sweeteners. This recipe uses maple syrup instead of the brown and white sugar it originally had, so it is not as cookie like as the original, but it is very yummy and the maple gives a wonderful flavour.

I also cut the ingredients by half, since there are only the two of us at home, and it was still more than enough for a family. Just double up if you would like the 24 pieces the original recipe promised.

This is best eaten with a beverage of choice and would be heavenly with a glass of milk, but goes equally well with tea or coffee.

You could also throw in some nuts or some dried fruit if that floats your boat.

Ingredients

  • 165g (1 1/3 cups) all purpose flour
  • 1tsp baking soda
  • 1 tbsp corn starch
  • 1/2 tsp salt
  • 85g (3/8 cup) unsalted butter
  • 140ml (~2/3 cup) maple syrup
  • 1 large egg
  • 1/2 tbsp vanilla extract
  • 100g (1 cup) dark chocolate chips

Instructions

  1. Preheat the over to 160C/325F
  2. Melt the butter in the microwave or in a pan and allow to cool slightly.
  3. Line a 4x8'' baking pan with baking parchment/grease-proof paper.
  4. Add the flour, baking soda, corn starch and salt and mix together in a bowl.
  5. Put the melted butter into a large bowl, add the maple syrup and mix together.
  6. Add the egg and vanilla to this mixture and whisk until it is light brown.
  7. Add the dry ingredients into the wet and combine.
  8. Stir in the chocolate chips.
  9. Put the mixture into the lined baking pan.
  10. Bake for between 25-30 mins depending on your oven until a tooth pick comes out clean.
This cake will keep up to a week in an airtight container and it gets better the second day.

And it's Tuesday!

That means it's Sexy Stories podcast day over at VirginiaWaytes.com. The Manor is taking a 1 week mid-season break, so I have sexy vampires for you on the podcast.

We have the podcast for all the naughty bits, and the eBook for all the plot and the naughty bits.
Forgotten Soul is one of my permanently free eBooks too, so win/win.

Thursday, 14 May 2020

Recipe: Tofu & Spam Fritters with Egg Fried Rice


Tofu & Spam Fritters with Egg Fried Rice

Tofu & Spam Fritters with Egg Fried Rice

So this is two recipes I saw on Youtube combined to make a lovely meal. And I know you're thinking "Spam?!" - but trust me, this is delicious and really easy and it's the tofu that makes it so easy and the spam that makes it delicious. My husband hates tofu, but really loves this. Original fritter recipe is here on a wonderful site called Aaron & Claire's Korea and their Youtube channel is fab. This is one of the channels where I saw the steamed egg recipe too.

The spam provides a wonderful flavour which permeates the tofu, and the tofu provides a fabulous second texture, nutritious content and means the spam is not fatty or too salty. A great balance. I mean you could probably use some comfit pork belly if you want to go posh for a dinner party, but for a week night, spam is good ๐Ÿ˜„.

Makes 4 fritters & enough rice for 2

Ingredients


Fritters
  • 1/2 block tofu (I used Cauldron Organic Tofu because that's what Morrisons had)
  • 1/3 of 200g can of Spam 
  • 1/2 cup plain flour (ish)
  • 1 egg
  • 50g panko bread crumbs (ish)
  • black pepper to season
  • oil for frying
Rice
  • 1 cup white rice
  • 2 egg yolks
  • 2 spring onions (green onions/scallions) chopped 
  • salt and pepper to season
Tofu & Spam Fritters with Egg Fried Rice

Instructions

  1. Cook the rice per instructions on the packet and cool down with cold water.
  2. Cut 4 slices from the tofu about 1cm deep, then cut these in half. Season with black pepper (we don't need salt because there is plenty in the spam).
  3. Place the blocks on kitchen paper to soak up excess moisture.
  4. Cut 2 slices from the spam and cut each in half to the same size as the tofu. I was lucky, mine matched almost exactly, but trim to fit if they don't. The idea is to make a cube (ish).
  5. Dust one side of a block of tofu in flour and press onto the spam. Do the same on the other side so we have a spam sandwich with the tofu as the bread. Repeat for all 4 fritters. Then leave for a minute or so - the flour will bind and stick them all together.
  6. Beat the egg in a shallow bowl, and put the flour on one plate and the bread crumbs on another.
  7. Cover the tofu/spam tower in flour.
  8. Dip in the egg with right hand.
  9. Drop in the bread crumbs with right hand and use left to pat on the bread crumbs on all sides, turning with left hand. Using separate hands for wet and dry dipping will prevent our fingers becoming caked as well. Repeat for all fritters and leave to stand for 10 mins or so to set up.
  10. Preheat the oven to about 120C (~250F)
  11. Take a frying pan and put in about 1,5 cm of oil - heat until a little piece of bread sizzles.
  12. Place the fritters in the oil carefully and fry until the breadcrumbs go golden on the bottom.
  13. Turn over and repeat for the top.
  14. Then turn fritters onto their sides and repeat for each face. The easiest way to do this is use tongs and always turn all the fritters the same way so that there is no confusion.
  15. Pop the fritters in the oven to keep warm.
  16. Take the cold rice and mix through the egg yolks.
  17. In a pan, add a tbsp of oil and heat.
  18. Add the chopped spring onion and fry for a few moments.
  19. Add the rice and egg to the pan and stir fry until piping hot. (You can add other things to the rice if you like, like soy sauce or other veggies, but it is really nice as is).
  20. Serve with the fritters and sweet chilli dipping sauce, or dipping sauce of choice. Would be yummy with some stir fried broccoli on the side too.

Monday, 4 May 2020

Recipe: Korean Steamed Eggs - #InstantPot & #StoveTop # Vegetarian #GlutenFree

Recipe: Korean Steamed Eggs

Korean Steamed Eggs 

#GlutenFree #Vegetarian


So I saw this recipe on Youtube in many different places and had to try it. I loved it, but my husband thinks it is the most horrible thing on the planet ๐Ÿ˜‚. The texture is like a creme caramel, but it is hot and savoury instead of cold and sweet. It goes really, really nicely with a toasted bagel. Absolute heaven. And there are so many ways to change it up.

I forgot to take pictures, but I will try and remember next time. (I forgot the second time too - sorry - in my defence it was breakfast and I was hungry ๐Ÿ˜‰).

The recipe below could easily feed 2 if having something with it, 1 if having it by itself. Nice and filling.

Ingredients

  • 2 eggs
  • 1/2 cup stock ( I used chicken, but a nice veggie stock would work brilliantly, or even just water)
  • salt and pepper to taste

Yep, really, that's all - see how herbs and spices could be added to change it up. Some recipes I found online call for finely chopped spring onion (green onion/scallion), but others said that was an optional extra. Ratio of eggs to stock is 1 egg to 1/4cup stock and just go up or down depending on how many it is for.

Variation I tried this morning (yes I wrote the post one day and posted it the next ๐Ÿ˜‰) that I came up with while trying to get to sleep last night. So good.
  • 2 eggs
  • 1/2 cup water
  • 1 tsp low sodium soy sauce
  • 1/2 tsp toasted sesame oil
  • salt and pepper to taste

Instructions

  1. Beat the egg and stock together with a fork or a small whisk.
  2. Add the salt and pepper (or other spices of choice) and beat in.
  3. Pour through a sieve into a heat proof container suitable for steaming - I used a ceramic Camembert baking pot I have (and a deep individual pie dish this morning). Two smaller ramekins would also work if dividing the recipe for 2 people.
  4. Add the chopped onion if using at this point.
For the Instant Pot
  1. Put 1 cup of water in the bottom of the pot.
  2. Put in the pot of egg mixture on a trivet so it is not in the water.
  3. Put on the lid and make sure the valve is set to sealing.
  4. Use the steam option and put it on for 10 mins.
  5. When the beeper goes off, do a quick pressure release, remove the lid and serve.
For the stove
  1. Set up a deep pan with water in the bottom with a steam rack or something to keep the pot out of the water at the bottom.
  2. Cover the pot in cling film and place the pot on the stand in the pan.
  3. Put on a lid and bring to the boil.
  4. Steam for 15-20 mins until set.
This is a silky smooth egg dish that is a delight to eat. I eat it with a spoon straight from the pot. Nommy.

[Edit - sorry, forgot this earlier Banner Background Photo by Jakub Kapusnak on Unsplash]

Wednesday, 29 April 2020

Recipe: Rosemary and Parmesan Potato Waffles #Vegetarian #GlutenFree

Recipe: Rosemary and Parmesan Potato Waffles

If you are looking for today's AtoZ post - sorry, I will be getting to it later. The WittegenPress Website is playing silly whatsits for no reason I know about, so I am having to chase that around and my creativity is suffering. Never fear, I will write today's drabble, I just have to sort that out first.

Recipe: Rosemary and Parmesan Potato Waffles


So these are based off of Nigella's Garlic & Parmesan waffles from her book, "At My Table", but these have a flavour profile I like even more and made up on the spot, so I though it would be good to share them.

Yes I know Parmesan isn't vegetarian, but it is easy to find vegetarian equivalents - in fact that's what we usually use since it's a) cheaper & b) just as nice. We buy the pre-grated fresh Italian hard cheese from the supermarket.

They are absolutely delicious with eggs and maple syrup - and yes they are savoury waffles, but the salt and sweet is divine.

Makes 7 waffles (10cm x 12cm/ 4''x 4.7'') - 1 serving = 2 waffles, but they can be reheated later if there are too many.

Ingredients

  • 400g / 2 cups mashed potato (I had left over from the night before, but you could use defrosted frozen mash or make it fresh)
  • 4 tbsp (60ml) butter
  • 8 tbsp (120ml) milk
  • 2 eggs
  • 45g/ ~3/8cup finely grated Parmesan (or vegetarian equiv)
  • 4 tbsp cornflour
  • 1/2 tsp baking powder
  • 1 tsp Dried Rosemary (I like the grind it in a pestle and mortar or spice grinder to make it distribute better and release its flavour)
  • salt & pepper to taste

Instructions

  1. Melt the butter and leave to stand to cool down.
  2. Preheat the waffle iron.
  3. Using a fork or something similar, break up the mash so that it is light pieces, not one lump.
  4. In a large bowl whisk together the cooled butter, eggs and milk.
  5. Add in the potato a little at a time, whisking it in each time. I used a flat manual whisk, but you could use an electric hand whisk or a bowl mixer if you prefer.
  6. Add the Parmesan, cornflour, baking powder, rosemary and salt and pepper and beat until smooth(ish).
  7. Add about an ice cream scoop of batter to each side of the waffle iron if using a square one (ours is electric and looks like a sandwich maker) - if using a round one go with what you are used to and close. You'll soon know if you used too much because it will squidge out the sides ๐Ÿ˜‚.
  8. Cook for about 7 mins total or until golden brown - different waffle makers will vary.
  9. If making lots, pop the cooked ones in a low oven until ready to eat.
As I mentioned above, these are lovely with eggs and a touch of maple syrup. They make a wonderful breakfast or brunch, but they would also go well with meats or as a side for a main meal as well.

The amounts of cheese and seasoning are all very handwavy - you can go with whatever you like best, but I was very pleased by the overall taste of these.

Enjoy! Stay safe.

Banner Background Photo by nabil boukala on Unsplash

Wednesday, 22 April 2020

Nigella's Garlic & Parmesan Mash in the Instant Pot

Recipe: Nigella's Garlic & Parmesan Mash in the Instant Pot

๐Ÿ’–Looking for today's AtoZChallenge post? Please scroll down to the previous entry.๐Ÿ’–

Nigella's Garlic & Parmesan Mash in the Instant Pot

So I tried out Nigella's recipe for garlic and Parmesan mash last night and it is delicious, but since I use my Instant Pot for everything these days, I couldn't resist adapting the recipe for that. Hence, here you go. For those wondering, the recipe comes from her book "At My Table" which is an amazing book, so go check it out.

Makes enough for 6-8 people - but keeps up to a week in the fridge and can easily be reheated.

Ingredients

2 kg (4.4lb) potatoes
8 fat cloves of garlic
Salt and pepper to taste
75g (2/3 stick) butter
50g (1/3 cup/ 2oz) Parmesan (grated) or veggie equiv

Optional topping

50g (~5/8 cup) Dried breadcrumbs or panko (since I had no breadcrumbs, I took a crust of brown bread, crumbed it up and dried it out in the oven before using it)
50g (~1/2 stick) butter
35g (1/4cup /1.5oz) Parmesan (grated) or veggie equiv

Instructions

  1. Peel and quarter all the potatoes.
  2. Bruise the garlic cloves with the back of a knife, but do not remove the skins (they will prevent them sticking to the bottom of the pot).
  3. Put 1 cup of water in the bottom of the Instant Pot.
  4. Add the bruised garlic and a tsp of salt to the water.
  5. Put the potatoes into a steamer basket and then into the Instant Pot.
  6. Put on the lid, make sure the knob is to sealing and set for high pressure for between 8-16 min. It will depend on the potatoes - they need to be very tender.
  7. Do a quick pressure release after 8 mins and check the potatoes, if they are not done, put the lid back on and do another few mins with QPR. It will come to pressure quickly because it is still hot.
  8. Once the potatoes are done, remove the steamer rack and place on the side.
  9. Tip the water from the bottom of the pot into a jug and make sure there are no garlic skins still in the pot.
  10. Put the butter in the pot and allow to melt (it will be on keep warm, so is perfect for this).
  11. Add the potatoes and the garlic cloves (without the skins - they should come away very easily) back in the instant pot. (If using a potato ricer, use it at this stage).
  12. Sieve the cooking water over the potatoes in the pot to make sure all garlic skin is removed.
  13. Mash the potatoes using your mashing method of choice, unless you have already used something like a ricer. I have one, but can never be bothered to get it out, so I use a regular hand masher. Keep going until it is smooth or at your preferred consistency. After all you are the master of your mash (I have been watching too much Chef John from Foodwishes.com ๐Ÿ˜‚).
  14. Add the Parmesan and stir in - now check for seasoning and add salt and pepper if needed.
  15. Preheat the oven to 200C/180C fan (390F/350F fan)
  16. Butter a 30x25cm (12x10'') baking dish (I used a Pyrex one).
  17. Spread the mash into the baking dish using a spatula.
  18. Rub together the breadcrumbs, butter and Parmesan (if using the topping) to form a crumble mixture.
  19. Sprinkle the crumble over the top of the mash.
  20. Pop in the oven for 20-30 mins until piping hot and the topping is toasty.
And what is even better, is the left overs can be made into waffles, which is the next recipe in Nigella's book, BTW. I made them this morning and my husband and I had them with a fried egg each and they were delicious. You'll have to check out her book for that though. ๐Ÿ˜‰

Banner BG Photo by Varun Gaba on Unsplash