Showing posts with label *Food: Bread. Show all posts

Monday, 2 August 2021

Recipe - Delicious Focaccia with Perfect Texture

Recipe: Delicious Focaccia

Recipe: Delicious Focaccia

So I made a focaccia this weekend that was utterly delicious and a lovely chewy texture, so I thought I'd share the recipe. It is based on this one by Kitchen and Craft on Youtube, but I changed is up a little, so here is my version. This vid is very good for technique though, very, very useful for all new to making focaccia, so definitely watch it. You may also prefer their recipe.


Ingredients

  • 600g/4.5cups Strong Bread Flour
  • 1 sachet of fast action yeast (7g)
  • 450g warm water (38-39C / 100-105F this is approx blood temp, so if you don't have a thermometer, check it with your little finger, if it feels hot, it's too warm, if it feel cool it's too cold)
  • 3/4 tsp salt
  • 2 tbsp extra virgin olive oil

toppings - dried rosemary, garlic granules, sea salt granules

Equipment

  • 2 large bowls
  • 1 med bowl
  • large 35x26cm baking pan (~14x10 inches)

Method

  1. Put the flour in one of the large bowls and add the yeast and mix through, making a well in the centre.
  2. Put the warm water in the med bowl and add the salt, making sure it dissolves fully.
  3. Add the salt water to the well in the flour, then add the olive oil as well.
  4. Bring the flour and liquid together (I put a little bit of oil on my fingers so the dough doesn't cling completely to them) until it's homogenised.
  5. Grease the second large bowl and transfer the dough to it (a bench scraper/dough scraper is really useful for this, but use a spatula if you don't have one - best not to use a hand since the dough will be very sticky).
  6. For this bit, it is definitely a good idea to lightly grease our fingers with oil as well. Grab a chunk of dough (about a third) from the side and drag it up and over the top, tucking it onto the other side of the dough. Turn the bowl 1 quarter and do the same again. Repeat two or three more times.
  7. Cover the bowl with a damp cloth or cling film and leave for 20 mins.
  8. Repeat 6 and 7 four more times, or until the dough is smooth and shows resistance to touch.
  9. Cover the bowl tightly with cling film or something equivalent so that there is an air tight seal and put the dough in the fridge for a slow prove. Overnight is easiest. This is to develop extra flavour and gluten in the flour, since we aren't doing a big knead.
  10. In the morning, grease the baking pan and transfer the dough to it. Push it out to the edges of the pan with finger tips. Sometime the dough will resist because it is cold, cover it and leave it for 10 minutes if it won't stretch, then try again.
  11. Cover with cling film or a damp cloth and place in a warm place to prove for about an hour. (I put my oven on its lowest setting in advance and then turned it off when I placed the pan in it).
  12. Take the pan out and with wet fingers put dimples all down the dough, but be careful not to knock out all the air.
  13. Put the dough back in the warm place and let rise for another 45 mins or so before bringing it out. The dough should fill 1/2 to 2/3 of the tin and should look a little bubbly and wobbly. If the dough has not risen enough, find a slightly warmer place - my oven was too cool at the end and I heated it up a little bit, then put the dough back in for another 15 mins, which did the trick.
  14. Pre-heat the oven to 230C/450F.
  15. Now add the toppings - you can add what you like, I went with dried rosemary, and garlic granules with some sea salt, but go with whatever flavours you fancy. Just add a drizzle of extra virgin oil over the top.
  16. Bake the bread for 15-20 mins until golden. If you have a baking thermometer the internal temp of the bread should be ~88C/190°F.
  17. Transfer the bread to a wire rack to cool.
The bread is very nice dipped in oil or slathered in butter πŸ˜‹.


πŸ“šJoin My NewsletterπŸ“š


Receive 2 FREE eBooks just for signing up and a free short story on the first Friday of every month on Free Fiction Friday.


Two books covers - one with a woman firing guns above the title "Assassin's Blood" the other with a woman screaming and glowing with the title "Curse of a Banshee"

List hosted on MailChimp, information will only be used for Newsletter contact, and we do not send spam.

Banner Photo by Savi P from Pexels

Tuesday, 9 June 2020

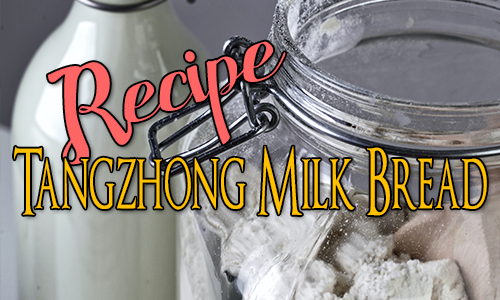
Recipe: Tangzhong Milk Bread - Delicious White Bread with a Great Shelf Life

Tangzhong Milk Bread

So I have been making this recipe for three weeks now and it is fabulous. This makes 2 loaves and it keeps for up to a week in an airtight container. That's if it lasts that long. However, it's a little tricky because it's a very sticky dough so I have a couple of tips.
  • Use a stand mixer or specialised dough mixer if possible - I use my Kitchen Aid with the dough hook attachment. If you need to do it by hand, oil is going to be your friend, because using flour with dry out the dough too much.
  • Handle the dough with oiled gloves or very oily hands.
  • Handle the dough on a well oiled surface or a non-stick silicon baking sheet - my lovely sister bought me a large silicon pasty mat for Christmas last year and it is so useful for this.
Not my image - but this is what it looks like - will swap this out when I remember to take a piccie!


Tangzhong Milk Bread


Ingredients

for the Tangzhong
  • 40g Strong White Bread Flour
  • 200ml/g 0.85 cups water

for the dough
  • 580g/ 4cups Strong White Bread Flour
  • 60g/ 1/4cup sugar
  • 12g/ 2 tsp salt
  • 10g/ 2.5 tsp dried yeast
  • 10g/ 2.5 tsp dried milk powder
  • 260g / 1cup + 2 tbsp milk
  • 1 large egg
  • 50g/ 1/2 stick unsalted butter (room temp)
for the glaze
  • 1 egg yolk
  • milk

Instructions

The Tangzhong - make in advance

Now I have seen recipes that call for this to me made the night before, 6 hrs before and 30 mins before, so it is up to you which you go for depending on what time you have.
  1. Place the flour and water into a shallow pan and heat gently, stirring all the time.
  2. Cook until the mixture is a thick paste.
  3. Transfer to a container and cover with cling film. Place in the fridge for 6hrs or over night, or place in the freezer for 30mins.
  4. Take out and allow to come to room temp before using.
The Bread
  1. Add the flour, sugar, salt, yeast and milk powder to the mixer bowl making sure not to let the salt and yeast come into direct contact.
  2. Mix the ingredients together to ensure proper distribution.
  3. Warm the milk in the microwave for 30s until it is luke warm to the touch.
  4. Add the egg and whisk together.
  5. Add the wet ingredients and the tangzhong to the dry and mix on low speed until the dough is beginning to come together.
  6. Add the butter to the dough and continue to mix on med until combined.
  7. Increase the mixer speed and knead for between 5-10 mins until the gluten is developed and the dough has come away from the sides of the mixer.
  8. Take the dough out and form into a ball by folding the sides under. (If you try this without oiled gloves or very oiled hands it will stick to you and you will never get it into a ball - trust me, this is what happened to me the first time).
  9. Place in an oiled bowl, cover in cling film and allow to rise for at least 45 mins to 1 hr depending on how warm it is. The dough is ready when you can put an oiled finger into it and it holds its shape. (I do this in my Instant Pot on the yoghurt setting - proves in 45 mins then).
  10. Turn out onto a non-stick surface and divide into six.
  11. Roll each into a ball and place under cling film for 15 mins.
  12. Lightly oil 2 2lb (9x5'') loaf pans.
  13. Take each ball and roll out into an oval using a non-stick rolling pin.
  14. Fold the top point of the oval over the middle and press down with the heel of your hand.
  15. Fold the bottom up over the middle and press down with the heel of our hand.
  16. Take one of the non-folded edges and press over like the first roll of a swiss roll and press the edge into the main dough with finger tips so it sticks.
  17. Roll up and seal the edge by pinching it, so you have a mini roll the approx width of the loaf pan and 1/3 the length (looks to be a similar shape to a pain au chocolat).
  18. Place in one end of the loaf pan.
  19. Repeat 13-18 until there are three rolls in each tin next to each other.
  20. Cover with cling film and allow to rise in a warm spot for 30 mins, until the dough is up to the top of the loaf pans.
  21. Pre-heat the over to 180C/355F
  22. Beat together an egg yolk and a little milk to form the glaze.
  23. Brush the tops of the loaves gently with the glaze.
  24. Bake for 25 mins - they will turn a lovely deep golden brown.
  25. Allow to cool on a wire rack.

This bread makes the most amazing eggy bread/egg flip or French toast. One small slice can suck up a whole egg! It is also delicious for sandwiches and toast.


The Sexy Stories Podcast 10


It's Tuesday, which means a new ep of my podcast Virginia Waytes' Sexy Stories. We are coming towards the end of season 1 of The Manor at the moment, and things are really getting exciting as well as very, very naughty!

Paranormal romance - adults only
The Manor s01e09
Daddy Issues: Vampire Wisdom & the Comfort of Friends


Tuesday, 28 July 2015

Recipe: Stilton, Pear and Walnut Bread and Book Rec - #TipsTuesdays 1


Welcome to Tips Tuesdays, a weekly blog feature where I impart tips on anything that crosses my mind :). There will be recipes, book/film/TV recs (not full reviews, those are for another day), things I discovered by accident, links to websites, basically anything and everything that might be useful.

Today I have a recipe for you that I invented a few years ago, but I have never gotten around to posting here and a book recommendation. I hope you enjoy both.

~*~

Stilton, Pear and Walnut Bread

I never had much luck with making bread until I watched a Paul Hollywood vid and he explained about letting it rise twice. It is his general techniques I have detailed below.

Ingredients 

  • 500g Strong White Bread Flour
  • 200g Pear purΓ©e (my Morrisons didn't sell pear purΓ©e in a can so I bought a can of pear halves in juice and blitzed the halves with a hand blender)
  • 7g (1 sachet) Allinson's easy bake yeast
  • approx 100 ml warm water (1 part boiling to 2 parts cold - I used the pear juice from the can as the two parts cold)
  • 1.5 tspn salt
  • 1 tsp sugar
  • 50g Blue Stilton cheese (or any other strong blue cheese with the same soft wax type texture)
  • 50g chopped walnuts

Equipment

  • Large mixing bowl
  • large baking tray
  • measuring equipment
  • eating knife
  • Sharp knife

Instructions

  1. If you do not have another warm place to prove the dough, put the oven on to about 160C/320F and place a baking tray in the bottom with just a little bit of water in it
  2. In the bowl mix the flour and the salt
  3. Add the easy bake yeast and sugar and stir in (if using yeast you have to mix with warm water and sugar, do that now, but leave the adding until step 5 - only use about 60ml or the water with the yeast and keep the rest in case you do not need it all)
  4. Crumble in the Stilton cheese and then rub through the flour until it has almost disappeared
  5. Make a well in the flour and add the pear purΓ©e, mixing through with a knife
  6. Add some of the water (or water and juice mix) and begin to bring the dough together, keep adding water until you have a slightly sticky, but firmish dough (you may not need all the water)
  7. Turn the dough out onto a lightly floured surface and knead for at least ten mins (until the dough is elastic) - you can use a dough hook and a mixer if you like and this reduces the time from somewhere between 4 and 5 mins. If you are going to prove the dough in the oven turn it off with about 5 mins to go on the kneading and leave the door open. For the last couple of mins of kneading, knead in the walnuts.
  8. Put the dough back in the bowl and cover with a damp tea towel, then put in your warm place to prove for about an hour
  9. Reflour your surface lightly and empty the proved dough onto it, then punch it for all you are worth to knock it back. (This bit's fun)
  10. Divide your dough into two parts (using the sharp knife is easiest) if you want two med loaves and shape into mounds (tuck the edges under and pat until circular), or make one big loaf if you wish.
  11. Lightly oil and flour your baking tray and place the loaves on it as far apart as possible, but equidistant from the edge of the tray.
  12. Brush the loaves with a little salt water and flour them lightly.
  13. Put them back in the warm place to prove for between 30 mins and an hour, until they have risen to twice their original size.
  14. If using the oven to prove, when they are almost there take them out of the oven and place them in another warm place (I used the grill, I put it on for a min or two to warm up, then turned it off and popped them in). Pre-heat the oven on to 240C/460F
  15. When the oven is hot cut an X in the top of the loaves and bake them for 8 mins
  16. Open the door of the oven and bake them for another 2 mins
  17. Turn the oven down to 180C/360F (fan/convection) or 190C/375F (normal) and bake for between 20 and 30 mins until the loaves make a hollow sound when tapped on the bottom.
  18. Leave to cool on a wire rack (or dive in and eat while hot ;))
~*~
Book Recommendation
This was a recommendation from my sister Sophie and she was right on the money. I would have read this book all in one sitting if my tablet hadn't run out of charge. It is a lot of fun and it is free on Amazon. I have already bought the other books in the series. Well worth a read.

A Gift of Ghosts (Tassamara Book 1)

Akira Malone believes in the scientific method, evolution, and Einstein’s theory of relativity. And ghosts. 

All the logic and reason in the world can’t protect her from the truth—she can see and communicate with spirits. But Akira is sure that her ability is just a genetic quirk and the ghosts she encounters simply leftover electromagnetic energy. Dangerous electromagnetic energy. 

Zane Latimer believes in telepathy, precognition, auras, and that playing Halo with your employees is an excellent management technique. He also thinks that maybe, just maybe, Akira can help his family get in touch with their lost loved ones. 

But will Akira ever be able to face her fears and accept her gift? Or will Zane’s relatives be trapped between life and death forever?
Book Links


Do you bake bread? What is your favourite recipe?
Do you have any ghostly book recs to share?