So I reorganised all my Blogger labels at the weekend because they were messy and not very helpful and I also looked into how to Display Blogger labels on their own page (mine is called Blog Topics), like the tags page on LJ so they were easier to see. I had a few issues, so I decided to write it up.
How To Display the Blogger Labels Widget on a Separate Label's Page
Now blog labels are very useful to find topics about which we might be interested or to track down our own posts without scrolling through the whole list. I believe we often use them straight from the posts on which they have been placed to find like posts, but Blogger also offers a widget so we can display the labels in our blog layout as well.
If we look at a screen shot of my blog I have this widget on my left side bar and I have called it Blog Topics:
 |
| click to enlarge |
However, until Sunday, this list was much, much bigger and very disorganised. What I did over the weekend was give all my posts what I like to refer to as
Major Topics and then
Sub Topics, where the
Sub Topics are much more specific and the
Major Topics are more an overview. Only the
Major Topics are now listed in the sidebar.
However, I did not wish to lose the functionality of all the
Sub Topics in a list as well.
All the topics,
Major and
Sub are now listed on the
Blog Topics page which I created at the same time. As you can see in the following image, which is just a subsection screen capture of that page, there are many more topics listed, but they are much more useful for finding individual posts.
 |
| click to enlarge |
Being a complete beginner when it comes to editing Blogger in any way except directly through the menus, I needed to do some research and it seems I am definitely not the only person who wants to do similar things. I had to edit my Blogger Template directly and I used this very helpful article to find out how to do it:
Blogger-Hints-and-tips - How to Edit Your Blogger Template.
Then I used the following article to find out what-part-of and how-to edit the template so that I could make it do what I wanted it to:
Blogger-Hints-and-tips - Displaying Gadgets Only on the Home Page. However, this post doesn't quite cover everything specifically and I found a few hang ups so I am going to create my own How-To post which will also list the other steps I took.
Re-Organise Your Labels:
Now your labels might be already beautifully organised, but mine weren't so the first thing I had to do was that. Doing this first will make choosing what labels go where much easier for us and means we won't have to do it twice. Bloggers labels can be a real pain and I had no idea how to change them, so I'm including that information as well.
How to Change Your Labels:
- Go to Posts in your Blogger back end.
- Choose the label you wish to edit from the drop down
 |
| Label select drop down. |
Select all posts and add the new label using the "New Label" option in the Add/Remove Label Drop Down Menu as show below (if you put a * in front of a label, it will appear above normally alphabetically sorted labels).
 |
| Add/Remove Label Drop Down Menu |
Use the Add/Remove Label Drop Down Menu again to choose the label you wish to remove and it will remove it from all selected posts.
DO NOT do this in the opposite direction because all the posts will disappear from the list you are looking at since they will no longer have the search label and then you will have to search them all out again by hand. Trust me, this is a pain in the bottom - I had to do it a couple of times :).
Adding the Labels Gadgets:
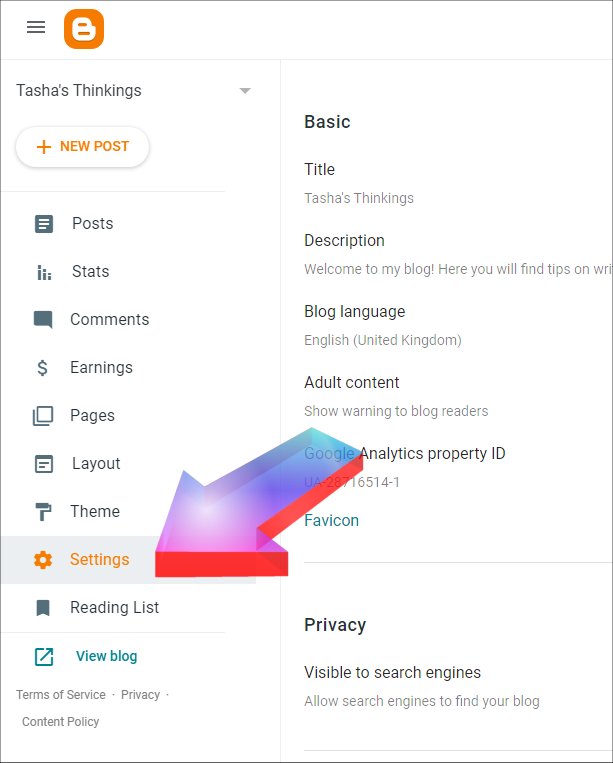
- Choose Layout from the main Blogger Dashboard menu.
- Click "Add Gadget" in the side bar where you wish to add the main Labels gadget and pick it from the options.
- Go in to this Gadget and choose the Selected Labels option, choosing all your Main Topics from the list offered.
- Repeat the adding Gadget process and move the gadget to the position in the Main section above the Blog Posts.
- Go in to this Gadget and choose the selected labels option and pick just one - this will mean the gadget is not obtrusive while you are making the other changes.
- Edit this Gadget again and maximise the edit window and look at the URL listed at the top, it will look like this and you will need the widgetId at the end shown below in red (it will probably be something like Label2) (once you have it, just cancel the edit):
https://www.blogger.com/rearrange?blogID=8918688759465977896&action=editWidget§ionId=main&widgetType=null&widgetId=Label2
Add Your New Topics Page:
I'm sure most of us have done this many times, but I'm including it for completeness.
- Choose Pages from the main Blogger Dashboard menu.
- Click New Page and create your new one. You don't need to add any content to it.
Editing Your Template:
The first 3 steps of this are how to edit your static template, if you are using a Dynamic template you will need to check the article I mentioned above
at this link. You can tell which you are using by looking at the Template page.
- Choose Template from the main Blogger Dashboard menu.
- Always BACKUP your template before you do anything else using the Backup/Restore button then make sure you save it somewhere safe in case you mess up and want to restore it.
 |
| Backup/Restore button |
- Click Edit HTML under the "Live on Blog" to open the raw template code.
- Use the "Jump to Widget" option to go to your Gadget using the ID you recorded when adding it. The code should look something like this:
 |
| Click to enlarge and read |
- Under the line that says <b:includable id="'main'> add the following line:
<b:if cond='data:blog.url == "http://tashasthinkings.blogspot.com/p/blog-topics.html"'>
Replacing the URL in red with the URL of the page you created as your topics page - as you can see mine is imaginatively called Blog Topics :). ALWAYS use the .com version of the URL, not the .co.uk one, because it won't work - it took me a whole day to find out why my condition was never being hit.
- Just before the line which says </b: includable> at the end of the widget, put in the following code:
<b:else/>
<style type='text/css'>
#Label2 {display:none !important;}/*remove blank space that the gadget leaves*/
</style>
</b:if>
Changing the Label2 part in red to the id of your widget.
- Use the Preview Template option, your new Labels Gadget just above your main posts should have disappeared.
- Save the Template.
I also added the new
Blog Topics page to my main menu at the top and added a new
HTML/text widget in just above the
Major Topics widget in the side bar to point people at the more detailed topics should they want to see them like so.
And there you have it, how I rearranged my blog labels to make them more useful :). Of course you can choose different ways of arranging the labels and different criteria for the labels you have in your side bar, but, hopefully, this will help have all your blog topics in their own page should you wish to.
We can do the same with any other widget since the principle also works for any of the Blogger Gadgets, simply choose the correct
widgetId and the correct
page URL when editing the code.
If you have any questions, please feel free to ask in the comments and I will do my best to answer them.
Authors - win a month's stay in a castle for NaNoWriMo 2016 via Derek Murphy (book designer and author).
(occasionally you see a page not found, but wait a second and it will redirect you to the right place - I think sometimes the server is overloaded)