Showing posts with label *Food: Savoury. Show all posts

Sunday, 25 February 2024

Delicious! Stuffed Potato & Parmesan Waffles

Delicious! Stuffed Potato and Parmesan Waffles - picture of a stuffed waffle on a plate with a cheese pull in front of a dark background.

Stuffed Potato & Parmesan Waffles

Gluten Free & Vegetarian

This is a partial repost, but also an updated recipe from back in 2020. The original recipe is for plain potato & parmesan waffles, but my lovely twin just gifted me and my hubby a stuffed waffle iron, so of course we had to try it out. These are so very delicious, I had to share.

As I mentioned, the original recipe is based off of Nigella's Garlic & Parmesan waffles from her book, "At My Table". This is just a different take on the recipe, with a stuffing of red peppers and mozzarella.

Makes 3x 5''(12.7cm) waffles

A serving for me was 1 waffle, but my husband ate 2 easily, so scale up to fit your needs

Ingredients

For the waffle batter (Gluten Free)
  • 400g / 2 cups mashed potato (left over mash works well, or I used cooked frozen mash this time)
  • 4 tbsp (60ml) butter
  • 8 tbsp (120ml) milk
  • 2 eggs
  • 45g/ ~3/8cup finely grated Parmesan (or hard Italian cheese vegetarian equiv)
  • 4 tbsp cornflour
  • 1/2 tsp baking powder
  • 1 tsp Dried Rosemary (I like the grind it in a pestle and mortar or spice grinder to make it distribute better and release its flavour)
  • salt & pepper to taste
For the stuffing
  • half a ball of mozzarella (vegetarians check the packet to make sure you have a veggie version)
  • half a large red pepper (capsicum) - I use jarred roasted peppers (I hate the skin on fresh ones), but if you are using fresh you will need to fry the peppers off before use, unless you want crunchy almost raw pepper in your waffle - which is an option for a texture change.

Instructions

  1. Melt the butter (I microwave it for 30s then stir until completely melted, but you can do it in a saucepan) and leave to stand to cool down.
  2. Preheat the waffle iron.
  3. Prepare the filling by chopping the mozzarella and pepper into small pieces.
  4. Microwave your mash if using frozen or allow to come to room temp if using leftovers, and, using a fork or something similar, break up the mash so that it is light pieces, not one lump.
  5. In a large bowl whisk together the cooled butter, eggs and milk.
  6. Add in the potato a little at a time, whisking it in each time. I used a flat manual whisk, but you could use an electric hand whisk, or a bowl mixer if you prefer.
  7. Add the Parmesan, cornflour, baking powder, rosemary, salt and pepper and beat until smooth(ish).
  8. Lightly oil the waffle iron.
  9. Place a few spoonfuls of batter in the bottom of the waffle iron - enough to just cover the raised areas. After a couple of second it will begin to puff up a little.
  10. Take 1/3rd of the filling and place in the centre of the waffle batter, leaving half a cm or so around the edge.
  11. Carefully spoon batter over the filling, sealing it in and filling the waffle iron to a little over 3/4 full.
  12. Close the waffle iron, invert it, and cook for about 7 mins total or until golden brown - different waffle makers will vary. After 7min check the cook and let it go a little longer if necessary.
  13. Tip out of the waffle from the maker onto a plate (I discovered tipping was way easier than trying to lever it out with a spatula - just be careful not to burn yourself).
  14. If making lots, pop the cooked ones in a low oven until ready to eat.

Depending what meal we are making these for, they go well with eggs or some suitable veg on the side (I imagine garlic roasted tender stem broccoli would be amazing). A piquant sauce on the side is also a nice flavour combo (Sauce Shop Honey Chipotle BBQ sauce is what I had with mine where as Rob ate his without anything on the side).

Stuffed Potato and Parmesan Waffles on a grey plate, with a cheese pull.

This is a very versatile recipe, so if you don't like the amount of cheese or want to use a different herb/spice, just go ahead and play. It one to have fun with.

Check Out My Fiction YouTube Channel

Tales with Tasha - YouTube

Each week we have a theme and so there will be something for all tastes.
  • 🎤Micro stories and/or silly jokes as YouTube Shorts Monday - Sunday- for fun quick viewing
  • 🕮A longer story every now and then for story time, over coffee or before going to bed

Tasha's Social Media

📚Join My Newsletter📚


Receive 2 FREE eBooks just for signing up and a free short story once every month on Free Fiction Friday.


Two books covers - one with a woman firing guns above the title "Assassin's Blood" the other with a woman screaming and glowing with the title "Curse of a Banshee"

List hosted on MailChimp, information will only be used for Newsletter contact, and we do not send spam.

Sunday, 28 November 2021

Recipe - Caramelised Onion & Goats Cheese Frittata #Vegetarian #GlutenFree

Caramelised Onion and Goats Cheese Frittata

Caramelised Onion & Goats Cheese Frittata

#Vegetarian #GlutenFree

Now this recipe is very versatile and you can basically add anything you want, as long as it is cooked in advance or will cook in the same time as the frittata. So for meat lovers, make sure to cook bacon or sausage before adding it in. This method is for the air fryer, but you can also make it in a skillet and pop it in the oven to finish off.

serves 2-3 people or 4 with sides

Equipment

  • Air fryer or oven proof skillet/frying pan and oven
  • baking tin that fits in the air fryer
  • grease proof paper
  • med bowl
  • whisk

Ingredients

  • 5 large eggs
  • 160ml (2/3 cup) milk 
  • ~4 tbsp caramelised onions (use your preferred method - I do something like this Instant Pot Caramelised Onions this is A Stove Top Method - they keep in the fridge well)
  • 45g (~1/4 cup) soft goats cheese
  • 30g smoked cheese (optional)
  • handful of frozen peas
  • sprinkling of grated cheese (I use a pre-grated four cheese mix, but mozzarella would do, it's mostly for the crust)
  • salt & pepper to taste

Instructions

Air Fryer

  • Line your baking tin with greaseproof paper on the bottom - as you can see from the image, I use a cake liner, but that's because my springform tin leaks - ask me how I know 😏. In the photos I hadn't cut down my liner, but now I cut off about a cm at the top, which prevents it folding inwards.
  • Spread the caramelised onions over the base of the lined tin.
  • Beat together the eggs, milk and seasoning (you can add other herbs here too if you like - rosemary would be good).

Eggs milk and seasoning in a bowl

  • Pour into the baking tin.
  • Dot in the goats cheese and smoked cheese in little lumps and scatter in the peas.
  • Sprinkle the grated cheese over the top.

Frittata in the air fryer ready to be baked.

  • Pre-heat the air fryer to 150C /300F (my air fryer is an Instant Pot Pro Crisp)
  • Pop the frittata in the air fryer and cook for ~20mins or until set in the middle (use a knife to test it). My baking tin is quite deep, so it takes longer, but start at 20 and keep checking.

Cooke frittata
As you can see my liner folded over, which is why I trim them now.

or

Oven/Hob

  • Preheat the oven to 180C/350F
  • Heat a little oil in the frying pan on the hob.
  • Add the onions on the base of the frying pan and pour in the egg/milk mixture.
  • Dot in the goats cheese and smoked cheese and peas.
  • Cook until the bottom is just set.
  • Sprinkle over the grated cheese and pop in the oven for 10-15 mins until set.

This comes out as a light and fluffy frittata which is delicious on its own or served with potatoes and veggies.


Check Out My Fiction YouTube Channel

Tales with Tasha - YouTube

Each week we have a theme and so there will be something for all tastes.
  • 🎤Micro stories as YouTube Shorts Monday - Thursday - for fun quick viewing
  • 🕮A longer story every Friday - for story time, over coffee or before going to bed

📚Join My Newsletter📚


Receive 2 FREE eBooks just for signing up and a free short story on the first Friday of every month on Free Fiction Friday.


Two books covers - one with a woman firing guns above the title "Assassin's Blood" the other with a woman screaming and glowing with the title "Curse of a Banshee"

List hosted on MailChimp, information will only be used for Newsletter contact, and we do not send spam.

Saturday, 13 November 2021

Recipe: Cauliflower Cheese Soup - Perfect and delicious for a cold autumn or winter day. #Vegetarian

Recipe: Cauliflower Cheese Soup

Cauliflower Cheese Soup

This is a lovely, filling soup, comforting and warm with some deep wintery flavours. Now the first part of the recipe where we roast the cauli is optional, but it really enhances the flavour of the soup, so only skip it if you really don't have time. 

I made my soup using my Instant Pot Pro Crisp, which is an air fryer and a pressure cooker (I really wanted to try it out since it's new and I had only used the air fryer part once), but it is totally possible using an oven and a large saucepan.

As long as you check your stock, this recipe is gluten free and vegetarian. To make it vegan, swap out the cheddar cheese for a vegan alternative and maybe a bit of nutritional yeast to boost the flavour.

Ingredients

  • 1 large cauliflower
  • 2 tbsp olive oil
  • 1/2 tsp ground turmeric
  • 1 tsp ground paprika
  • salt and pepper to taste
  • 1 large onion
  • 2 cloves of garlic
  • 1 can (400ml/14oz) coconut milk
  • 1lt vegetable (or chicken if you don't mind it not being vegetarian) low sodium stock
  • 150g shredded mature cheddar
  • 1/2 tsp garlic powder (optional)

Instructions

  1. Cut the cauliflower into medium sized florets, then cut each in half.
  2. Mix the turmeric, paprika, salt and pepper in a small bowl.
  3. In a large bowl add 1tbsp olive oil to the cauliflower and make sure it is all coated, then add the mixed spices and toss until each floret is covered.
  4. Optional, but recommended - Roast the cauliflower: in the air fryer, place in the basket and roast at 200C (390F) for around 15 mins, giving it a shake at regular intervals, or until the edges of the cauli have browned nicely - in the oven, spread the cauli on a large baking sheet and pop it in at 220C (425F) and roast for 20 mins, turning the cauli ever 5 mins or so.
  5. Chop the onion into medium sized pieces.
  6. Sauté the onion: for an Instant Pot, press the saute option on high, for the hob, put a large saucepan over a med to high heat and add the other tbsp of olive oil with the onion. Cook the onion, stirring constantly until it is going golden, but not crisping on the edges.
  7. Bruise and add the garlic cloves and cook for another minute until it is fragrant.
  8. Add the cauliflower (if you would like, reserve some of the cauli as a garnish, but I totally forgot) to the pot and mix with the onion.
  9. Add the coconut milk and the stock and stir to combine.
  10. Cook until the onion is melting away and the cauli is so tender it is breaking up. Instant Pot - put on the lid, pressure cook for 10 min and do an instant pressure release. Hob - simmer for 15-20 mins.
  11. Taste the soup, add more seasoning if necessary, but remember the cheese will add salt. I also added some garlic powder at this point because pressure cooking can mute garlic flavour.
  12. Add the cheese to the pot and using a stick/immersion blender, blend the soup until it is smooth.
Serve with something crunchy sprinkled on top, or your reserved cauliflower as a garnish. Those little crunchy fake bacon bits would be really nice, or real crispy bacon, or croutons, or crunchy onions - the options are limitless.


Check Out My Fiction YouTube Channel

Tales with Tasha - YouTube

Each week we have a theme (this week is was vampires, next week it is creepypasta/urban legends) and so there will be something for all tastes.
  • 🎤Micro stories as YouTube Shorts Monday - Thursday - for fun quick viewing
  • 🕮A longer story every Friday - for story time, over coffee or before going to bed

📚Join My Newsletter📚


Receive 2 FREE eBooks just for signing up and a free short story on the first Friday of every month on Free Fiction Friday.


Two books covers - one with a woman firing guns above the title "Assassin's Blood" the other with a woman screaming and glowing with the title "Curse of a Banshee"

List hosted on MailChimp, information will only be used for Newsletter contact, and we do not send spam.
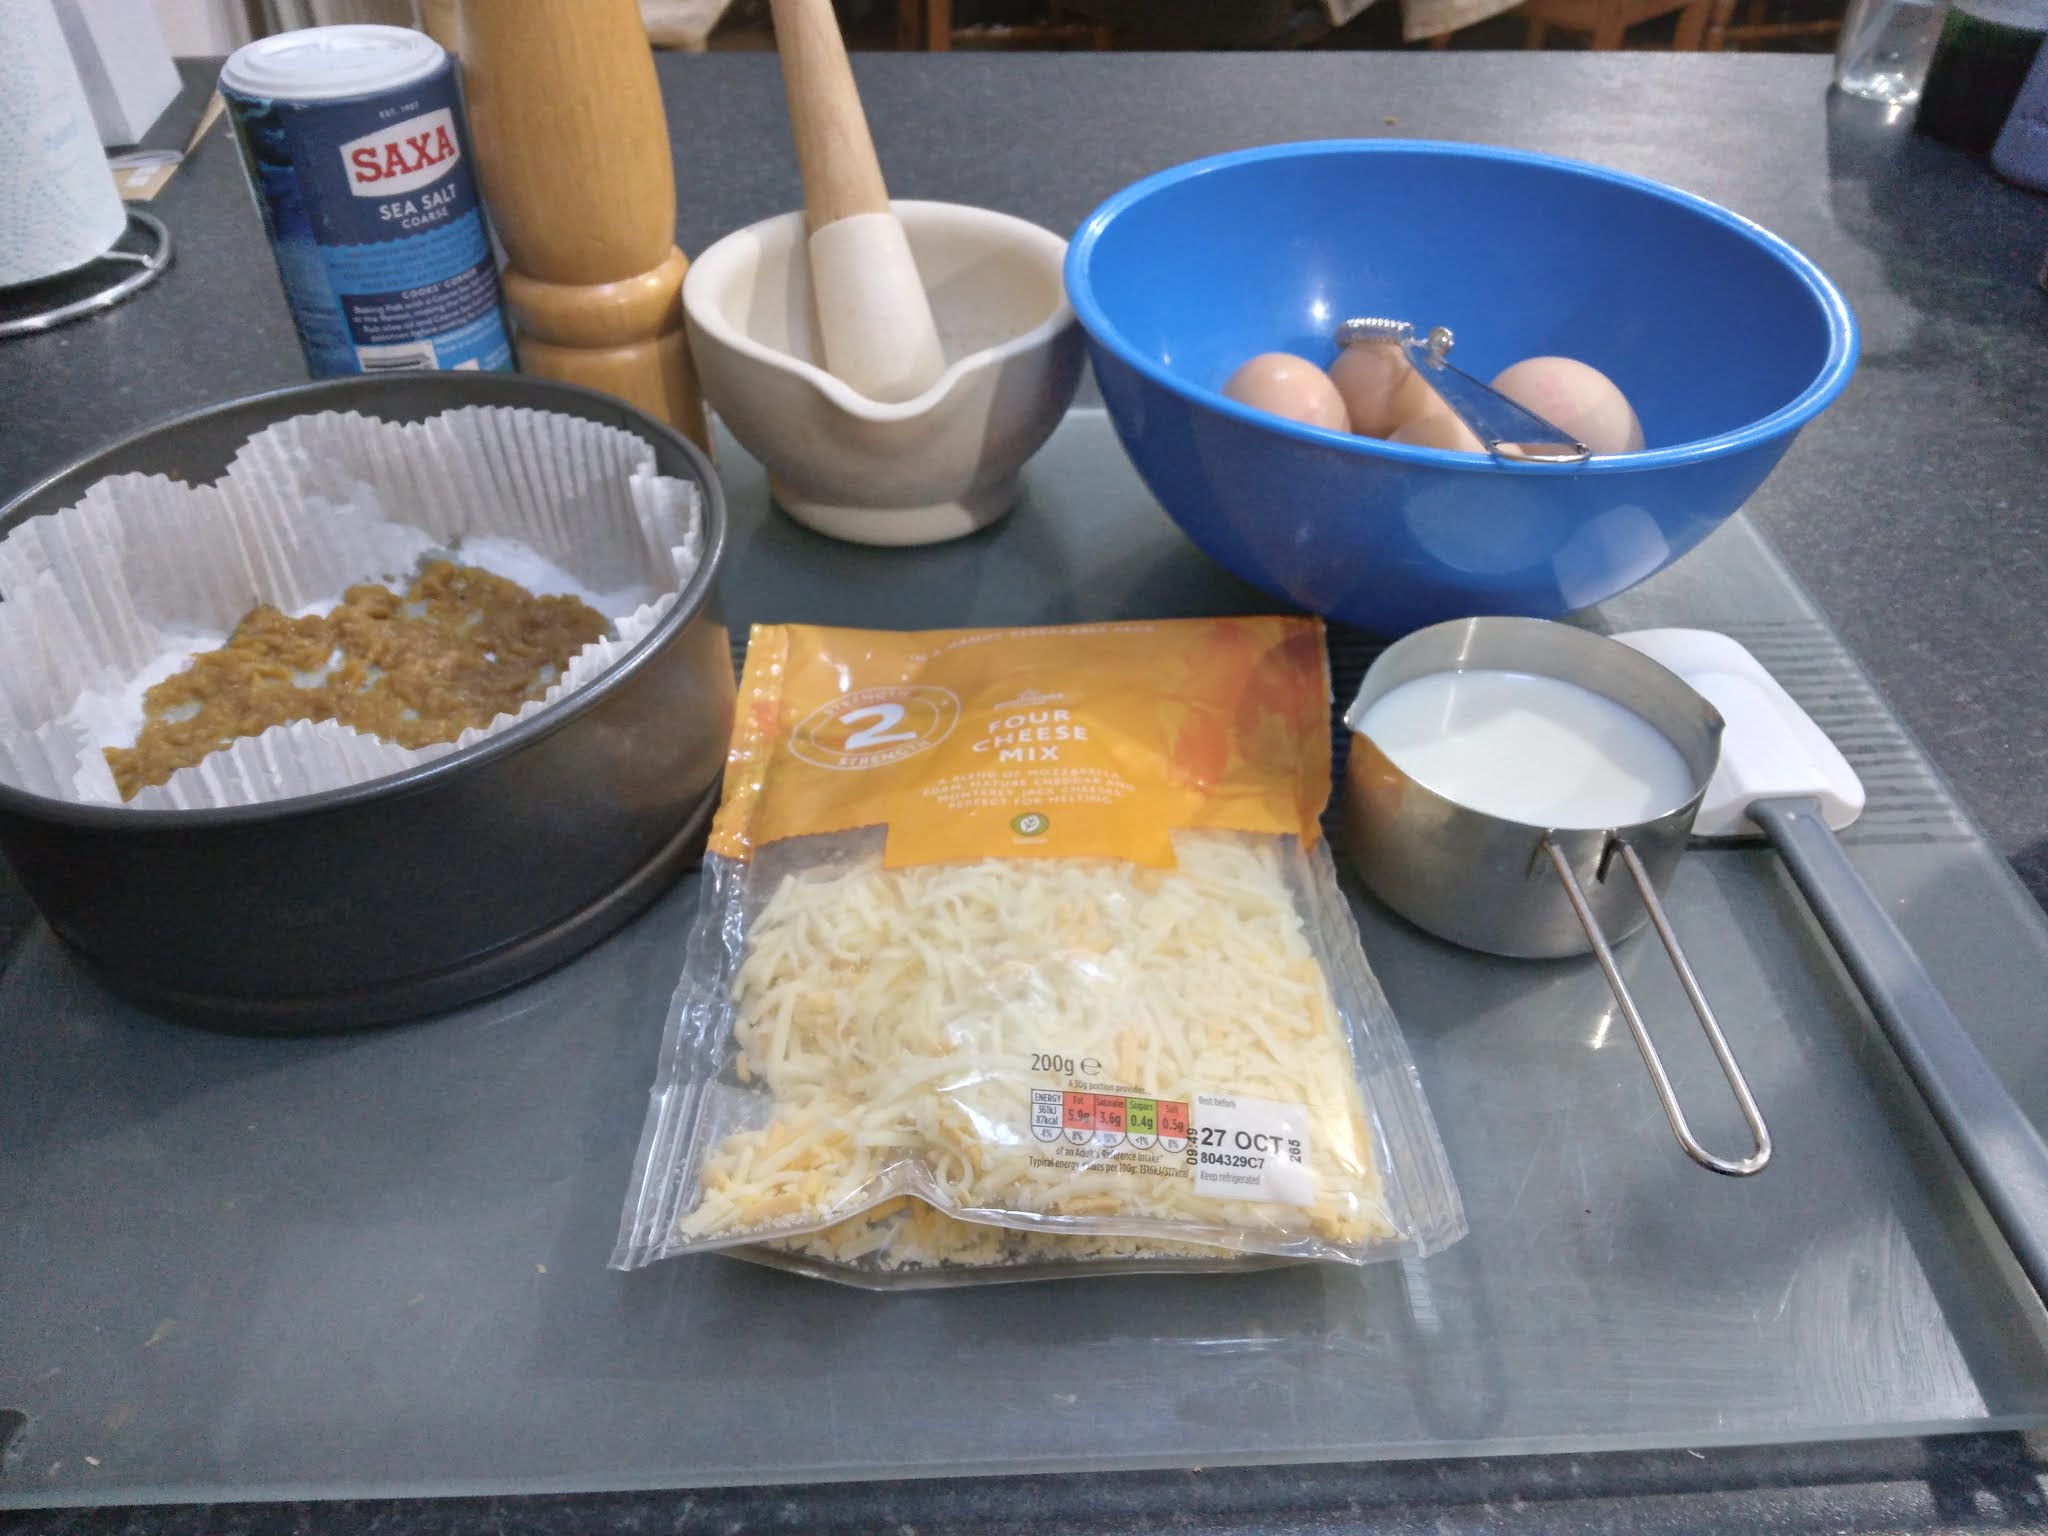
Image used in banner by Anna Nekrashevich from Pexels

Monday, 18 October 2021

Recipe: Delicious & Healthy Instant Pot Potato, Garlic & Rosemary Soup #Vegetarian #Vegan #GlutenFree

Recipe: Potato, Garlic and Rosemary Soup, with image of instant pot behind

Delicious & Healthy Instant Pot Potato, Garlic & Rosemary Soup

This is a lovely, hearty and healthy smooth soup that you can add crunchy things like croutons to, if that is what you like. Would also be lovely with nuts or pine nuts or roasted pumpkin seeds - anything like that. It uses coconut milk for some extra creaminess as a delicious alternative to cream or milk.

Now before you say, but I don't have an Instant Pot, never fear, you can make this on the stove top just as easily, except you'll probably have to give it a stir every now and then. Simply follow the instructions using a large saucepan on the hob and cook the potatoes until they are tender.

Vegetarian / Vegan / Gluten Free

Serves 6 hungry people min, and will keep in the fridge/freezer

Equipment

Required

  • 5.7 lt / 6 quart Instant Pot (or you could halve the recipe if you have the smaller one)
  • or a large heavy base saucepan
  • trivet
  • wooden spatula
  • 1lt / 4 cup jug
  • Stick blender of stand blender
Optional if you're not worried about how smooth the soup is

  • sieve
  • large bowl
  • silicon spatula
  • ladle

Ingredients

  • 2kg/4.4lb potatoes of your choice (I used Albert Barlett Rooster Potatoes)
  • 1 bulb/head of garlic
  • 1 large white onion
  • 1.5 tsp dried rosemary
  • 1lt/ 4 cups low or no salt veggie stock (I use 2 good quality stock cubes and boiling water) - chicken stock would work too if you're not worried about it being vegetarian.
  • 1 can (400ml / 1.7 cups) coconut milk
  • salt and pepper to taste
  • 1 tbsp oil for frying
Potato, garlic and rosemary soup in an instant pot.
Instant Pot Potato, Garlic & Rosemary Soup

Instructions

  1. Peel and chop the onion and garlic roughly (it's going to be blended so doesn't need to be fancy, just small enough to fry off).
  2. Use the sauté option on the instant pot on high - add in the oil and the onion and fry off until translucent (make sure to stir often of it will stick).
  3. Add the garlic and fry for another minute or so.
  4. Set aside in a bowl to cool.
  5. Deglaze the bottom of the Instant Pot with a little of the stock.
  6. Put in the trivet (because potatoes are heavy, they can cause a burn notice if they all slump and stick to the bottom, so having the trivet in the way makes this much more unlikely).
  7. Peel and chop the potatoes into small chunks and add to the Instant Pot.
  8. Blend the onions and garlic (optional - I did this so I didn't have to blend the soup as much at the end) and add on top of the potatoes.
  9. Add the rosemary. To get the most flavour out of my dried rosemary, I like to grind it down in my pestle and mortar before adding it, but you can just add it whole if you prefer.
  10. Add the can of coconut milk, the stock, and the salt and pepper (go easy on the seasoning, you can always add more at the end, but you can't take it out).
  11. Close the lid of the Instant Pot and choose the Pressure/Manual option and cook for 15 mins.
  12. When the cook time is done, release the pressure - this will take a while because the pot is pretty full.
  13. Lift out the internal pot to the counter and take out the trivet using a fork. Give it a few minutes to begin to cool before either blending with the stick blender or blending in batches in a stand blender. It can splash when blending, so letting it cool is a good plan - I have a lovely burn from where I failed to do this when making pumpkin soup last week.
  14. Optional - Pass the soup through the sieve into a large bowl, using the ladle to get it out of the instant pot and the silicon spatula to push it through. It shouldn't take long, but if you don't want to do this part, you can miss it out, I just hate little bits in a smooth soup that I didn't deliberately put there 😉.
  15. Return the soup to the Instant Pot and check for seasoning, add more if necessary. It can be left on keep warm or simply reheated when it is needed.


📚Join My Newsletter📚


Receive 2 FREE eBooks just for signing up and a free short story on the first Friday of every month on Free Fiction Friday.


Two books covers - one with a woman firing guns above the title "Assassin's Blood" the other with a woman screaming and glowing with the title "Curse of a Banshee"

List hosted on MailChimp, information will only be used for Newsletter contact, and we do not send spam.

Monday, 2 August 2021

Recipe - Delicious Focaccia with Perfect Texture

Recipe: Delicious Focaccia

Recipe: Delicious Focaccia

So I made a focaccia this weekend that was utterly delicious and a lovely chewy texture, so I thought I'd share the recipe. It is based on this one by Kitchen and Craft on Youtube, but I changed is up a little, so here is my version. This vid is very good for technique though, very, very useful for all new to making focaccia, so definitely watch it. You may also prefer their recipe.


Ingredients

  • 600g/4.5cups Strong Bread Flour
  • 1 sachet of fast action yeast (7g)
  • 450g warm water (38-39C / 100-105F this is approx blood temp, so if you don't have a thermometer, check it with your little finger, if it feels hot, it's too warm, if it feel cool it's too cold)
  • 3/4 tsp salt
  • 2 tbsp extra virgin olive oil

toppings - dried rosemary, garlic granules, sea salt granules

Equipment

  • 2 large bowls
  • 1 med bowl
  • large 35x26cm baking pan (~14x10 inches)

Method

  1. Put the flour in one of the large bowls and add the yeast and mix through, making a well in the centre.
  2. Put the warm water in the med bowl and add the salt, making sure it dissolves fully.
  3. Add the salt water to the well in the flour, then add the olive oil as well.
  4. Bring the flour and liquid together (I put a little bit of oil on my fingers so the dough doesn't cling completely to them) until it's homogenised.
  5. Grease the second large bowl and transfer the dough to it (a bench scraper/dough scraper is really useful for this, but use a spatula if you don't have one - best not to use a hand since the dough will be very sticky).
  6. For this bit, it is definitely a good idea to lightly grease our fingers with oil as well. Grab a chunk of dough (about a third) from the side and drag it up and over the top, tucking it onto the other side of the dough. Turn the bowl 1 quarter and do the same again. Repeat two or three more times.
  7. Cover the bowl with a damp cloth or cling film and leave for 20 mins.
  8. Repeat 6 and 7 four more times, or until the dough is smooth and shows resistance to touch.
  9. Cover the bowl tightly with cling film or something equivalent so that there is an air tight seal and put the dough in the fridge for a slow prove. Overnight is easiest. This is to develop extra flavour and gluten in the flour, since we aren't doing a big knead.
  10. In the morning, grease the baking pan and transfer the dough to it. Push it out to the edges of the pan with finger tips. Sometime the dough will resist because it is cold, cover it and leave it for 10 minutes if it won't stretch, then try again.
  11. Cover with cling film or a damp cloth and place in a warm place to prove for about an hour. (I put my oven on its lowest setting in advance and then turned it off when I placed the pan in it).
  12. Take the pan out and with wet fingers put dimples all down the dough, but be careful not to knock out all the air.
  13. Put the dough back in the warm place and let rise for another 45 mins or so before bringing it out. The dough should fill 1/2 to 2/3 of the tin and should look a little bubbly and wobbly. If the dough has not risen enough, find a slightly warmer place - my oven was too cool at the end and I heated it up a little bit, then put the dough back in for another 15 mins, which did the trick.
  14. Pre-heat the oven to 230C/450F.
  15. Now add the toppings - you can add what you like, I went with dried rosemary, and garlic granules with some sea salt, but go with whatever flavours you fancy. Just add a drizzle of extra virgin oil over the top.
  16. Bake the bread for 15-20 mins until golden. If you have a baking thermometer the internal temp of the bread should be ~88C/190°F.
  17. Transfer the bread to a wire rack to cool.
The bread is very nice dipped in oil or slathered in butter 😋.


📚Join My Newsletter📚


Receive 2 FREE eBooks just for signing up and a free short story on the first Friday of every month on Free Fiction Friday.


Two books covers - one with a woman firing guns above the title "Assassin's Blood" the other with a woman screaming and glowing with the title "Curse of a Banshee"

List hosted on MailChimp, information will only be used for Newsletter contact, and we do not send spam.

Banner Photo by Savi P from Pexels

Tuesday, 18 May 2021

Recipe: Dillegrout - more like Dille-icious - Wonderful Chicken & Almond Stew in the Instant Pot

Recipe: Dillegrout - Chicken & Almond Stew in the Instant Pot

Dillegrout - more like Dille-icious

Wonderful Chicken & Almond Stew

So this is a recipe from Tasting History with Max Miller. If you have not seen his channel on Youtube, run, do not walk, to check it out, because it is utterly fabulous, as is Max (he really used to be a Disney Prince). 💜 Some wonderful recipes, some not so wonderful too (Kykeon - just nope), but always packed full of fantastic historical information, brilliantly presented and 100% entertaining.

This is Max's video all about Dillegrout:


Make sure to like the video and subscribe to Max's channel - you will not regret it.

Now, I have used Max's recipe, but I have adjusted the method to use my Instant Pot (probably sacrilegious, but I love my Instant Pot), and I reduced it so it will feed 2, since Max's recipe would do for at least 4 I should think. It is very yummy and like nothing else I have had before. It is very nice served with Jersey Royal new potatoes and I think it would also be good with some in season runner beans.

Ingredients

Main stew

  • 1/2 cup / 60g blanched almonds - I used flaked almonds for speed
  • 1.5 cup / 355ml white wine - something on the sweeter side, I used a Pino Grigio
  • 1.5 lb / 750g chicken - I used 2 chicken breasts and 3 thighs (UK sized, US tend to be much bigger than ours)
  • 1/8 cup / 25g sugar
  • 1/8 tsp ground clove
  • 1/4 tsp ground mace
  • 1/8 cup / 20g (ish) pine nuts (I added a little bit more because I love pine nuts 😉)
  • 1/4 tsp dried ginger (I could not find dried ginger for love nor money, so used crystallised ginger which seemed to work really well - I added a pinch of ground ginger as well to make up the flavour)
  • 1/2 tsp salt
Added at the end
  • 1 tbsp / 15ml white wine vinegar
  • 1/2 tsp rose water
  • 1/4 tsp ground ginger

Instructions

  1. Put almonds in cool water to soak for min 1 hr - preferably for several (I know 1hr works because I forgot and had to rush, but more would be better).
  2. When almonds have soaked long enough, chop the dark meat and give it a good pounding - I did this between cling film to stop me flinging bit of meat across the room 😂. Keep the breasts whole.
  3. Drain the almonds and place in a blender (or a bowl if using a stick blender like I did) with the wine and blitz until you can blitz no more to make the almond milk. It smelled amazing - almost like pear drops.
  4. Sieve the almond milk through cheese cloth lying in a fine sieve, allowing to drain and then giving the cheese cloth a squeeze when most of the liquid is through. (I have kept the almond paste that was left over and intend to make frangipane with it).
  5. Add the almond milk to the Instant Pot, then add the chicken breasts with the beaten dark meat on top (thigh meat is more likely to stick, so best to make sure it is not under the breasts to begin with), then the spices, seasoning and pine nuts from the first part of the list above.

    Dillegrout in the Instant Pot

  6. Close the Instant Pot, set to sealing, then pressure cook (also known as manual) for 20 mins.
  7. Allow natural pressure release for 10 mins.
  8. Open the pot and take out the chicken breasts, hit cancel, then the sauté option on high.
  9. Chop the chicken breast and return to the pot as it comes to a boil. Allow to bubble and reduce for another 10 mins or so.
  10. Turn off the sauté option.
  11. Add the vinegar, rose water and ground ginger, and stir in.
  12. Serve in bowls with the sides of your choice. It was really good with the new potatoes and would probably be awesome with some artisanal bread of some description and/or lighter flavoured veggies like green beans or peas. Not sure it would go with a brassica though.
Mine didn't look stunning, as you can see, since it's all one colour and the lighting in our kitchen washed it out, but it could easily be spruced up with some veggies on the side. This is my husband's bowl when he had already started eating, because I forgot to take piccies at the beginning. 😁

This is my bowl - somewhat smaller - but I somehow managed to get lots of pine nuts 😉.
Smaller bowl of Dillegrout

It might work with jack fruit, for my vegetarian friends - something I may try in the future. Might need a wee bit of veggie stock to bulk out the flavour though, since the chicken does add some.

And there you have it, Dillegrout a la Instant pot. Remember - go check out Tasting History, it's wonderful - one of my go to channels for feel good content. Try out Max's recipe for Sally Lunn Buns too, if you get the chance - so good!


New Book

Mina's Children: The Legacy of Dracula

Dracula's Heritage Book 1

Silhouette of a woman in front of a Romanian castle and a mountain, with the moon and red eyes in the sky. Mina's Children: The Legacy of Dracula

Regina Harker, immortal, vampire tainted, descendant of the famous Mina, has spent her whole life preparing for one mission: destroy Dracula.

Mina Harker (nee Murry) was changed by Dracula's attentions and so were her descendants. Reggie comes from this line of vampire hunters, nature's definitive balance to the darkness. Her whole life has been building up to this one mission in Romania, to face the evil that started everything for her family.  Unfortunately there are others with their eyes on Dracula too, and Reggie has run right into them. She must make them allies or remove them from the game before she can face the ultimate foe.

Amazon Kindle  Amazon Paperback
Currently free to read on Kindle Unlimited

📚Join My Newsletter📚


Receive 2 FREE eBooks just for signing up and a free short story on the first Friday of every month on Free Fiction Friday.


Two books covers - one with a woman firing guns above the title "Assassin's Blood" the other with a woman screaming and glowing with the title "Curse of a Banshee"

List hosted on MailChimp, information will only be used for Newsletter contact, and we do not send spam.

Sunday, 27 December 2020

Recipe: Turkey (or Chicken) Bake with Mushrooms - Great for leftovers

Recipe: Turkey (or Chicken) Bake with Mushrooms


Turkey (or Chicken) Bake with Mushrooms
Great for leftovers

Greetings one and all, it's been a while hasn't it. I've been focusing on VirginiaWaytes.com for the last few months. I hope you have missed me 😁. Blessings of the Christmas season and Happy Holidays - I hope you have had a pleasant one this year, even if circumstances made it less than ideal. I return with a recipe that is great for using up all that leftover turkey and it works well with chicken leftovers as well for the rest of the year.

Serves 2-3

Ingredients

  • 50g (heaped tbsp) butter
  • 50g (heaped tbsp) plain flour
  • 1 pint/570ml milk
  • 1/2 tsp dried thyme
  • 1/2 tsp dried rosemary
  • salt & pepper to taste
  • 6x24g packets salt n shake crisps or similar (unsalted potato chips)
  • 100-150g (1-1.25cups) grated cheddar cheese
  • tbsp oil for frying
  • 2-3 cloves garlic minced or equiv garlic puree
  • 150g (half a punnet) chestnut mushrooms
  • left over turkey 

Instructions

  1. Preheat the oven to 180C/360F.
  2. Shred the turkey.
  3. Slice the mushrooms into bite sized pieces.
  4. In a frying pan heat the oil. Add the garlic and then the mushrooms and cook until they have released all their water and are looking toasty, but not dried out.
  5. Mix the turkey and mushrooms and place in the base of an oven proof dish - should cover the bottom in a nice thick layer.
  6. Melt the butter in a med saucepan.
  7. Add the flour and stir to make a thick paste.
  8. Add the milk, little by little, stirring in at each stage until all the milk is combined with the flour and butter mixture in a smooth sauce.
  9. Add the rosemary and thyme (I grind mine together in a pestle and mortar first because I don't like the large bits of rosemary and it helps release the flavour even more) and salt and pepper.
  10. Cook for a couple of minutes until it begins the thicken.
  11. Test for taste and add more seasoning if needed.
  12. Pour the white sauce over the turkey and mushrooms and mix through gently. Don't be too vigorous or the sauce may go grey because of the mushrooms - still tasty, just not as pretty. 😉
  13. Crush the crisps (potato chips) until they are small pieces, but not too far and place in a bowl.
  14. Mix the crisps and half the cheese and spread over the top of the turkey and sauce.
  15. Sprinkle the rest of the cheese on top of the crisps and put in the oven.
  16. Bake until cheese has melted and is starting to go golden - between 15-20 mins usually.
  17. Serve piping hot.

We had this today - still have turkey left, but it used up a good deal of it and was delicious. Just up the amounts to feed more people - I did double this today for five people and we have leftovers or the leftovers now 😂

Tuesday, 9 June 2020

Recipe: Tangzhong Milk Bread - Delicious White Bread with a Great Shelf Life

Tangzhong Milk Bread

So I have been making this recipe for three weeks now and it is fabulous. This makes 2 loaves and it keeps for up to a week in an airtight container. That's if it lasts that long. However, it's a little tricky because it's a very sticky dough so I have a couple of tips.
  • Use a stand mixer or specialised dough mixer if possible - I use my Kitchen Aid with the dough hook attachment. If you need to do it by hand, oil is going to be your friend, because using flour with dry out the dough too much.
  • Handle the dough with oiled gloves or very oily hands.
  • Handle the dough on a well oiled surface or a non-stick silicon baking sheet - my lovely sister bought me a large silicon pasty mat for Christmas last year and it is so useful for this.
Not my image - but this is what it looks like - will swap this out when I remember to take a piccie!


Tangzhong Milk Bread


Ingredients

for the Tangzhong
  • 40g Strong White Bread Flour
  • 200ml/g 0.85 cups water

for the dough
  • 580g/ 4cups Strong White Bread Flour
  • 60g/ 1/4cup sugar
  • 12g/ 2 tsp salt
  • 10g/ 2.5 tsp dried yeast
  • 10g/ 2.5 tsp dried milk powder
  • 260g / 1cup + 2 tbsp milk
  • 1 large egg
  • 50g/ 1/2 stick unsalted butter (room temp)
for the glaze
  • 1 egg yolk
  • milk

Instructions

The Tangzhong - make in advance

Now I have seen recipes that call for this to me made the night before, 6 hrs before and 30 mins before, so it is up to you which you go for depending on what time you have.
  1. Place the flour and water into a shallow pan and heat gently, stirring all the time.
  2. Cook until the mixture is a thick paste.
  3. Transfer to a container and cover with cling film. Place in the fridge for 6hrs or over night, or place in the freezer for 30mins.
  4. Take out and allow to come to room temp before using.
The Bread
  1. Add the flour, sugar, salt, yeast and milk powder to the mixer bowl making sure not to let the salt and yeast come into direct contact.
  2. Mix the ingredients together to ensure proper distribution.
  3. Warm the milk in the microwave for 30s until it is luke warm to the touch.
  4. Add the egg and whisk together.
  5. Add the wet ingredients and the tangzhong to the dry and mix on low speed until the dough is beginning to come together.
  6. Add the butter to the dough and continue to mix on med until combined.
  7. Increase the mixer speed and knead for between 5-10 mins until the gluten is developed and the dough has come away from the sides of the mixer.
  8. Take the dough out and form into a ball by folding the sides under. (If you try this without oiled gloves or very oiled hands it will stick to you and you will never get it into a ball - trust me, this is what happened to me the first time).
  9. Place in an oiled bowl, cover in cling film and allow to rise for at least 45 mins to 1 hr depending on how warm it is. The dough is ready when you can put an oiled finger into it and it holds its shape. (I do this in my Instant Pot on the yoghurt setting - proves in 45 mins then).
  10. Turn out onto a non-stick surface and divide into six.
  11. Roll each into a ball and place under cling film for 15 mins.
  12. Lightly oil 2 2lb (9x5'') loaf pans.
  13. Take each ball and roll out into an oval using a non-stick rolling pin.
  14. Fold the top point of the oval over the middle and press down with the heel of your hand.
  15. Fold the bottom up over the middle and press down with the heel of our hand.
  16. Take one of the non-folded edges and press over like the first roll of a swiss roll and press the edge into the main dough with finger tips so it sticks.
  17. Roll up and seal the edge by pinching it, so you have a mini roll the approx width of the loaf pan and 1/3 the length (looks to be a similar shape to a pain au chocolat).
  18. Place in one end of the loaf pan.
  19. Repeat 13-18 until there are three rolls in each tin next to each other.
  20. Cover with cling film and allow to rise in a warm spot for 30 mins, until the dough is up to the top of the loaf pans.
  21. Pre-heat the over to 180C/355F
  22. Beat together an egg yolk and a little milk to form the glaze.
  23. Brush the tops of the loaves gently with the glaze.
  24. Bake for 25 mins - they will turn a lovely deep golden brown.
  25. Allow to cool on a wire rack.

This bread makes the most amazing eggy bread/egg flip or French toast. One small slice can suck up a whole egg! It is also delicious for sandwiches and toast.


The Sexy Stories Podcast 10


It's Tuesday, which means a new ep of my podcast Virginia Waytes' Sexy Stories. We are coming towards the end of season 1 of The Manor at the moment, and things are really getting exciting as well as very, very naughty!

Paranormal romance - adults only
The Manor s01e09
Daddy Issues: Vampire Wisdom & the Comfort of Friends


Monday, 1 June 2020

Recipe: Delicious Chicken & Rice - #InstantPot & #StoveTop Instructions


Recipe: Chicken & Rice

Delicious Chicken & Rice


Instant Pot or Stove Top


This is a recipe I only tried last week and it has become one of my husband's favourites and I love it too. Possibly not quite as much as he does, but it is very yummy. It is also so very easy and can be made in the Instant Pot (or other pressure cooker) or on the stove top.

serves 2 (just up the amounts for more)

Ingredients

  • 6 mini breast fillets (chicken tenders) cut into bite sized pieces ~300g - breast would work well too, but thighs might need a little more cooking.
  • 1/2 large onion - diced very small
  • 1 large carrot or 2 small ones - diced very small
  • 500ml / 2 cups chicken stock (I use low sodium, but just use your favourite)
  • 2 cloves garlic (crushed - I use lazy garlic and its about a tsp)
  • sprinkle of Italian seasoning
  • 200g/1 cup Jasmine rice (or white rice of choice)
  • 2 tbsp oil
  • salt and pepper to taste
  • 25g/ 1/4 cup Parmesan cheese, or something similar
  • fresh herbs - e.g. parsley, coriander/cilantro or basil (optional)

Instant Pot Instructions

  1. Turn on the Instant Pot and choose the saute setting.
  2. Add the oil, the onions and the carrots and saute for about 5 mins or until the onions are translucent and the carrots are beginning to go tender.
  3. Add the garlic and stir for about 30 sec.
  4. Add the chicken and stir around until the chicken is beginning to colour a little.
  5. Cancel the saute.
  6. Use a little of the chicken stock to deglaze the bottom of the pot, then add the rest.
  7. Add in the rice and stir gently so all the rice is covered in the stock.
  8. Add the Italian seasoning and salt and pepper.
  9. Put on the lid, make sure the valve is on sealing, choose the pressure/manual setting and set for 10mins.
  10. When the time is up, allow to sit for 5 mins to allow the chicken to rest.
  11. Release the pressure and open the pot.
  12. Stir the rice and make sure it hasn't stuck.
  13. Add the Parmesan and stir through.
  14. If using fresh herbs, chop them and add them now and stir through.
  15. Serve immediately.

Stove Top Instructions

  1. Add the oil to a deep stove top pan that has a tight fitting lid and heat.
  2. Add the chicken and cook through until almost completely done, then remove and set aside.
  3. Add a little more oil to the pan and add the carrots and the onions and sweat down until the onions are soft and the carrots are beginning to become tender.
  4. Add the glaric and fry until it become fragrant, 30-60sec
  5. Deglaze the pan with a little of the stock and then add the rest.
  6. Add in the rice and stir in.
  7. Add in the Italian herbs and seasoning.
  8. Add back in the chicken.
  9. Bring to the boil and cover with the lid.
  10. Turn down the heat and cook for 13-15 mins or until the rice is done to your liking and has absorbed nearly all the stock. Add more water if necessary, but there should be enough.
  11. Turn off the heat and stand for 5 mins with the lid still on.
  12. Stir to fluff the rice and add in the Parmesan and fresh herbs (if using) and stir through.
  13. Serve immediately.
This recipe is so quick and easy and makes a great, hearty meal. It's also very adaptable and we could add different veg if we wanted to. The secret is the spicing and Parmesan - everything else is up for debate. It would be easy to veggify this by substituting the chicken, either with some chunky veg, or some quorn or tofu, and using a Parmesan substitute that is vegetarian friendly.

Thursday, 14 May 2020

Recipe: Tofu & Spam Fritters with Egg Fried Rice


Tofu & Spam Fritters with Egg Fried Rice

Tofu & Spam Fritters with Egg Fried Rice

So this is two recipes I saw on Youtube combined to make a lovely meal. And I know you're thinking "Spam?!" - but trust me, this is delicious and really easy and it's the tofu that makes it so easy and the spam that makes it delicious. My husband hates tofu, but really loves this. Original fritter recipe is here on a wonderful site called Aaron & Claire's Korea and their Youtube channel is fab. This is one of the channels where I saw the steamed egg recipe too.

The spam provides a wonderful flavour which permeates the tofu, and the tofu provides a fabulous second texture, nutritious content and means the spam is not fatty or too salty. A great balance. I mean you could probably use some comfit pork belly if you want to go posh for a dinner party, but for a week night, spam is good 😄.

Makes 4 fritters & enough rice for 2

Ingredients


Fritters
  • 1/2 block tofu (I used Cauldron Organic Tofu because that's what Morrisons had)
  • 1/3 of 200g can of Spam 
  • 1/2 cup plain flour (ish)
  • 1 egg
  • 50g panko bread crumbs (ish)
  • black pepper to season
  • oil for frying
Rice
  • 1 cup white rice
  • 2 egg yolks
  • 2 spring onions (green onions/scallions) chopped 
  • salt and pepper to season
Tofu & Spam Fritters with Egg Fried Rice

Instructions

  1. Cook the rice per instructions on the packet and cool down with cold water.
  2. Cut 4 slices from the tofu about 1cm deep, then cut these in half. Season with black pepper (we don't need salt because there is plenty in the spam).
  3. Place the blocks on kitchen paper to soak up excess moisture.
  4. Cut 2 slices from the spam and cut each in half to the same size as the tofu. I was lucky, mine matched almost exactly, but trim to fit if they don't. The idea is to make a cube (ish).
  5. Dust one side of a block of tofu in flour and press onto the spam. Do the same on the other side so we have a spam sandwich with the tofu as the bread. Repeat for all 4 fritters. Then leave for a minute or so - the flour will bind and stick them all together.
  6. Beat the egg in a shallow bowl, and put the flour on one plate and the bread crumbs on another.
  7. Cover the tofu/spam tower in flour.
  8. Dip in the egg with right hand.
  9. Drop in the bread crumbs with right hand and use left to pat on the bread crumbs on all sides, turning with left hand. Using separate hands for wet and dry dipping will prevent our fingers becoming caked as well. Repeat for all fritters and leave to stand for 10 mins or so to set up.
  10. Preheat the oven to about 120C (~250F)
  11. Take a frying pan and put in about 1,5 cm of oil - heat until a little piece of bread sizzles.
  12. Place the fritters in the oil carefully and fry until the breadcrumbs go golden on the bottom.
  13. Turn over and repeat for the top.
  14. Then turn fritters onto their sides and repeat for each face. The easiest way to do this is use tongs and always turn all the fritters the same way so that there is no confusion.
  15. Pop the fritters in the oven to keep warm.
  16. Take the cold rice and mix through the egg yolks.
  17. In a pan, add a tbsp of oil and heat.
  18. Add the chopped spring onion and fry for a few moments.
  19. Add the rice and egg to the pan and stir fry until piping hot. (You can add other things to the rice if you like, like soy sauce or other veggies, but it is really nice as is).
  20. Serve with the fritters and sweet chilli dipping sauce, or dipping sauce of choice. Would be yummy with some stir fried broccoli on the side too.

Monday, 4 May 2020

Recipe: Korean Steamed Eggs - #InstantPot & #StoveTop # Vegetarian #GlutenFree

Recipe: Korean Steamed Eggs

Korean Steamed Eggs 

#GlutenFree #Vegetarian


So I saw this recipe on Youtube in many different places and had to try it. I loved it, but my husband thinks it is the most horrible thing on the planet 😂. The texture is like a creme caramel, but it is hot and savoury instead of cold and sweet. It goes really, really nicely with a toasted bagel. Absolute heaven. And there are so many ways to change it up.

I forgot to take pictures, but I will try and remember next time. (I forgot the second time too - sorry - in my defence it was breakfast and I was hungry 😉).

The recipe below could easily feed 2 if having something with it, 1 if having it by itself. Nice and filling.

Ingredients

  • 2 eggs
  • 1/2 cup stock ( I used chicken, but a nice veggie stock would work brilliantly, or even just water)
  • salt and pepper to taste

Yep, really, that's all - see how herbs and spices could be added to change it up. Some recipes I found online call for finely chopped spring onion (green onion/scallion), but others said that was an optional extra. Ratio of eggs to stock is 1 egg to 1/4cup stock and just go up or down depending on how many it is for.

Variation I tried this morning (yes I wrote the post one day and posted it the next 😉) that I came up with while trying to get to sleep last night. So good.
  • 2 eggs
  • 1/2 cup water
  • 1 tsp low sodium soy sauce
  • 1/2 tsp toasted sesame oil
  • salt and pepper to taste

Instructions

  1. Beat the egg and stock together with a fork or a small whisk.
  2. Add the salt and pepper (or other spices of choice) and beat in.
  3. Pour through a sieve into a heat proof container suitable for steaming - I used a ceramic Camembert baking pot I have (and a deep individual pie dish this morning). Two smaller ramekins would also work if dividing the recipe for 2 people.
  4. Add the chopped onion if using at this point.
For the Instant Pot
  1. Put 1 cup of water in the bottom of the pot.
  2. Put in the pot of egg mixture on a trivet so it is not in the water.
  3. Put on the lid and make sure the valve is set to sealing.
  4. Use the steam option and put it on for 10 mins.
  5. When the beeper goes off, do a quick pressure release, remove the lid and serve.
For the stove
  1. Set up a deep pan with water in the bottom with a steam rack or something to keep the pot out of the water at the bottom.
  2. Cover the pot in cling film and place the pot on the stand in the pan.
  3. Put on a lid and bring to the boil.
  4. Steam for 15-20 mins until set.
This is a silky smooth egg dish that is a delight to eat. I eat it with a spoon straight from the pot. Nommy.

[Edit - sorry, forgot this earlier Banner Background Photo by Jakub Kapusnak on Unsplash]

Wednesday, 29 April 2020

Recipe: Rosemary and Parmesan Potato Waffles #Vegetarian #GlutenFree

Recipe: Rosemary and Parmesan Potato Waffles

If you are looking for today's AtoZ post - sorry, I will be getting to it later. The WittegenPress Website is playing silly whatsits for no reason I know about, so I am having to chase that around and my creativity is suffering. Never fear, I will write today's drabble, I just have to sort that out first.

Recipe: Rosemary and Parmesan Potato Waffles


So these are based off of Nigella's Garlic & Parmesan waffles from her book, "At My Table", but these have a flavour profile I like even more and made up on the spot, so I though it would be good to share them.

Yes I know Parmesan isn't vegetarian, but it is easy to find vegetarian equivalents - in fact that's what we usually use since it's a) cheaper & b) just as nice. We buy the pre-grated fresh Italian hard cheese from the supermarket.

They are absolutely delicious with eggs and maple syrup - and yes they are savoury waffles, but the salt and sweet is divine.

Makes 7 waffles (10cm x 12cm/ 4''x 4.7'') - 1 serving = 2 waffles, but they can be reheated later if there are too many.

Ingredients

  • 400g / 2 cups mashed potato (I had left over from the night before, but you could use defrosted frozen mash or make it fresh)
  • 4 tbsp (60ml) butter
  • 8 tbsp (120ml) milk
  • 2 eggs
  • 45g/ ~3/8cup finely grated Parmesan (or vegetarian equiv)
  • 4 tbsp cornflour
  • 1/2 tsp baking powder
  • 1 tsp Dried Rosemary (I like the grind it in a pestle and mortar or spice grinder to make it distribute better and release its flavour)
  • salt & pepper to taste

Instructions

  1. Melt the butter and leave to stand to cool down.
  2. Preheat the waffle iron.
  3. Using a fork or something similar, break up the mash so that it is light pieces, not one lump.
  4. In a large bowl whisk together the cooled butter, eggs and milk.
  5. Add in the potato a little at a time, whisking it in each time. I used a flat manual whisk, but you could use an electric hand whisk or a bowl mixer if you prefer.
  6. Add the Parmesan, cornflour, baking powder, rosemary and salt and pepper and beat until smooth(ish).
  7. Add about an ice cream scoop of batter to each side of the waffle iron if using a square one (ours is electric and looks like a sandwich maker) - if using a round one go with what you are used to and close. You'll soon know if you used too much because it will squidge out the sides 😂.
  8. Cook for about 7 mins total or until golden brown - different waffle makers will vary.
  9. If making lots, pop the cooked ones in a low oven until ready to eat.
As I mentioned above, these are lovely with eggs and a touch of maple syrup. They make a wonderful breakfast or brunch, but they would also go well with meats or as a side for a main meal as well.

The amounts of cheese and seasoning are all very handwavy - you can go with whatever you like best, but I was very pleased by the overall taste of these.

Enjoy! Stay safe.

Banner Background Photo by nabil boukala on Unsplash

Wednesday, 22 April 2020

Nigella's Garlic & Parmesan Mash in the Instant Pot

Recipe: Nigella's Garlic & Parmesan Mash in the Instant Pot

💖Looking for today's AtoZChallenge post? Please scroll down to the previous entry.💖

Nigella's Garlic & Parmesan Mash in the Instant Pot

So I tried out Nigella's recipe for garlic and Parmesan mash last night and it is delicious, but since I use my Instant Pot for everything these days, I couldn't resist adapting the recipe for that. Hence, here you go. For those wondering, the recipe comes from her book "At My Table" which is an amazing book, so go check it out.

Makes enough for 6-8 people - but keeps up to a week in the fridge and can easily be reheated.

Ingredients

2 kg (4.4lb) potatoes
8 fat cloves of garlic
Salt and pepper to taste
75g (2/3 stick) butter
50g (1/3 cup/ 2oz) Parmesan (grated) or veggie equiv

Optional topping

50g (~5/8 cup) Dried breadcrumbs or panko (since I had no breadcrumbs, I took a crust of brown bread, crumbed it up and dried it out in the oven before using it)
50g (~1/2 stick) butter
35g (1/4cup /1.5oz) Parmesan (grated) or veggie equiv

Instructions

  1. Peel and quarter all the potatoes.
  2. Bruise the garlic cloves with the back of a knife, but do not remove the skins (they will prevent them sticking to the bottom of the pot).
  3. Put 1 cup of water in the bottom of the Instant Pot.
  4. Add the bruised garlic and a tsp of salt to the water.
  5. Put the potatoes into a steamer basket and then into the Instant Pot.
  6. Put on the lid, make sure the knob is to sealing and set for high pressure for between 8-16 min. It will depend on the potatoes - they need to be very tender.
  7. Do a quick pressure release after 8 mins and check the potatoes, if they are not done, put the lid back on and do another few mins with QPR. It will come to pressure quickly because it is still hot.
  8. Once the potatoes are done, remove the steamer rack and place on the side.
  9. Tip the water from the bottom of the pot into a jug and make sure there are no garlic skins still in the pot.
  10. Put the butter in the pot and allow to melt (it will be on keep warm, so is perfect for this).
  11. Add the potatoes and the garlic cloves (without the skins - they should come away very easily) back in the instant pot. (If using a potato ricer, use it at this stage).
  12. Sieve the cooking water over the potatoes in the pot to make sure all garlic skin is removed.
  13. Mash the potatoes using your mashing method of choice, unless you have already used something like a ricer. I have one, but can never be bothered to get it out, so I use a regular hand masher. Keep going until it is smooth or at your preferred consistency. After all you are the master of your mash (I have been watching too much Chef John from Foodwishes.com 😂).
  14. Add the Parmesan and stir in - now check for seasoning and add salt and pepper if needed.
  15. Preheat the oven to 200C/180C fan (390F/350F fan)
  16. Butter a 30x25cm (12x10'') baking dish (I used a Pyrex one).
  17. Spread the mash into the baking dish using a spatula.
  18. Rub together the breadcrumbs, butter and Parmesan (if using the topping) to form a crumble mixture.
  19. Sprinkle the crumble over the top of the mash.
  20. Pop in the oven for 20-30 mins until piping hot and the topping is toasty.
And what is even better, is the left overs can be made into waffles, which is the next recipe in Nigella's book, BTW. I made them this morning and my husband and I had them with a fried egg each and they were delicious. You'll have to check out her book for that though. 😉

Banner BG Photo by Varun Gaba on Unsplash

Thursday, 9 April 2020

Recipe: Fridge/Store Cupboard Raid Stew

Recipe: Fridge/Store Cupboard Raid Stew

💖Looking for the AtoZ post for today? Please scroll down to the previous post. 💖

Recipe: Fridge/Store Cupboard Raid Stew


So my husband made a plea not to make something with beans in it (we have been going through the cupboard using up all our cans of various beans and his stomach is finally rebelling 😂), so I thought, stew. This is another recipe that can be made from just about anything, so I am sharing it.

You could make this recipe vegetarian by using a meat substitute like tofu and quorn, or mushrooms, swapping out the Worcester sauce for soy sauce, and using robust veggie stock cubes.

Ingredients

  • 1-2 chicken breasts in chunks (can be any meat, just needs to be bite-sized)
  • 1 tbsp oil
  • 1 540g/19oz can new potatoes (fresh would be fine, new or old, just bite sized again)
  • frozen peas - however many you have or fancy (or fresh or canned - whatever is in the freezer/cupboard)
  • veggies - peeled and cut in to bite sized pieces - I used a large carrot and half a courgette (zuchinni) because that's what I had  (could be suede or parsnip or sweet pot or turnip or anything to hand as long as it's robust) 
  • 1 can cream of tomato soup (440ml/14oz) (if you don't have this, ketchup, a little tomato paste and some water made up to the right amount will work)
  • dash of Worcestershire sauce
  • 1/2 tsp mild chilli powder (optional)
  • salt and pepper to taste
  • 2 beef stock cubes
  • 400 ml boiling water
  • 1.5 tbsp corn flour (starch)

Instructions (Instant Pot)

  1. Turn on the pot and put the oil in the bottom.
  2. Use the saute option on normal.
  3. When the oil is heated, add the meat and brown.
  4. Mix the stock cubes with the water and use a little of this to deglaze the bottom of the pot to make sure nothing is sticking to it.
  5. Add the rest of the stock cube mixture.
  6. Add all the potatoes and veggies and stir.
  7. Add the cream of tomato soup and stir in.
  8. Add the dash of Worcestershire sauce and the spice and seasonings and mix.
  9. Put the lid on making sure the value is set to sealing.
  10. Cancel the saute.
  11. Use the pressure (may be called manual on some models) option and set for 15 mins.
  12. When the timer goes off, leave to natural pressure release for 10 minutes.
  13. Release the remaining pressure and open the pot.
  14. Make a slurry using equal parts cold water to corn flour.
  15. Turn on saute again and add the slurry to the pot, stirring all the time until the broth thickens. If it does not thicken enough make more slurry, half a tbsp at a time and add it until the desired thickness is achieved.
  16. Serve in bowls with crusty bread.

Instructions (Stove/Oven)

  1. Preheat the oven to 160C/140C fan/Gas 3 (320F/285F for fan)
  2. Using a stove proof casserole dish with a lid, heat the oil and brown the meat.
  3. Add the stock cubes to the boiling water and add them into the casserole.
  4. Add the potatoes and other veggies and stir in.
  5. Add the cream of tomato soup and stir in.
  6. Add the Worcestershire sauce, the spice and the seasonings and mix.
  7. Put on the lid and place in the oven (if you do not have a lid, wrap the top of the dish tightly with foil to seal it).
  8. Cook for 2 to 2.5 hrs until the meat is really tender.
  9. Make a slurry using equal parts cold water to corn flour.
  10. Put the casserole back on the hob and add the slurry to the pot, stirring all the time until the broth thickens. If it does not thicken enough make more slurry, half a tbsp at a time and add it until the desired thickness is achieved.
  11. Serve in bowls with crusty bread.
This was delicious and not too heavy, so good for bright days as well as murky ones. We actually used turkey in our stew the other night because I had some that needed using up. It fell to pieces because it was thinly sliced turkey steaks, but it was lovely none-the-less.

Banner BG Photo by Selina Thomas on Unsplash