Showing posts with label *Food: Healthy. Show all posts

Monday, 18 October 2021

Recipe: Delicious & Healthy Instant Pot Potato, Garlic & Rosemary Soup #Vegetarian #Vegan #GlutenFree

Recipe: Potato, Garlic and Rosemary Soup, with image of instant pot behind

Delicious & Healthy Instant Pot Potato, Garlic & Rosemary Soup

This is a lovely, hearty and healthy smooth soup that you can add crunchy things like croutons to, if that is what you like. Would also be lovely with nuts or pine nuts or roasted pumpkin seeds - anything like that. It uses coconut milk for some extra creaminess as a delicious alternative to cream or milk.

Now before you say, but I don't have an Instant Pot, never fear, you can make this on the stove top just as easily, except you'll probably have to give it a stir every now and then. Simply follow the instructions using a large saucepan on the hob and cook the potatoes until they are tender.

Vegetarian / Vegan / Gluten Free

Serves 6 hungry people min, and will keep in the fridge/freezer

Equipment

Required

  • 5.7 lt / 6 quart Instant Pot (or you could halve the recipe if you have the smaller one)
  • or a large heavy base saucepan
  • trivet
  • wooden spatula
  • 1lt / 4 cup jug
  • Stick blender of stand blender
Optional if you're not worried about how smooth the soup is

  • sieve
  • large bowl
  • silicon spatula
  • ladle

Ingredients

  • 2kg/4.4lb potatoes of your choice (I used Albert Barlett Rooster Potatoes)
  • 1 bulb/head of garlic
  • 1 large white onion
  • 1.5 tsp dried rosemary
  • 1lt/ 4 cups low or no salt veggie stock (I use 2 good quality stock cubes and boiling water) - chicken stock would work too if you're not worried about it being vegetarian.
  • 1 can (400ml / 1.7 cups) coconut milk
  • salt and pepper to taste
  • 1 tbsp oil for frying
Potato, garlic and rosemary soup in an instant pot.
Instant Pot Potato, Garlic & Rosemary Soup

Instructions

  1. Peel and chop the onion and garlic roughly (it's going to be blended so doesn't need to be fancy, just small enough to fry off).
  2. Use the sautΓ© option on the instant pot on high - add in the oil and the onion and fry off until translucent (make sure to stir often of it will stick).
  3. Add the garlic and fry for another minute or so.
  4. Set aside in a bowl to cool.
  5. Deglaze the bottom of the Instant Pot with a little of the stock.
  6. Put in the trivet (because potatoes are heavy, they can cause a burn notice if they all slump and stick to the bottom, so having the trivet in the way makes this much more unlikely).
  7. Peel and chop the potatoes into small chunks and add to the Instant Pot.
  8. Blend the onions and garlic (optional - I did this so I didn't have to blend the soup as much at the end) and add on top of the potatoes.
  9. Add the rosemary. To get the most flavour out of my dried rosemary, I like to grind it down in my pestle and mortar before adding it, but you can just add it whole if you prefer.
  10. Add the can of coconut milk, the stock, and the salt and pepper (go easy on the seasoning, you can always add more at the end, but you can't take it out).
  11. Close the lid of the Instant Pot and choose the Pressure/Manual option and cook for 15 mins.
  12. When the cook time is done, release the pressure - this will take a while because the pot is pretty full.
  13. Lift out the internal pot to the counter and take out the trivet using a fork. Give it a few minutes to begin to cool before either blending with the stick blender or blending in batches in a stand blender. It can splash when blending, so letting it cool is a good plan - I have a lovely burn from where I failed to do this when making pumpkin soup last week.
  14. Optional - Pass the soup through the sieve into a large bowl, using the ladle to get it out of the instant pot and the silicon spatula to push it through. It shouldn't take long, but if you don't want to do this part, you can miss it out, I just hate little bits in a smooth soup that I didn't deliberately put there πŸ˜‰.
  15. Return the soup to the Instant Pot and check for seasoning, add more if necessary. It can be left on keep warm or simply reheated when it is needed.


πŸ“šJoin My NewsletterπŸ“š


Receive 2 FREE eBooks just for signing up and a free short story on the first Friday of every month on Free Fiction Friday.


Two books covers - one with a woman firing guns above the title "Assassin's Blood" the other with a woman screaming and glowing with the title "Curse of a Banshee"

List hosted on MailChimp, information will only be used for Newsletter contact, and we do not send spam.

Monday, 27 September 2021

Recipe: Date, Oat & Walnut Bites - Chocolatey goodness without added refined sugar #GlutenFree

Recipe: Date, Oat & Walnut Bites - shows chocolate covered sweets on a plate

Date, Oat & Walnut Bites

Chocolatey goodness without added refined sugar #GlutenFree 

So I am very much into reducing my refined sugar intake at the moment because it makes me feel better. I was eating far too much junk and it does not agree with me. Hence I went looking for healthier alternatives to make at home. There is an amazing channel on YouTube Schnelle Rezepte that has some absolutely yummy ones. This is one of their recipes, but I altered it a little, so this is my version. I have made their version and it is good, but it was a little too dry for my liking and I had to use too much maple to moisten it so it would stick together. 

This is Schnelle Rezepte's version, check it out and give it some love.

The dry version is more like a protein bar, where as my take is more of a truffle texture. Both very valid and just as tasty. They are not sugar free because they have dates and a touch of maple, but the sugars in those are much better than the refined white stuff in everything from the shops. Hence them being healthier than a Mars bar. As long as you use gluten free oats (not all oats are packaged where this is guaranteed) then these are gluten free too and vegan.

These are my version (as you can tell if you check out the YouTube vid, our YouTube host has much better lighting πŸ˜‰):

Tasha's Date, Oat & Walnut Bites
Please forgive the marks on them - they have been in a bag in the fridge for 3 days and it only now occurred to me to take a picture πŸ˜‚.

Equipment

  • Small food processor/hand blender - mine is a set kind of like this one, but held together with duct tape 😎.
  • Food processor
  • spatula
  • baking sheet lined with grease proof paper or silicon mate
  • bowl
  • 2 forks

Personal notes:

  1. I know in the vid the lovely host only uses one small food processor, but that did not go well for me the first time I tried - too much for the bowl, hence me using the two. 
  2. It could also all be popped into the large food processor and done in one, but if you are using unsoaked dates in a big food processor, make sure your blade is sharp because mine just batted around the bits without mincing them the first time. I think it counted as a blunt object rather than a blade at that point (it was old), so I bought a new one 😏.

Ingredients

  • 80g/1cup oats (oatmeal)
  • 130g approx 3/4cup pitted dates (if you don't have enough dates, I have topped up with raisins and it worked fine)
  • 100g /1cup walnuts (pecans would work too)
  • 1 tsp maple syrup (you can use more, but I like it just for a background flavour) after making them several times, I don't use this anymore
  • 10g/ approx 1.5 tbsp cocoa (it doesn't have to be particularly accurate)
  • 150g/5.3oz 72% dark choc (this is 1 cup of choc chips, but I use a bar, hence the oz conversion on this one - Dr Oetker is great for this)
Another variation for sweeter and sharper
  • 80g/1cup oats (oatmeal)
  • 40g  pitted dates
  • 90g dried apricots
  • 100g ground almonds (or take almonds and give them a blast in the food processor)
  • 10g cocoa
  • 150g 72% dark choc
  • tbsp boiling water - because on the dates are soaked a little bit of water is needed to make the mixture sticky enough

Instructions

  1. Soak the dates in boiling water for 20 mins
  2. Put the oats in the small food processor, or in a tall vessel to use with the stick blender, and blend to a fine a consistency as you like. I prefer mine fine, but if you like more texture just give them a short blitz. Transfer to the large food processor.
  3. Repeat with the walnuts and add to the large food processor.
  4. Drain the dates and add them to the mini food processor and process into a paste (scrape down the sides to make sure everything is processed between blasts). When done, add to the large food processor. If you want some chunky fruit in their too, you could add a couple of whole, unsoaked dates to the large food processor too.
  5. Add the cocoa powder and the maple syrup to the large food processor as well and blend everything into one mixture.
  6. Remove the blade and set aside.
  7. With your hands ball up the mixture and place on the baking sheet, flattening slightly - a pair of gloves is good for this because it is very sticky. I make mine bite size and the mixture makes between 16 and 25, but you can go larger if you prefer. (I make these in double batches of 40 once a week because I give so many away - they are very popular).
  8. EITHER - Melt the chocolate in the microwave on high in the following sequence 30s/30s/15s/10s, stirring between each so the choc does not overheat - this should temper the chocolate. OR - Melt 3/4  of the chocolate in the microwave in 30s intervals until completely melted. Add the last quarter of the choc back in and stir to melt - this should temper the choc.
  9. Dip the date bites in the choc using the 2 forks, allowing excess to drip back into the bowl before putting them back on the baking sheet.
  10. Place in the fridge until set. I keep mine in the fridge because my kitchen is warm and it also means we don't eat them all at once.
These are great for an energy boost instead of a biscuit (cookie) with a nice cup of tea/coffee. They also work for cycle rides etc.

I also tried to create a version that uses peanut butter as well, but I have not perfected that yet. I may just try Schnelle Rezepte's alternative snickers bar instead. 😎


πŸ“šJoin My NewsletterπŸ“š


Receive 2 FREE eBooks just for signing up and a free short story on the first Friday of every month on Free Fiction Friday.


Two books covers - one with a woman firing guns above the title "Assassin's Blood" the other with a woman screaming and glowing with the title "Curse of a Banshee"

List hosted on MailChimp, information will only be used for Newsletter contact, and we do not send spam.

Monday, 4 May 2020

Recipe: Korean Steamed Eggs - #InstantPot & #StoveTop # Vegetarian #GlutenFree

Recipe: Korean Steamed Eggs

Korean Steamed Eggs 

#GlutenFree #Vegetarian


So I saw this recipe on Youtube in many different places and had to try it. I loved it, but my husband thinks it is the most horrible thing on the planet πŸ˜‚. The texture is like a creme caramel, but it is hot and savoury instead of cold and sweet. It goes really, really nicely with a toasted bagel. Absolute heaven. And there are so many ways to change it up.

I forgot to take pictures, but I will try and remember next time. (I forgot the second time too - sorry - in my defence it was breakfast and I was hungry πŸ˜‰).

The recipe below could easily feed 2 if having something with it, 1 if having it by itself. Nice and filling.

Ingredients

  • 2 eggs
  • 1/2 cup stock ( I used chicken, but a nice veggie stock would work brilliantly, or even just water)
  • salt and pepper to taste

Yep, really, that's all - see how herbs and spices could be added to change it up. Some recipes I found online call for finely chopped spring onion (green onion/scallion), but others said that was an optional extra. Ratio of eggs to stock is 1 egg to 1/4cup stock and just go up or down depending on how many it is for.

Variation I tried this morning (yes I wrote the post one day and posted it the next πŸ˜‰) that I came up with while trying to get to sleep last night. So good.
  • 2 eggs
  • 1/2 cup water
  • 1 tsp low sodium soy sauce
  • 1/2 tsp toasted sesame oil
  • salt and pepper to taste

Instructions

  1. Beat the egg and stock together with a fork or a small whisk.
  2. Add the salt and pepper (or other spices of choice) and beat in.
  3. Pour through a sieve into a heat proof container suitable for steaming - I used a ceramic Camembert baking pot I have (and a deep individual pie dish this morning). Two smaller ramekins would also work if dividing the recipe for 2 people.
  4. Add the chopped onion if using at this point.
For the Instant Pot
  1. Put 1 cup of water in the bottom of the pot.
  2. Put in the pot of egg mixture on a trivet so it is not in the water.
  3. Put on the lid and make sure the valve is set to sealing.
  4. Use the steam option and put it on for 10 mins.
  5. When the beeper goes off, do a quick pressure release, remove the lid and serve.
For the stove
  1. Set up a deep pan with water in the bottom with a steam rack or something to keep the pot out of the water at the bottom.
  2. Cover the pot in cling film and place the pot on the stand in the pan.
  3. Put on a lid and bring to the boil.
  4. Steam for 15-20 mins until set.
This is a silky smooth egg dish that is a delight to eat. I eat it with a spoon straight from the pot. Nommy.

[Edit - sorry, forgot this earlier Banner Background Photo by Jakub Kapusnak on Unsplash]

Thursday, 9 April 2020

Recipe: Fridge/Store Cupboard Raid Stew

Recipe: Fridge/Store Cupboard Raid Stew

πŸ’–Looking for the AtoZ post for today? Please scroll down to the previous post. πŸ’–

Recipe: Fridge/Store Cupboard Raid Stew


So my husband made a plea not to make something with beans in it (we have been going through the cupboard using up all our cans of various beans and his stomach is finally rebelling πŸ˜‚), so I thought, stew. This is another recipe that can be made from just about anything, so I am sharing it.

You could make this recipe vegetarian by using a meat substitute like tofu and quorn, or mushrooms, swapping out the Worcester sauce for soy sauce, and using robust veggie stock cubes.

Ingredients

  • 1-2 chicken breasts in chunks (can be any meat, just needs to be bite-sized)
  • 1 tbsp oil
  • 1 540g/19oz can new potatoes (fresh would be fine, new or old, just bite sized again)
  • frozen peas - however many you have or fancy (or fresh or canned - whatever is in the freezer/cupboard)
  • veggies - peeled and cut in to bite sized pieces - I used a large carrot and half a courgette (zuchinni) because that's what I had  (could be suede or parsnip or sweet pot or turnip or anything to hand as long as it's robust) 
  • 1 can cream of tomato soup (440ml/14oz) (if you don't have this, ketchup, a little tomato paste and some water made up to the right amount will work)
  • dash of Worcestershire sauce
  • 1/2 tsp mild chilli powder (optional)
  • salt and pepper to taste
  • 2 beef stock cubes
  • 400 ml boiling water
  • 1.5 tbsp corn flour (starch)

Instructions (Instant Pot)

  1. Turn on the pot and put the oil in the bottom.
  2. Use the saute option on normal.
  3. When the oil is heated, add the meat and brown.
  4. Mix the stock cubes with the water and use a little of this to deglaze the bottom of the pot to make sure nothing is sticking to it.
  5. Add the rest of the stock cube mixture.
  6. Add all the potatoes and veggies and stir.
  7. Add the cream of tomato soup and stir in.
  8. Add the dash of Worcestershire sauce and the spice and seasonings and mix.
  9. Put the lid on making sure the value is set to sealing.
  10. Cancel the saute.
  11. Use the pressure (may be called manual on some models) option and set for 15 mins.
  12. When the timer goes off, leave to natural pressure release for 10 minutes.
  13. Release the remaining pressure and open the pot.
  14. Make a slurry using equal parts cold water to corn flour.
  15. Turn on saute again and add the slurry to the pot, stirring all the time until the broth thickens. If it does not thicken enough make more slurry, half a tbsp at a time and add it until the desired thickness is achieved.
  16. Serve in bowls with crusty bread.

Instructions (Stove/Oven)

  1. Preheat the oven to 160C/140C fan/Gas 3 (320F/285F for fan)
  2. Using a stove proof casserole dish with a lid, heat the oil and brown the meat.
  3. Add the stock cubes to the boiling water and add them into the casserole.
  4. Add the potatoes and other veggies and stir in.
  5. Add the cream of tomato soup and stir in.
  6. Add the Worcestershire sauce, the spice and the seasonings and mix.
  7. Put on the lid and place in the oven (if you do not have a lid, wrap the top of the dish tightly with foil to seal it).
  8. Cook for 2 to 2.5 hrs until the meat is really tender.
  9. Make a slurry using equal parts cold water to corn flour.
  10. Put the casserole back on the hob and add the slurry to the pot, stirring all the time until the broth thickens. If it does not thicken enough make more slurry, half a tbsp at a time and add it until the desired thickness is achieved.
  11. Serve in bowls with crusty bread.
This was delicious and not too heavy, so good for bright days as well as murky ones. We actually used turkey in our stew the other night because I had some that needed using up. It fell to pieces because it was thinly sliced turkey steaks, but it was lovely none-the-less.

Banner BG Photo by Selina Thomas on Unsplash

Monday, 9 March 2020

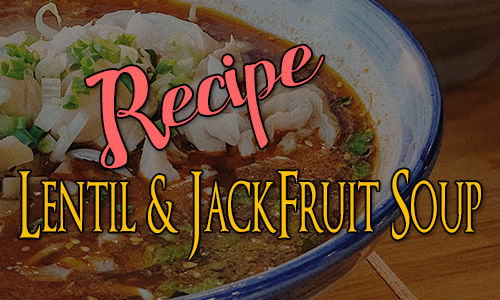
Recipe: Lentil & Jackfruit Hearty Soup #GlutenFree #Vegetarian #Vegan #InstantPot

Recipe: Lentil & Jackfruit Soup

Lentil & Jackfruit Hearty Soup
#GlutenFree #Vegetarian #Vegan


This recipe is based off of Best Instant Pot Lentil Soup Recipe by Olena from iFOODreal - yes the same lass who came up with the brownie recipe. However, I've changed lots of things, so this is my version πŸ˜Š. You can in fact adapt this recipe any way you like with any ingredients you like.

Now I made this in my Instant Pot , because I have one and I love it, but it would be easy enough to do it in a large saucepan on a stove. There is just the small matter of having to keep checking it while it's cooking rather than wandering away and doing whatever else we fancy doing. I've included instructions below for both methods.

This makes a lot of soup! Good news, it will keep in the fridge or in the freezer, ready to be reheated whenever we want it. This is great for batch cooking or those with a large family.

Ingredients

  • 1 medium onion
  • 1 large carrot
  • 2 sticks celery
  • 400g/2 cups brown or green lentils (uncooked)
  • 500g (1 3/4 cups) Tomato Passata (or a tin of chopped tomatoes if preferred - I don't like the bits)
  • 150-250g/2-3cups chestnut mushrooms (add to taste)
  • 400g (14oz) can shredded jackfruit (if you can't get this or don't like it, just substitute something you do like - this is a very versatile recipe)
  • 400g can baby carrots and petite pois (frozen carrots and peas would do just as well and be just as easy - of fresh if you have them, or just peas - I simply happen to love baby carrots)
  • 2 tsp ground cumin
  • 2 tsp oregano
  • 1 tsp basil
  • 2 bay leaves
  • 2 bouillon cubes (I use low-sodium ones, can be veggie or chicken, depending on the dietary requirements of consumers)
  • 1 tsp salt
  • 1 tbsp oil (avocado or olive are good)

To Serve

  • sprinkling of cheese or vegan cheese - Parmesan (or veggie equiv) is good, so is a mature cheddar - purely optional, but adds a lot to the flavour profile
  • 1 clove garlic - also optional, but adds a zing - this is added with the onion in the stove top version
  • any fresh herbs like coriander (cilantro), or basil, or parsley - whatever you like, also optional

Instant Pot Instructions

  1. Chop onion finely and dice the carrot and the celery.
  2. Turn on the Instant Pot and press the saute button (normal setting).
  3. Add the tbsp oil to the cooking pot along with the onions. Saute until soft. 
  4. Add a little water to deglaze the pot and make sure no onion is stuck. Step 2 3 & 4 are optional, you can just add everything without sauteing (i.e. dump and go), but I really don't like lumps of onion in my soup, I like it to flavour and melt in.
  5. Add the carrots, celery, lentils, passata, mushrooms, carrots & peas, shredded jackfruit, spices and bouillon cubes (crumbled).
  6. Use boiling water from a kettle to fill the instant pot up to the max pressure fill line (2/3rds).
  7. Put on the lid.
  8. Cancel the saute.
  9. Press the pressure (or manual depending on model) button and choose a cook time of 18 min.
  10. If you are in a hurry, allow the Instant Pot to sit for at least 5 mins after the cooking time has ended before a QPR (quick pressure release), or it will spurt because of how full it is. When there is time, I like to do NPR (natural pressure release) for at least 15 mins before letting out the final pressure until the pin drops.
  11. Open the lid and grate in the raw clove of garlic and stir in your chosen fresh herbs.
  12. Stir and serve, with a sprinkling of cheese on top to taste.
  13. The keep warm function will keep it hot so everyone can return for seconds.

Stove Top Instructions

  1. Chop onion finely, mince the garlic, and dice the carrot and the celery.
  2. Heat a tbsp oil in a large saucepan, add the onion and garlic and saute for 2 mins or so.
  3. Add the celery and carrot and cook for 7-10 mins until they are softened.
  4. Add the lentils, passata, mushrooms, carrots & peas, shredded jackfruit, spices and bouillon cubes (crumbled).
  5. Add 6 cups/1.5l boiling water from the kettle to the saucepan and stir everything together.
  6. Bring the soup to a simmer, place a lid on and turn down the heat. Simmer for 35-40 mins, or until the lentils are tender, checking every now and then. (There may be scum on the top from the cooking at times - ladle this off).
  7. Stir in fresh herbs if wanted.
  8. Serve with a sprinkling of cheese on top to taste.
Now the Instant Pot cooking time is shorter, but the make time can be similar because of the heat to pressure and pressure release times, however, it really is easier in that there is no standing around. This makes me very happy because if I stand too long I end up in severe pain. Hence one of the reasons I love my Instant Pot. I've only had it two weeks, but I never want to stop using it.

This soup is perfectly hearty enough to be eaten on its own, but for those who like their bread, a crusty loaf or roll would make a great accompaniment.

We had this Saturday and there was enough over (even after Rob had seconds) to fill two big (1litre) soup bags. I gave one to my dear Mama, and we're having the other for tea tomorrow, although it would freeze perfectly well too.

I really like the jackfruit in this because it is like shredded chicken as an underlying texture, and I really like that in a soup. If that is not to your taste or you can't get it or its really expensive where you are, you could easily take it out and sub in something else.

The truth behind this recipe is that its an add whatever you like kind of thing. Experiment and see what you like best. Don't like cumin, pick something different. Fancy it spicier - add some chilli. Love curry, add in some paste or powder.

This makes a really hearty meal that can be kept warm in the Instant Pot or on the hob for people on the go, or put in the centre of the table to let everyone help themselves at a family meal. It works for all occasions. And the big plus is that its good for us. Lots of fibre and vitamins and healthy veggies in a delicious package.

Do you have a favourite soup that you absolutely love?

I have to admit, I am really fond of a good mushroom soup, although I think my fav is probably Stilton and broccoli.

Header Background Photo by Jeeray TANG on Unsplash

Thursday, 5 March 2020

Recipe Recommendation: Black Bean Brownies (The Delicious Healthy Option) #GlutenFree

Recipe Rec - Black Bean Brownies (The Delicious Healthy Option)

Recipe Recommendation: Black Bean Brownies 

(The Delicious Healthy Option) #GlutenFree

So I have been making a conscious effort to improve my diet, because, frankly I used to eat far too much crap. One of the big things I am doing is reducing the amount of refined sugar I eat.

Now I have to admit, this was really hard for the first week. They are right that sugar is more addictive than cocaine - however, it seems withdrawal doesn't last that long πŸ˜‚. I've been doing this since New Year and I find that I don't really crave the sweet things that often anymore.

However, I cannot live without chocolate. Sorry - never going to happen. And also, research says that dark chocolate has some great properties, so I have moved on to having some dark chocolate every day - the 72% or 85%, which are supposed to have all the good stuff in them.


I miss cake, though, so have been looking for alternatives. Now I have a new Instant Pot (which I will talk about more in later posts) and while looking for recipes for that I came across a website called iFOODreal run by a lovely lady called Olena Osipov which has some fabulous recipes on it. She also has a great Youtube channel.


One of these recipes is Black Bean Brownies - yes that is brownies made from black beans.

Good news for my gluten intolerant friends too - this recipe is gluten free.

Now I know what you're thinking, probably the same as I did - black beans? Really?

Well I made this recipe the other day and everyone loves it. They are delicious.


Word of warning - this is a very dark chocolate recipe, so if you're not into dark chocolate, this will not be for you. All the sweetness comes from fruit and there is no added refined sugar, so the brownies are dense, squidgy and wonderful with a cup of tea or coffee. They also get better with time IMHO, so if you can leave some overnight they improve even more.


If you want to see the whole recipe, and all the advice Olena gives, than check out her original post:
Black Bean Brownies.

I'm going to include the ingredients here because all the measurements are in North American style on iFOODreal, so here are the UK/Metric equivalents.

Ingredients

  • 400g tin of Black Beans
  • 2 large eggs
  • 155g unsweetened apple sauce (I looked up 1/2 cup and is said 125g, but I had a small 155g jar and it just about filled my 1/2 cup measure, so that's what I'm going with) - I think next time I will use the over-ripe banana idea though, because it's easier to get.
  • 15 small or 10-12 Medjool dates (I used the small ones)
  • the original recipe has 2 tbsp brewed coffee, but I threw in a tsp of instant coffee for a similar effect, since I didn't have brewed coffee on hand.
  • 1 tsp pure vanilla extract
  • 50g cacao or cocoa powder (cacao is better for you, but is not as easy to get)
  • 1/2 tsp baking powder
  • 1/4 tsp salt
  • 100g bag of extra dark chocolate chips (I used Dr Oetkers 72% choc chips) - 50g for inside, 50g for the top (this may not be quite the right amounts, but it made it easy for meπŸ˜‚).

Tips

  • A stick blender works well to blend the batter - my food processor is not overly great and I don't have a normal blender, so I used the stick one and it came out brilliantly.
  • Oven temp conversion (350F) - 180C or Gas Mark 4
  • I didn't have an 8x8 brownie tin so I used a 20cm/8inch sponge tin instead and just cut the brownies into cake style slices.
  • Cutting it into 16 might make the pieces look small, but they aren't - trust me - each piece is just enough.
  • I checked my brownies after 25min not 30 and they were perfect so I didn't use the final 5min of cooking time. It will depend on your oven.
  • Do not, and I repeat, do not skip the baking parchment lining. Because these don't use flour, they are not as robust as brownies can be, so getting them out of the tin was ... well ... entertaining. Without the baking paper I would have been sunk.
πŸ’–Yummy brownies that have things in them that are actually good for us - win/win! Don't forget to check out Olena's other delicious recipes and tips for hearty, healthy eating.πŸ’–

Do you have any favourite recipes that taste decadent, but are, in fact, surprisingly healthy? I would love to hear what they are.

Banner BG Photo by Alison Marras on Unsplash

Sunday, 19 January 2020

Recipe Recommendation - 3 Ingredient Banana Oatmeal Breakfast Cookies (#GlutenFree, #Vegan)


Recipe: Banana, Oat and Chocolate Chip Cookie

Recipe Recommendation

3 Ingredient Banana Oatmeal Breakfast Cookies

Gluten Free and Vegan

So Soph (my sister) was recommended this recipe on Youtube after she started looking up overnight oat recipes, but I was the first to try it. I made these yesterday morning and this morning because I had the bananas and the cookies keep well in the fridge or freeze and they disappear fast.

Many of the recipes I have seen for breakfast cookies require loads of honey or some other sugar substitute, but all the sweetness in these comes from the bananas. The riper the bananas the sweeter the cookies and more prevalent the banana flavour - so we can adjust how we like our cookies by how ripe our bananas are. Personally I like them relatively sweet, so my bananas were on the brown side.

Of course the chocolate has sugar in it, but we're not dumping in huge amounts of refined sugar at the cookie level, so it is much better for us.

There is no lie in the title, these cookies literally only have 3 ingredients (I've listed them out with measures to add in the metric measurements as well - the original recipe is in US measurements). 
  • 2 large Bananas
  • 1.5 cups / 135g Rolled Oats - I picked up gluten free porridge oats
  • 1/3 cup Dark Chocolate Chips (I just used a standard 100g packet of Dr Oetker 70% Extra Dark Chocolate Chunks - which is probably loads too much, but it works πŸ˜‚ - use vegan chocolate chips if required)
I mean we could easily add other things if we wanted too like nuts or raisins or even a little spice, just as long as we don't add too much and loose all structural integrity of the cookies.

Word of warning - do not touch these when they first come out of the over unless you like being covered in chocolate! Leave them to cool completely before attempting to eat. πŸ˜‚

Banana, oat and chocolate chip cookies on a cooling rack.
Waiting, waiting, waiting for them to cool!
This is the original recipe video from the Clean & Delicious Youtube channel - which has just about everything we need to know, but I've put a few tips below it, that I found most important along the way.


  1. For those who are metric 350F = ~180C = Gas Mark 4
  2. The only sweetness comes from the bananas so the riper they are the better IMHO.
  3. A fork is okay for squishing the bananas, but a potato masher is much faster πŸ˜‚.
  4. Mix the oats and banana and then cover them (I bought some silicone stretch lids before Christmas and they are awesome for such things - no more cling film) and let them sit for 20mins or so, so the oats absorb the banana - gives a moister cookie and better structural integrity.
  5. I baked mine on the lower end at 15mins and they are moist and chewy.
  6. Try not to eat them all at the same time.πŸ˜‚πŸ˜‚πŸ˜‚
These are moist, delicious and filling. Could not recommend them enough. These are perfect for those of us trying to cut down on our chocolate bar consumption, but still find ourselves in need of a chocolate hit - and studies have suggested that dark chocolate is good for us too, so yay!

Wednesday, 6 March 2019

Recipe: Roasted Veg, Nuts and Rice - #Vegan and #GlutenFree


Roasted Veg, Nuts and Rice

So while we were a Disneyland Paris, there was a distinct lack of vegetables in our diet, so this week, Rob and I have decided to pack in  as many veggies as possible. We're not eating totally vegetarian, but this dish turned out to be vegan and gluten free, as well as filling and delicious. It's is also super easy.

Serves 2 hungry people
Prep: 15 mins, Cooking time: 45 mins

Ingredients

  • 2 large parsnips (Morrisons Wonky parsnips are great for this)
  • 1 medium courgette (zucchini)
  • 10 small Chantenay carrots (or a couple of large carrots cut into pieces)
  • 1/2 small butternut squash
  • 1 medium red onion
  • 50g pecans
  • 50g unsalted cashews
  • Italian seasoning (to taste)
  • garlic powder or garlic flakes (if your Italian seasoning does not already have it)
  • 3 tbsp extra virgin olive oil (more for drizzling)
  • 150g Jasmine rice

Instructions

  1. Preheat the oven to 220C (430F, Gas 7).
  2. Peel and cut each parsnip into six (cut in half width ways, split the bottom half into 2 and the top half into 4, for 6 relatively similar sized pieces).
  3. Peel the Chantenay carrots (or peel and chop the big carrots into Chantenay sized pieces).
  4. Cut the courgette into approx 12 pieces (I do batons, but rounds would be fine too).
  5. Peel and chop the butternut squash into chunks of a similar size to the rest of the veg (I tend to buy one that has a longish neck and then use that part because there are no seeds involved :)).
  6. Place all the veg in a bowl and drizzle over the oil and the seasoning and garlic, mixing so all are coated (a pair of silicon tongs are great for this).
  7. Chop off the top and bottom of the onion and peel it. Then make cuts vertically through it that do not quite go all the way through.
  8. Place the onion in the centre of a baking sheet (I cover mine with baking parchment to prevent sticking) and drizzle with a little of the olive oil, and a little of the seasoning.
  9. Arrange all the veg around the onion - keep the bowl with it's residue oil.
  10. Put the tray in the oven for 15 mins.
  11. Turn down the oven to 200C (400F, Gas 6) and turn the veg on the tray. Cook for another 15 mins.
  12. Put the nuts in the reserved veg bowl and cover with the residual oil and spices - there will be plenty.
  13. Scatter the nuts over the veg and return to the oven for the final 15 mins.
  14. Cook the rice as instructed on the packet.
  15. Serve the veg and nuts over the rice in a bowl and drizzle with more extra virgin olive oil for flavour and moisture.
It can be left in the oven for longer if necessary, but be careful that it does not burn.

This really is a wonderful way to do veg - the higher temp at the beginning gives the veg some colour and caramelisation, and then the rest of the cooking softens it to a wonderful roasted consistency. And the nuts, oh my the nuts - yum! I could not finish my portion, it was so filling, but Rob polished his off completely, which is why this is for hungry adults. If people have smaller appetites it would easily do 3, just add a bit more rice.

And the best thing about this recipe is you can use whatever veg you like. You might need to blanch things like broccoli first, to stop it being tough, but it will all work. I understand Aubergine (Eggplant) is supposed to be amazing roasted.

~*~
become an Ally, Friend, Companion or Confidant for lots of exciting, exclusive content.

Thursday, 21 June 2018

Recipe: Chilli Chicken/Tofu with Spicy Beans & Tomato Sauce


Chilli Chicken/Tofu with Spicy Beans & Tomato Sauce

My apologies for not updating in a while - I have been busy with a project, but I am back today with a lovely recipe to share. It is actually a cross between two recipes that I am very fond of, Chicken Marsala (I haven't posted this one yet), which gave me the technique for doing the chicken and Turkey/Soya/Quorn Chilli with Tortilla Crust and Avocado Salsa for the beans and sauce.

Updated - I forgot to mention this works extremely well with smoked tofu, rather than chicken for the vegetarians among us - the flavour goes beautifully, and coating it in flour and frying it would give the little crunch too.

Serves 4 Cooking Time 45 min

Ingredients

  • 4 skinless chicken breasts or 1 packet of smoked Tofu (Tofoo is fantastic)
  • 3 tbsp regular flour (for gluten free, you could use another flour of your choice - it is only to help the browning)
  • Salt
  • Pepper
  • ½ tsp mild chili powder
  • ½ red onion
  • 1 skinned red pepper 
  • 500g box of passata
  • 1 tbsp chipotle (if you don't like it as spicy, reduce the amount)
  • 1 tsp ground cumin
  • 1 can red kidney beans
  • 1 can cannellini beans
  • ¼ cup sherry (optional)
  • 2 tbsp oil for frying
Rice or tortillas for serving, with soured cream and avocado salsa (optional).

Instructions

  1. Put flour, pepper, salt and mild chili powder in a bag and shake to mix. 
  2. Pound the chicken breast until they are about ¼ inch thick or Cut the tofu into four equal, flat pieces.
  3. Put the chicken or tofu in the bag and shake to coat with flour.
  4. In a large frying pan (30cm/12in) or flameproof casserole heat the oil and add the chicken/tofu. Cook until golden on both sides and just cooked - about 5-6 mins for chicken, less for tofu.
  5. Remove and set aside to rest in a warm place.
  6. Chop the onion finely.
  7. Sweat down in the same pan as the chicken was cooked in, over a low heat, until translucent.
  8. Chop the red pepper into bite sized pieces and add to the pan.
  9. Add the ground cumin and stir through - cook for 1 min.
  10. Stir in the passata and chipotle - rinse out the passata box/can with a little water and add that too.
  11. Add the beans and the sherry and bring to the boil.
  12. Cook until the sauce has thickened and is viscous - can take up to 10 mins, but use your judgement.
  13. Turn the heat down, add the chicken/tofu to the pan, including any juices that came out, pop on the lid and cook for 2-3 mins until the chicken/tofu is warmed through.
  14. Serve with rice or tortillas.
This is a very hearty meal with lots of things that are really good for us. It is also very tasty and the way the chicken comes out so juicy inside and slightly crunchy on the outside it just about perfect.

Tuesday, 16 January 2018

Recipe: Honey Sesame Chicken with Sesame Broccoli and Rice


Honey Sesame Chicken with Sesame Broccoli and Rice

It's the new year, so it's time to try new recipes. I started last night with this one. The base recipe comes from Two Peas and Their Pod, but it's done with a pressure cooker, so this is how I made it without one. I've also added UK measurements as well as US and reduced the original recipe which was to feed six.

N.B. This recipe can be gluten free if you use Tamari (Japanese soy sauce) rather than regular soy sauce, which usually contains gluten.

Given that chicken is basically a meat that takes on any flavour it is put with, I would guess this would be nice done with tofu or Quorn, for those of a vegetarian persuasion.

If you don't like broccoli, you could substitute snow peas, or something similar - but if you haven't tried sesame broccoli, give it a go - it was that which turned me onto the green menace after years of having hated it.

Feeds 2 (just scale up for more)


Ingredients


For the chicken
  • 2 large skinless chicken breasts, bite-sized pieces
  • 1/2 tblspn oil (use whichever you like best)
  • 1/2 small (lemon sized) onion, finely chopped (I used red, the original recipe says white, so go with what you prefer)
  • 1 clove garlic
  • 1/4 cup/60ml soy sauce (low salt)
  • 2 tbsp/30ml ketchup
  • 1/4 tsp mild chilli powder
  • 1 tsp toasted sesame oil
  • 1/4cup/60ml honey
  • 1 tbsp corn flour (cornstarch)
  • 1.5 tbsp cold water
For the broccoli
  • 1/2 head of broccoli in florets
  • 1/2 tbsp oil
  • 1/2 tbsp toasted sesame oil
  • 1 clove garlic minced
Sesame seeds to garnish, optional - (I toasted mine in a dry pan to bring out the flavour)
Rice to serve - I like Jasmine rice, but just use your favourite.

Instructions

  1. Put the oil in a frying pan or casserole (suitable for direct heat) that has a lid, heat gently on the hob and add the onion. Pop on the lid and allow to soften and go translucent.
  2. Add the garlic and cook for 1 min to allow the flavour to start coming out.
  3. Turn up the heat and add the diced chicken, sealing it all over.
  4. Lower the heat again, add the soy sauce, ketchup and chilli, put the lid on and cook gently until the chicken is cooked through and no longer pink inside. (Depending on your definition of bite sized, this can take between 10 & 15 mins usually - check by splitting a chunk in two). If you are waiting for someone to come home, this is the point where you can leave it until you know they are almost back - just keep the lid on and the heat really low once the chicken is done.
  5. While the chicken is cooking, get the rice going - follow the instructions on the packet.
  6. Blanch the broccoli by bring a pan of water to the boil, dropping in the florets and cooking for 3-4 mins (if you have small florets, go for 3, bigger, go for 4). Drain and leave to the side.
  7. Add the sesame oil and honey to the chicken and stir well to mix.
  8. Mix the corn flour and water in a small bowl, then add to the frying pan - stir in quickly and cook gently until the sauce thickens.
  9. Heat the oils for the broccoli in a small frying pan or wok and add the garlic (you could use a saucepan if you are using your only frying pan for the chicken :)).
  10. Add the blanched broccoli to the garlicy oil and stir fry for a minute.
  11. Serve in warmed bowls with sesame seeds sprinkled on the chicken and the broccoli (you can sprinkle them on the rice too if it makes you happy ;)).

Rob all but licked the bowl when he was finished, which I count as a success :).

Tuesday, 31 January 2017

Recipe: Harissa Chicken & Butternut and Moroccan Style Vegetable Couscous


I have had another success in the kitchen with a new recipe, so I thought I'd share. :)

Gluten Free: since this has couscous it is not gluten free, however, subbing in quinoa or wild rice would work just as well. Also make sure your harissa paste has not been bulked out with gluten.

Vegetarian: Quorn or Tofu would make a good substitute for the chicken.

Vegan: Vegan Quorn  or Tofu instead of chicken and a soy or coconut yogurt would work well to make this dish vegan friendly.

Harissa Chicken & Butternut with Moroccan Style Vegetable Couscous


Serves 4 (if you have a group with really healthy appetites then up the amount of couscous and veggies, or add another chicken breast :))

Ingredients

Traybake
4 skinless chicken breasts
2 red onions
3 tbsp harissa paste
3 tbsp natural yogurt
2 tbsp oil (sunflower, olive, vegetable, coconut etc)
Vegetable Couscous
120g couscous
150ml (~3/4cup) chicken or vegetable stock
2 tsp Moroccan spice mix (this is available off the shelf or there are recipes for making it)
2 red bell peppers (capsicum) (I use roasted, deskinned ones from a jar because I hate pepper skin, but you could use fresh)
2 large flat mushrooms
100g frozen peas
1 tbsp oil (sunflower, olive, vegetable, coconut etc)
Other options are aubergine, courgette, tender stem broccoli - anything you like really that will take the Moroccan spice.
To serve: more natural yogurt

Instructions

  1. Pre-heat the oven to 200C(400F)/180C(350F) fan/Gas 6.
  2. Mix 2tbsp of the harissa with the 3tbsp of yogurt and add a little salt as well (leaving the salt out if you don't normally use it is fine).
  3. Slash the tops of the chicken breast.
  4. Roll the chicken breast in the yogurt mixture and leave to marinate.
  5. Peel, de-seed and cut the butternut squash into wedges.
  6. Peel and cut the red onions into eight wedges each.
  7. Mix the last tbsp of harissa with the oil in a large roasting tin.
  8. Add the butternut and onion and stir until covered.
  9. Cook in the oven for 10 mins.
  10. Add the chicken to the tray and pop back in the oven for 20-30 mins until the chicken is done and the butternut is tender.
  11. While the bake is cooking, chop the mushroom and red pepper into small chunks.
  12. Add the tbsp oil to a frying pan with 1tsp of the Moroccan spice mix and heat until the spices start to give off their aroma.
  13. Add the mushroom and cook until it gives off its water.
  14. Add the pepper and peas and cook for five mins until they pick up the spice.
  15. Cook the couscous in the stock with the other tsp of Moroccan spice (check the instructions on the packet, for mine it was bring the stock mixture to the boil, add the couscous and keep cooking for five mins, or until all the water was absorbed and then let stand until the time totals five mins).
  16. Add the couscous to the frying pan of veg and mix together.
  17. Take the tray bake out of the oven and serve one chicken breast per person with some of the butternut and onion, with the couscous on the side, and extra yogurt for those who want it.
This is very tasty and mildly spicy. I'm a mild chilli, korma kind of girl, so its that level of heat for anyone who might be worried. I had never used harissa before, so I was not sure if it would be too spicy for me, but it was good. For those who like more punch, adding a chilli or two would work to give it a bit of a whack.

Tuesday, 9 August 2016

Recipe: Avocado Pesto Tagliatelle with Italian Style Chicken (or Roasted Veg) #TipsTuesdays 39


I'm betting you can tell we eat a lot of chicken in our house, because this week I have another recipe that involves chicken. However, this is a very easy one to make vegetarian and even vegan, because all you do is replace the chicken with roasted vegetables (or tofu or Quorn if you like). This recipe makes a lovely creamy pesto without all the cheese and oil used in a normal pesto and with all the goodness of avocado.

Avocado Pesto Tagliatelle with Italian Style Chicken (or Roasted Veg)

You could make this recipe even healthier by swapping out the tagliatelle for courgetti or another spiralized vegetable, but this is one of the few dishes where I prefer actual pasta. The tagliatelle takes the creamy pesto so well.

The pesto is the most amazing bright green colour thanks to the basil and the avocado, which makes my inner child so very happy :).

The pesto will store, but not for too long and it will go brown unless kept cold and sealed. I used the leftovers of mine on crackers the next day after covering it in cling film and storing it in the fridge. It was still lovely, but aim to use this quickly for best results.

Serves 4

Ingredients

For the pesto

  • 1 large avocado (make sure it is ripe)
  • 31g fresh basil leaves (this is one packet from Morrisons :) - the original recipe I used said 1 cup)
  • 50g (1/3 cup) Pine Nuts
  • 3 cloves of garlic (I use the squeezy stuff :))
  • 1 lemon
  • 2 tblspns extra-virgin olive oil
  • salt and pepper

For the chicken

  • 2 chicken breasts
  • Italian seasoning (I use a pre-made spice mix from Morrisons called "Italian Seasoning", but to make it: dried basil, dried oregano, dried rosemary, dried marjoram, dried thyme, dried sage, red pepper flakes, onion powder, garlic powder - all in equal amounts)
  • 1 tblsp oil for frying

or For Roasted Veg

  • 1 red pepper (bell pepper, capsicum)
  • 1 yellow pepper (bell pepper, capsicum)
  • 1 green pepper (bell pepper, capsicum)
  • 1 courgette
  • 2 large mushrooms
  • 2 tblsp extra virgin olive oil
  • Italian Seasoning
+ pasta - you can use any pasta you like, but my fav is tagliatelle


Instructions

  1. Cook your pasta and leave in cold water (pasta is much better for you if you cook it, cool it down and then refresh it just before you use it).
For Chicken
  1. Take the chicken breasts and butterfly them (this page shows you how).
  2. Sprinkle both sides of the chicken breasts with the Italian seasoning.
  3. Heat the oil in the pan on a high heat and cook the chicken on both sides until it goes golden brown (the caramelisation gives extra flavour).
  4. Turn down the heat, put on a lid and allow the chicken to cook through completely until there is no pink left - shouldn't take more than a minute or two.
  5. Leave to rest in the pan with the lid on (this makes sure it is juicy).
or For Veg
  1. Heat the oven to 240C (230 fan)/475F/Gas 9
  2. Chop all the vegetables into bite sized peices.
  3. Put the oil in a roasting pan and turn all the veg in the oil to coat.
  4. Sprinkle with Italian seasoning.
  5. Cook for approx 45 mins or until tender (start the pesto just before done).
For both
  1. Peel the avocado and cut into pieces (this page shows you the best way to do it without slicing your fingers).
  2. Juice the lemon (I use a tea strainer to make sure there are no pips or bits in my juice).
  3. If you're using whole cloves of garlic, chop them roughly.
  4. Place all the ingredients of the pesto, apart from the salt and pepper into a large bowl or your food processor and blend until smooth. (I found a stick blender was much better at breaking up the basil leaves, but if you like bits in your pesto, use the food processor - you may need to add a little water if the pesto is too thick, but remember that it will loosen a bit when added to the hot pasta).
  5. Add salt and pepper to taste (I used just a tiny bit of salt).
  6. Refresh your pasta with boiling water from the kettle, drain and place back in the saucepan.
  7. Add the pesto to the saucepan and mix with the pasta (the little bit of water that always clings to pasta will loosen the pesto).
  8. If using slice the chicken breasts into bite size pieces.
  9. Place the pesto pasta in bowls with the chicken breast or roasted vegetables scattered on top.
  10. Enjoy.
This is a wonderful creamy recipe - just don't forget the garlic like I did the first time - luckily when I tasted it I realised what I had done before trying to serve it :). As ever the key to getting it right is tasting while cooking (just don't taste the chicken until it's done).

Tuesday, 2 August 2016

Recipe: Pulled Chicken with Avocado Salsa - #TipsTuesdays 38


Welcome back to my blog and Tips Tuesdays, where I am continuing sharing some of the staple recipes I use during the week. I try to use recipes that are as healthy as possible. This is pulled chicken, which is a healthier version of pulled pork, but just as tasty.

Pulled Chicken with Avocado Salsa


This can easily be made gluten free, just check the highlighted* ingredients.

Serves 4 - but is very good reheated the next day

Ingredients

  • 6-8 skinless chicken thighs (you can use bone in or not as you like)
  • 2 tbspn Chipotle Paste (you can use less if you prefer - just go to your own taste)
  • 250ml passata
  • 75g BBQ sauce* (this is the one you need to check for gluten - some add flour - this recipe can be used if you can't find any,)
  • 1 onion (I use red)
  • 1 lime
  • 1 large avocado
  • handful of fresh coriander or 1/2 tsp of dried coriander leaf (optional)
to serve:
  • tacos or rice, 
  • lime wedges, 
  • 1 can of refried beans, 
  • lettuce (shredded), 
  • soured cream if feeling naughty

Instructions
  1. Put the oven on at 180C/160C fan/Gas mark 4 (350F/300F Fan).
  2. Take the chicken thighs and rub them with 1 tbspn of the chipotle paste. (Use gloves if you can while doing this because you don't want chilli on your skin. You can also add salt and pepper if you want, but I don't really think it needs it.)
  3. Finely chop the onion.
  4. Mix the remaining 1 tbspn of chipotle paste with the passata, the BBQ sauce and half the onion, adding about 100ml of water as well. (I tend to do this straight in the casserole dish to save on washing up :))
  5. Place the chicken in a roasting tin or casserole dish that will take the chicken pieces quite snugly.
  6. Spoon the sauce over the top of the chicken so it is covered.
  7. Either cover with foil very tightly or put on the casserole lid and pop into the oven for 1 hr.
  8. Increase the oven temp to 200C/180 fan/ Gas Mark 6 (400F/350F fan) and uncover the chicken, baking for another 20 mins.
  9. While waiting for the chicken to cook, juice the lime and place in a container with half a teaspoon of salt and the other half of the chopped onion. (I like to use smoked salt because it gives a little more flavour).
  10. If serving with rice, remember to put on your rice for the correct cooking time during this period too.
  11. Check the chicken to see it is tender and the sauce is not too runny. (If your chicken is done and your sauce is not reducing you can take the chicken out and keep warm, then put the sauce in saucepan and reduce it a bit more. You don't want it too sloshy :))
  12. Shred the chicken using 2 forks and remove the bones if using bone in thighs. (I find it easier to do this by taking the chicken out of the sauce and doing it on a flat surface, then adding it back into the sauce).
  13. Cut the avocado into small cubes. 
    1. The easiest way to do this is to cut all around the avocado stone along the longest axis, halving the avocado. 
    2. Then twist and the two halves will come away from each other. 
    3. Then take your knife and tap it sharply into the stone and twist again, the stone should come out.
    4. Now cut stripes into the avocado halves, length wise and width wise while still in the skin. 
    5. Then make one cut perpendicular to the others around the inside of where the stone was. 
    6. Now turn it out into the bowl.
  14. Add the avocado and coriander (if using) to the onion and lime mixture.
  15. Heat the refried bean as instructed on the packet.
To serve either load up tacos with beans, lettuce, pulled chicken and avocado salsa (with soured cream on top if you're feeling decadent) or serve everything on a plate with rice. It is delicious either way. A spritz of lime over the top can make the flavour even fresher if you like that kind of thing.

What is your favourite use of chipotle paste?

Tuesday, 26 July 2016

Recipe: Mexican Chicken and Wild Rice Soup #TipsTuesdays 37


Greetings and welcome to my blog this week for Tips Tuesday and another healthy recipe. This is based on a recipe from Goodfood, but I'm putting in more details and have changed it a little, hence the post :).

Mexican Chicken and Wild Rice Soup

This is a great recipe for a hot day - it's light and (slightly) spicy and has lots of things that are good for you.

The recipe can be gluten free - none of the ingredients contain gluten on their own - you just have to be careful with a couple of them and check the label because some products are cross contaminated. All the varieties I have linked to are gluten free.

You could also make this recipe vegetarian by shredding tofu using a box grater and substituting that for the chicken, and using vegetable stock instead of chicken.

Serves 4 (or refrigerate and reheat a second day for 2 - N.B. make sure to bring the soup to the boil then simmer gently for a while, when reheating, to insure everything is back up to temperature.)

Ingredients


  • 2 tsp oil (olive, coconut or sunflower are all okay)
  • 1 onion (I used red)
  • 1 green or red pepper (I used a roasted and skinned red pepper from a jar in brine not oil)
  • ~200g sweetcorn, canned or frozen (if you get a can that is slightly smaller, don't worry)
  • 1-2 tblspn chipotle paste (check the label for gluten free) (I use 1 tbspn for mild heat)
  • 150g wild/basmati rice mix
  • 400g can of black beans (check label for gluten free - some producers warn for contamination)
  • 1L low sodium chicken stock (check the label for gluten free)
  • 2 skinless chicken breasts
  • 1 tspn dried coriander leaf or small bunch of fresh coriander chopped
  • low fat soured cream
  • 1 large avocado
  • 1 tspn garlic powder (check it has not been bulked with gluten)
  • juice of 1/2 a lime

Instructions

  1. Heat 1 tsp oil gently in a frying pan and add the chicken breasts.
  2. Cook on a low heat with the lid on, turning once, until the chicken is cooked through (approx 10 mins, but always check to make sure there is no pink left and the juices run clear). Then leave to rest before shredding with 2 forks.
  3. Cook the rice as per the instructions on the packet - mine took 20mins so remember to do this in plenty of time. (You can use a precooked packet as per the original recipe, just check the ingredients to make sure there is nothing in it you do not want.)
  4. Dice the avocado and place in a bowl.
  5. Add the lime juice and garlic powder to the avocado and stir well, then leave to infuse.
  6. Finely chop the onion.
  7. In a large saucepan heat the other tsp of oil and add the onion, putting on a lid and cooking over a low heat until translucent (approx 5 mins). Stir every now and then to prevent sticking and browning.
  8. While the onion is cooking, chop the pepper.
  9. Add the pepper to the pan and cook for 2 mins.
  10. Add the sweetcorn, chipotle paste and pre-cooked rice and stir, cooking for a further 2 mins.
  11. Add the black beans and the stock and bring to the boil.
  12. Turn down to a simmer and add half the chicken and the coriander, simmering for about a minute.
  13. Allow to cool a little and then ladle into bowls.
  14. Scatter some more or the shredded chicken on top of each bowl (and a little of the coriander if you are using fresh) and add a dollop of soured cream and the prepared avocado for extra flavour. (Omit the soured cream if you are being very, very good :)).
The chipotle paste is what makes this dish sing. It gives a little bit of heat (or a lot if you add more :)) and a beautiful flavour that permeates through the whole dish and contrasts wonderfully with the soured cream and avocado. I do not like spicy food, so do not be put off by the chipotle if you are the same. I was afraid of it for a long time, but, used in smaller amounts it is wonderful even for those of us who fear chilli :).

Tuesday, 19 July 2016

Recipe: Creamy Chicken and Broccoli Bake With Peas, Baby Corn and Mushrooms #TipsTuesdays 36


This week for Tips Tuesdays I am continuing to share some of the staple recipes I use all the time. This one is based off this recipe from allrecipes, but I've tweaked it, so I'm sharing my version. It is very tasty and filling without heavy amounts of starch, but I have to admit mine is not as low fat as the original.

Creamy Chicken and Broccoli Bake With Peas, Baby Corn and Mushrooms

Serves 2 with healthy appetites or 3 who like smaller portions

Ingredients

  • ~half a head of Broccoli
  • 6 baby corns
  • 1 large flat mushroom (I find the large mushrooms much tastier than the small closed cap ones, but if that's all you can find they will do - use 4 or 5)
  • handful of frozen peas
  • 4-6 skinless chicken thigh fillets (the original recipe uses chicken breast, but I think thigh is much tastier)
  • 1 400g can Heinz Cream of Chicken Soup
  • 50g Hellmans Light Mayo
  • 2 tspn curry powder or 1 tspn of curry paste (you can add more of less to your taste if you like)
  • splash of milk (I use semi-skimmed because that's what we have in the house)
N.B. All the vegetable amounts are very hand-wavy - if you prefer one to the other, add more of that. This is a very as-you-like-it recipe and easy to adapt to personal tastes.

Gluten Free - for those who require gluten free this is a recipe for gluten free cream of chicken soup or the Pacific brand does a gluten free condensed soup (but its organic so it's expensive :)) and you will need to make sure your curry powder brand is gluten free as well - many aren't.

Instructions

  1. Pre-heat the oven to 190C/375F
  2. Cut the broccoli into bite sized florets.
  3. Bring a saucepan of water to the boil and add the broccoli. Cook for 2-3 mins until almost tender.
  4. Chop the baby corns and mushroom into bite sized pieces.
  5. Trim the chicken thigh fillets and cut into bite sized pieces.
  6. Put all the veg and chicken into a medium sized oven proof dish (a standard Pyrex one is good).
  7. Put the soup, mayo, curry powder and milk into a bowl and mix together top make the sauce (a whisk is useful to make sure the curry powder is mixed in properly).
  8. Pour the sauce over the chicken and vegetables and mix to coat thoroughly.
  9. Put in the oven and cook for 45 mins, until you can see everything bubbling nicely and the chicken is cooked through.
The broccoli will go quite soft, but the baby corns give a nice crunch because they don't lose their texture. For me its the addition of the curry powder that really makes this recipe sing. It gives it another flavour level and brings out the taste of the mushroom.

Tuesday, 12 July 2016

Recipe: Turkey Mince Courgetti Bolognese (Gluten Free) #TipsTuesdays 35


Good morning (or whatever time of day it happens to be for you now :)), today I have another recipe for you for Tips Tuesdays 35. My husband said I haven't included enough of the staple recipes that I cook often here, so I have promised to rectify this. I've also tried to standardise my recipe labelling so they are easy to find :).

Turkey Mince Courgetti Bolognese (Gluten Free)

This recipe used turkey mince instead of beef mince and courgette (zucchini) spaghetti instead of pasta - so it is a very healthy version of spaghetti bolognese and it is gluten free. You could use Quorn mince or soya mince and check your Worcestershire sauce (many makes use anchovies) to make this vegetarian as well. If you hate courgetti, just use spaghetti, but it won't be quite as good for you ;).

N.B. If you haven't tried courgetti, I recommend it, even if you are not fond of courgette. My mother doesn't like courgette as a side vegetable, but done this way she thought it was lovely.

Feeds 2-3

Ingredients

Bolognese
  • 1 tblspn sunflower/vegetable oil (or you can use spray oil to reduce the calories even more - but I think that's overkill)
  • 2 large field mushrooms
  • 2 cloves of garlic, minced (I use the stuff in a tube)
  • 340g turkey breast (or Quorn) mince (thigh mince is okay, but disintegrates more - so for texture breast mince is better)
  • 500g passata (this is 1 box per Morrisons - if yours comes in a tin and is not exactly the same amount, don't worry, it will be fine)
  • 1 tspn dried oregano
  • smiggen of chilli paste (optional and to taste)
  • 2 small beef stock cubes or 1 large (small = Oxo = NOT gluten free, large = Knorr = gluten free)
  • splash of sweet sherry (optional)
  • splash of Worcestershire sauce (Lea & Perrins is gluten free but not vegetarian - here is a recipe for homemade vegetarian worcestershire sauce or you can buy a vegetarian version or just use soy sauce instead :))
  • fresh ground black pepper
Courgetti (Zucchini noodles)
  • 2 courgettes (zucchini) (if you are serving for 3, add another courgette - it should be about 1 per person)
  • 1 tspn garlic powder
  • squeeze of lime (optional)

Instructions

  1. Chop the field mushrooms into bite sized pieces.
  2. Heat the oil in a deep frying pan and add the mushrooms and 1 clove of the garlic. Stir until coated in oil and then pop a lid on and leave until the mushrooms are giving out their moisture. (Adding some of the garlic to the mushrooms, makes their flavour pop, rather than just adding it later).
  3. Add the mince and stir to break it up.
  4. Add the rest of the garlic, the oregano and the chilli paste (if you are using it - not too much though, you don't want chilli, just a little hint in the background) and stir to mix in.
  5. Crumble in the stock cube(s) and stir to coat the mince.
  6. Add the passata, then rinse out the box/tin with a little water and add that too, stirring to combine.
  7. Add the sherry, the Worcestershire sauce and the pepper, stir and pop a lid on, turning the heat down to leave it to simmer for about 20 mins to allow the flavours to combine. (You can add extra salt as well if you wish, but I find the Worcestershire sauce gives enough for us).
  8. Spiralize the courgette into noodles using the large noodle setting (if you don't have a spiralizer, I believe Sainsburys and Waitrose sell pre-spiralized courgette). 
  9. In a large pan spray some oil, or dribble just a little oil in the bottom, heat and add the courgette.
  10. Add the garlic powder and allow the courgetti to cook with the lid on for 3 mins.
  11. Add the lime and cook until the courgetti is releasing its water (between another 30secs and 1 min).
  12. Transfer the courgetti to the bolognese leaving the water behind (or is will make the sauce too wet) and mix in for 20 seconds or so (you don't want to over cook the courgetti).
  13. Serve in bowls.

Thursday, 3 March 2016

Easy Chicken Katsu Curry Recipe (Gluten-Free)


So I love Katsu Curry, but the kits in the supermarket are so expensive for what it little more than a sachet of sauce and some breadcrumbs. They are also full of gluten, which several of my friends have to avoid. Hence I came up with this recipe and tried it on my husband last night and he loved it :). It is based off of these two recipes: Chicken Katsu Curry from allrecipes.co.uk, Crunchy Chicken Cutlets from Simply Nigella. If you wanted a vegetarian version you could use vegetables like aubergine (egg plant), sweet potato and butternut squash, like they do in Wagamamas.

Easy Chicken Katsu Curry

Serves 2

For the sauce

(the original recipe says this serves 4, but my family like a lot of sauce :))
  • 2 tblspns sunflower or coconut oil
  • 1 red onion, sliced
  • 4 cloves of garlic, chopped (I used garlic from a tube, which worked well)
  • 2 medium carrots, sliced
  • 2.5 tblspns corn flour (if you like your sauce slightly runnier, go with 2 instead)
  • 4 tspns curry powder (check you have a gluten free variety or here is a recipe for making your own)
  • 600ml chicken stock (I use the liquid stock that you add to water - many varieties are gluten free, but always check the label)
  • 2 tspns honey
  • 4 tspns Tamari (Japanese gluten free soy sauce - you can get it in most supermarkets)
  • 1 bay leaf
  • 1 tspn garam masala 

For the Chicken

  • 2 chicken breasts
  • 1 large egg
  • 1 tspn curry powder (check you have a gluten free variety or here is a recipe for making your own)
  • 1 tblspn corn flour
  • 1 clove garlic, minced (again I used garlic from a tube)
  • 1 tspn garam masala
  • 75g/3 cups cornflakes (check the packet to make sure they are gluten free)
  • 2 tblspns sunflower oil for frying (coconut oil isn't good in this instance because it tends to burn the cornflakes)

Instructions

  1. In a bowl with a flat bottom (big enough to get all the bits of chicken in), mix the egg, the curry powder, the corn flour and the garlic together with a small whisk.
  2. Lay out a sheet of cling film on a hard surface and, one at a time, place a chicken breasts on it and fold the film over the top. Then pound the chicken until it is nice and thin and flat.
  3. Cut each breast into 4 or five smaller pieces along it's length (with the grain).
  4. Add each mini-fillet to the bowl of curry mixture, turning to fully cover each piece, then leave for a little while.
  5. Put the cornflakes in another large bowl and gently crush them with your hands.
    • Tip: you want small pieces, but not tiny crumbs.
  6. Add the garam masala to the cornflakes and stir in.
  7. Take each piece of soaked chicken and cover in the cornflakes, pushing the cornflakes firmly onto both sides of the meat. Then leave the pieces on a wire rack to dry while you make the sauce.
    • Tip: If you don't leave them for at least 10 mins the cornflakes will fall off as soon as they hit the pan.
  8. In a non-stick saucepan heat the oil and add the garlic and the onion, leaving to soften.
    • Tip: I find putting a lid on helps with this part.
  9. Add the carrots, stir and cook very gently for 10 to 12 mins.
  10. Add the curry powder and the corn flour, stirring for about 1 min until everything is coated.
  11. Slowly add the stock.
    • Tip: add only a little stock at a time, stirring well to make sure the sauce remains smooth and without lumps.
  12. Add the honey, the bay leaf and the Tamari and bring to the boil, before turning down the heat and leaving to simmer for 20 mins.
    • Tip: if your sauce thickens too much, add a little bit of water.
  13. When there is about 10 mins to go, heat the frying oil in a wide based frying pan.
  14. Add the chicken pieces and cook for 3 mins on each side and then put in a warm oven while you finish the sauce.
    • Tip: they are thin so this should be enough, but always check that the chicken is cooked through properly. If you see any translucent pink, keep cooking.
  15. Take the bay leaf out of your sauce and stir in the garam masala. Then blitz it with a stick blender or in a food processor.
  16. Pass the sauce through a sieve and then return to the saucepan to reheat.
Serve everything with rice (I used brown rice, but white rice is traditional, sticky white rice if possible).

This recipe takes time, but it is straightforward and very, very tasty. You also get to take out any pent up frustration on the chicken when you prepare it :).


(Free on Kindle Unlimited)

The Machine: Rise of the Gifted
by Natasha Duncan-Drake

Rafe Derouet used to be a world class, British figure skater competing against his arch rival, flamboyant American Louis Hayes. A catastrophic knee injury ended his career and now all he can do is look on from the sidelines, commentating where he used to be a star. He hates Louis and wants nothing more than to see his nemesis go down in a blaze of failure.

Then mysterious men in black with guns take over a press meet, trying to arrest Louis, awakening something dangerous in their target, and setting in motion events they cannot control. Most shocking of all, Rafe finds out Louis can literally read his mind.

Dragged into a murky world of government agents and x-files by one of those x-files, Rafe finds his world view completely changing. And, along the way, his hatred for Louis proves to be something else entirely.

Now Rafe just needs to survive so he can decide what to do about it.